
How to Build a Side Table
A Chunky Side Table Inspired by a Catalog Retailer
A little over a year ago, I built a coffee table similar to one found in a high-end catalog. The catalog price was $399 – yikes! I built the coffee table for about $50. Now it is time for matching end tables. The end tables in the catalog run $199 each and I built two of these beauties (yes, two!) that are a tad bit bigger at $30 for the pair!!
The plans for the coffee table are easy to build. I drew up the plans for the end tables myself in order to customize the size to fit my needs. The construction method is quite a bit different, also. The plan drawings are at the end of the post.
Materials:
- Four – 2×4 at 8′ (stud length is fine also)
- One – 4×4 post at 8′ (these will be ripped down 3″ x 3″)
- Kreg jig and 2-1/2″ pocket hole screws (<– affiliate link!)
- Stain or paint and sealer
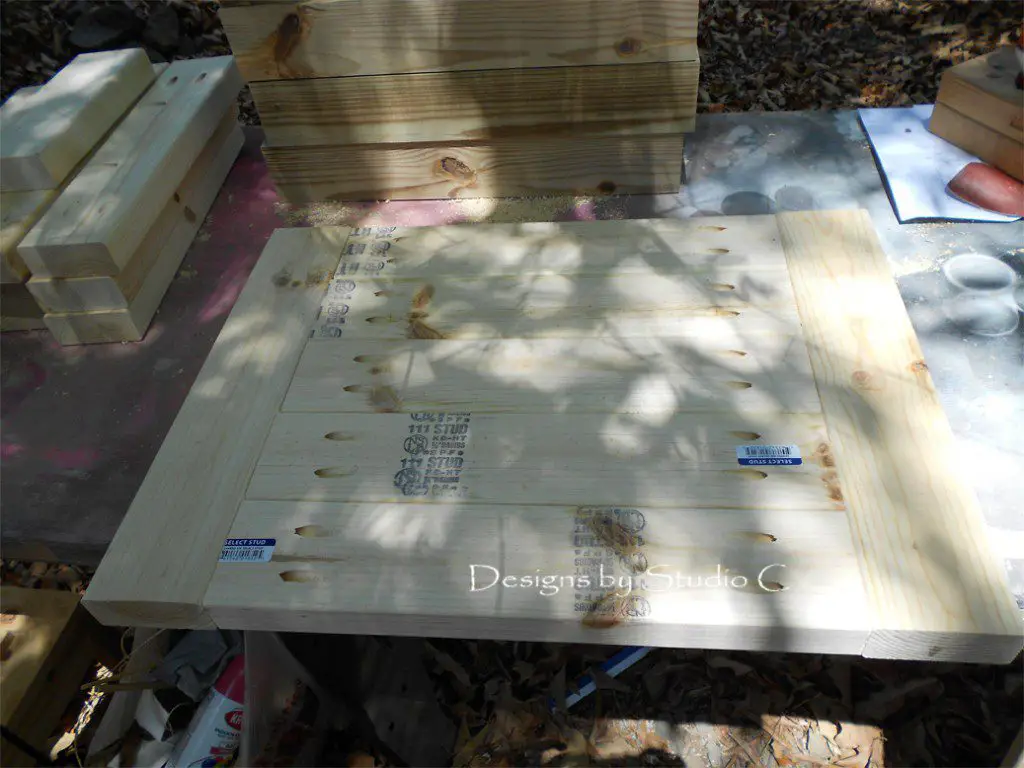
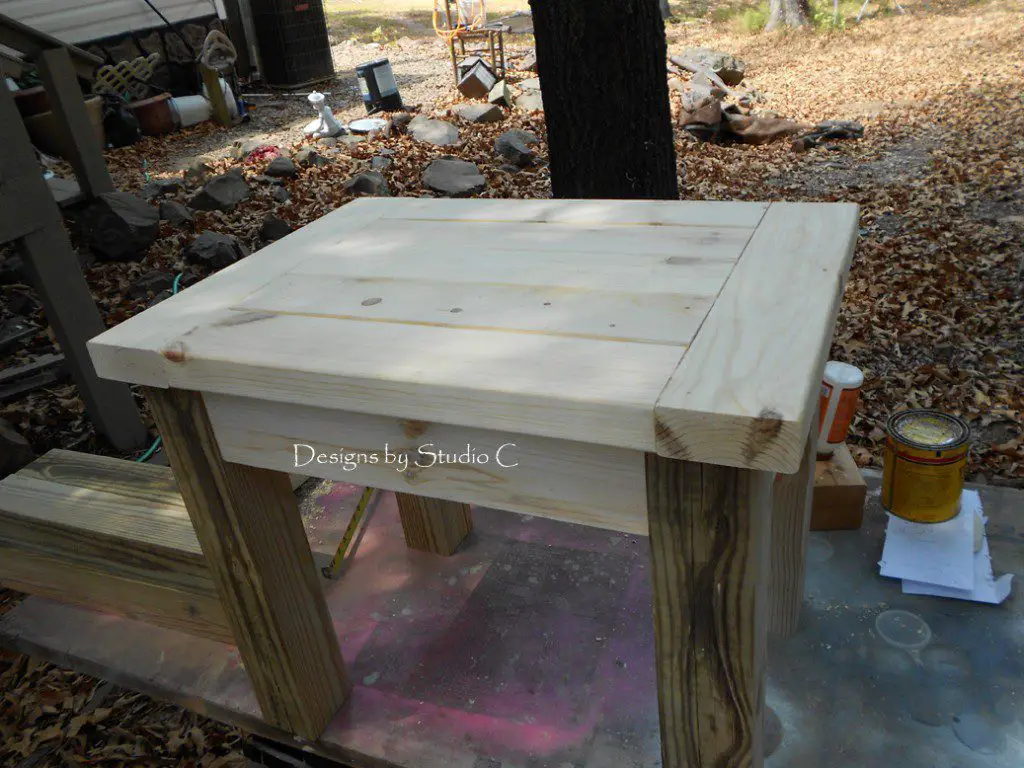
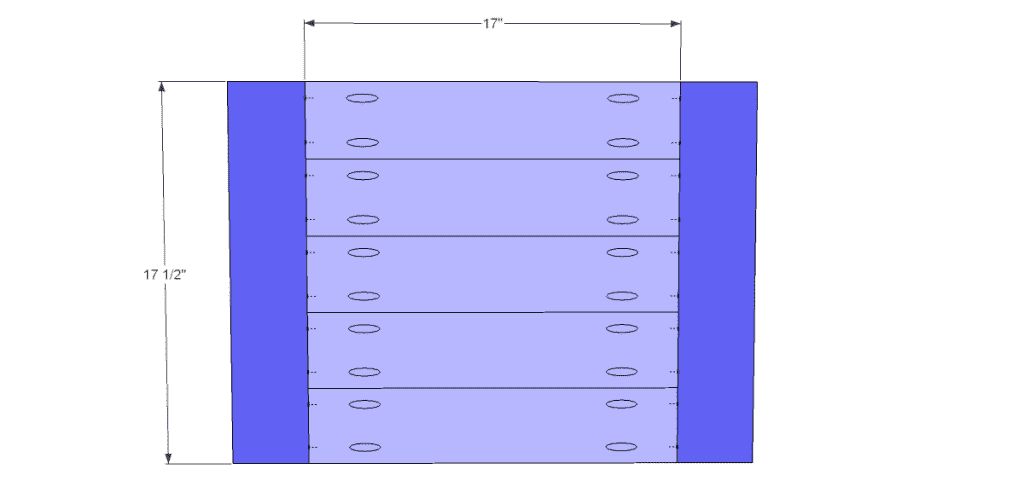
I started by cutting all of the lumber to length with the miter saw. These tables will each measure 18″ x 24″ x 20″.
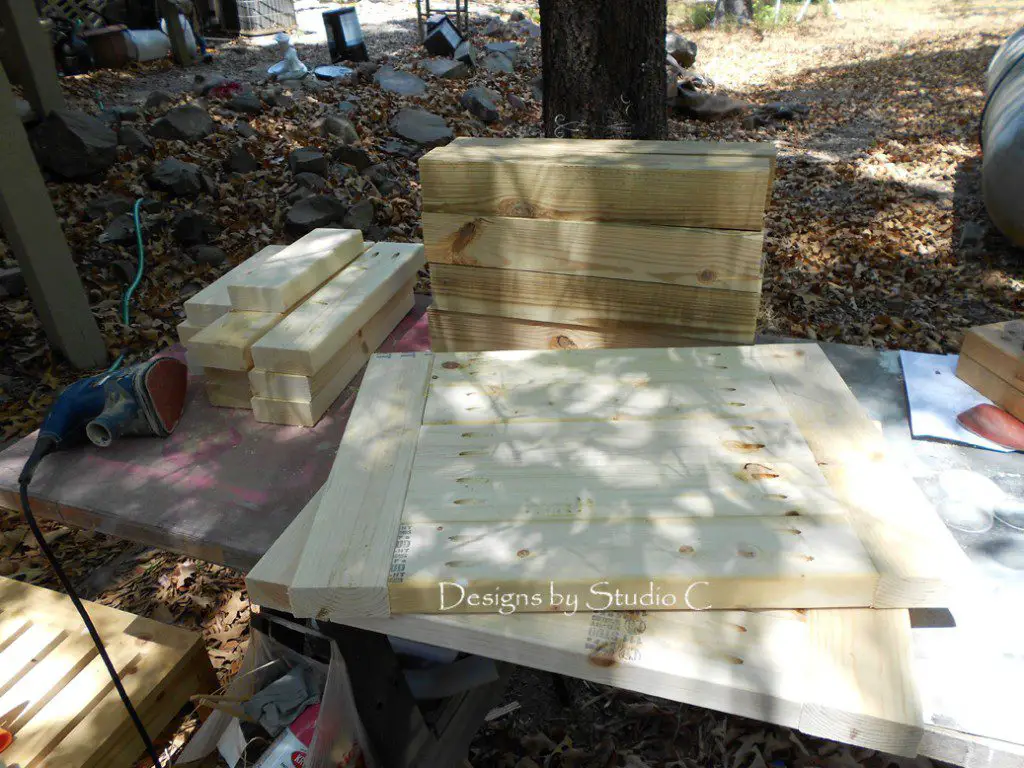
While I ripped the posts down to 3″ x 3″ on the table saw, the pocket holes were drilled with the Kreg jig set for 1-1/2″ material.
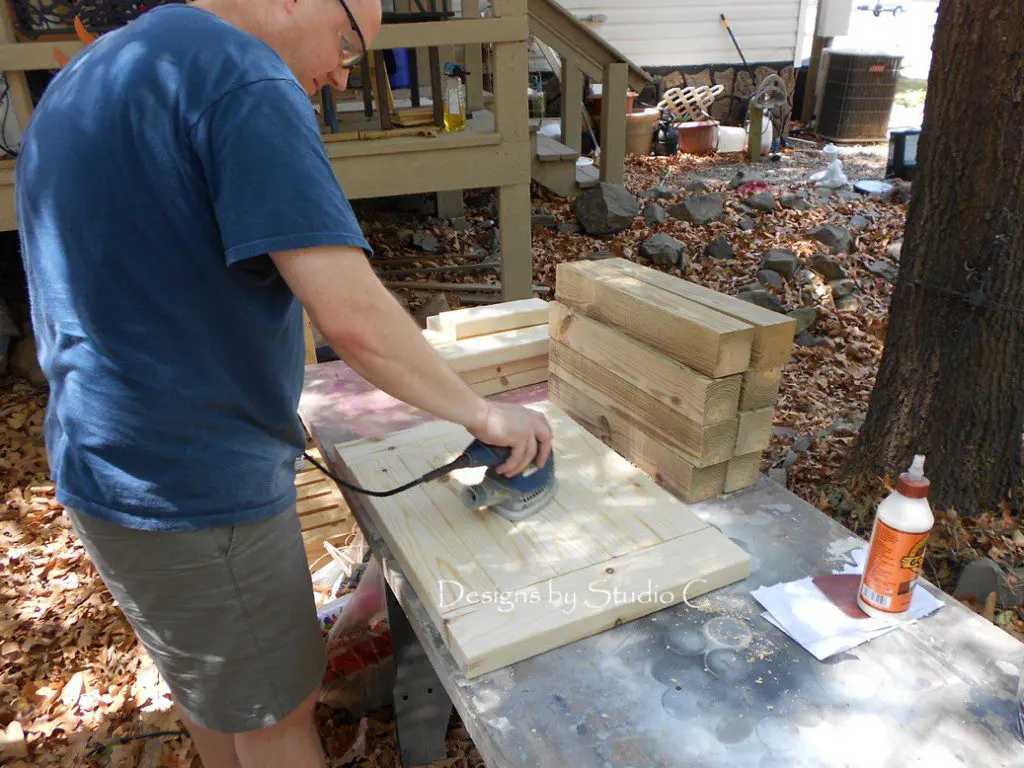
All of the pieces were sanded before assembly. At the same time, I assembled the table tops using glue, 2″ pocket hole screws, and clamps.
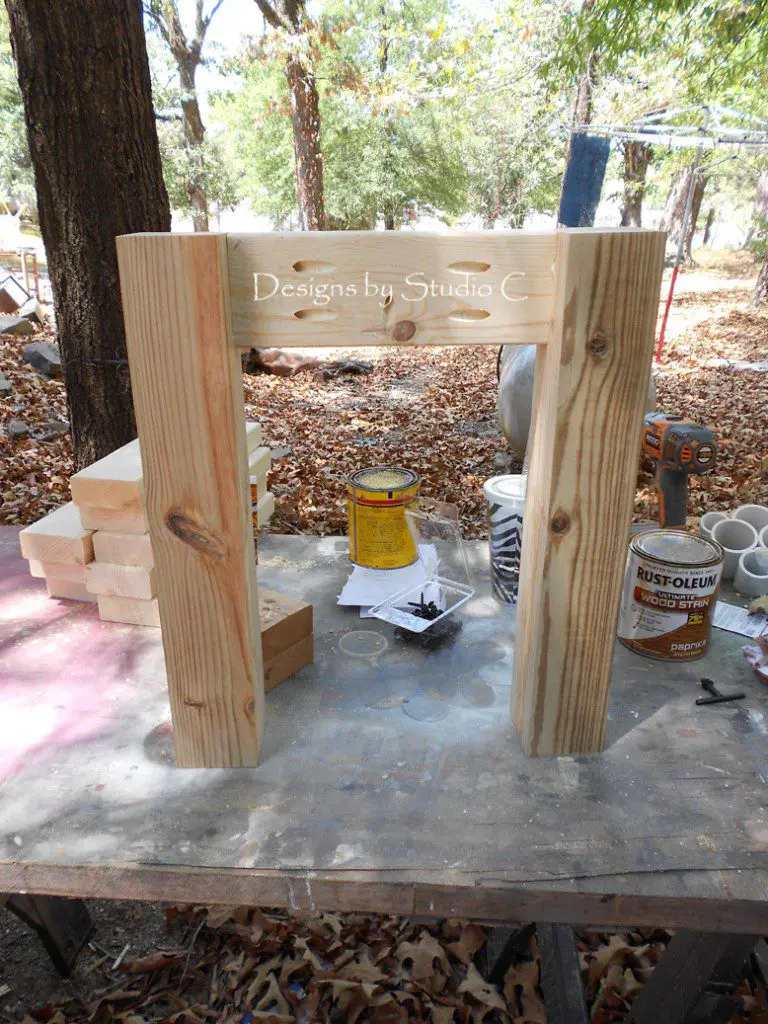
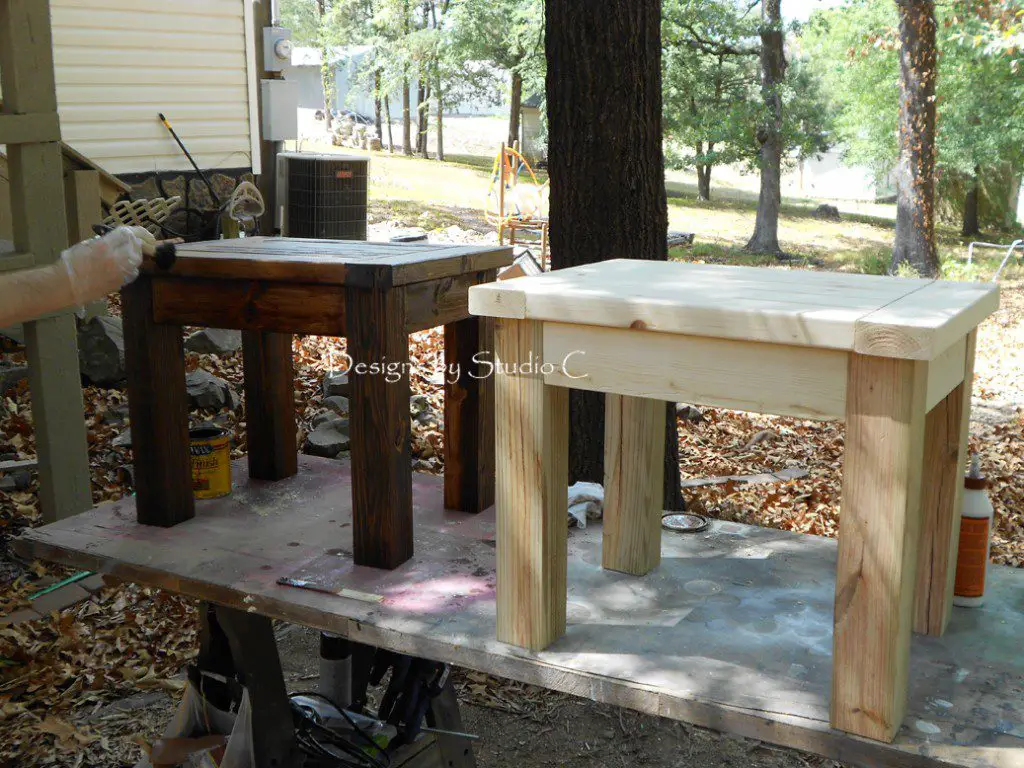
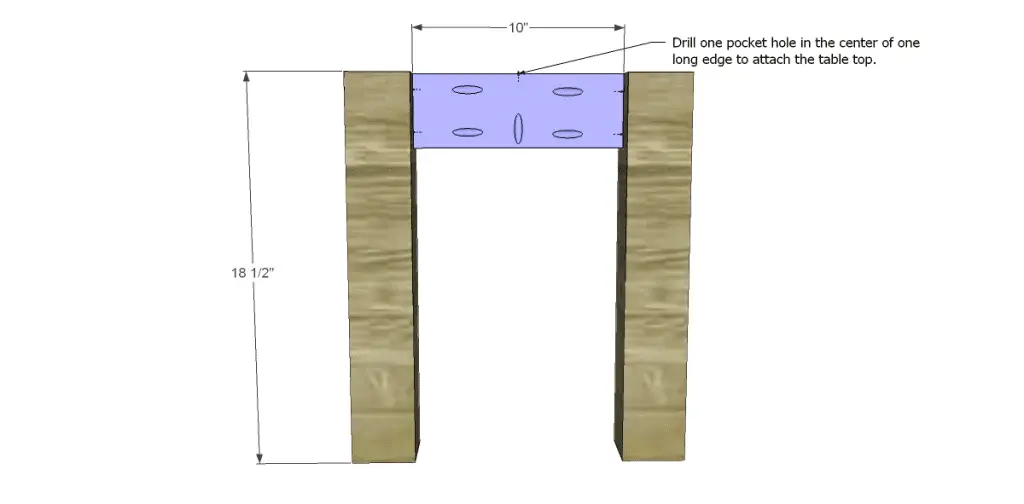
I attached the shorter apron to the legs using glue and 2-1/2″ pocket hole screws. Because this piece is so short, I used a close-quarter drill to get into the tight space.
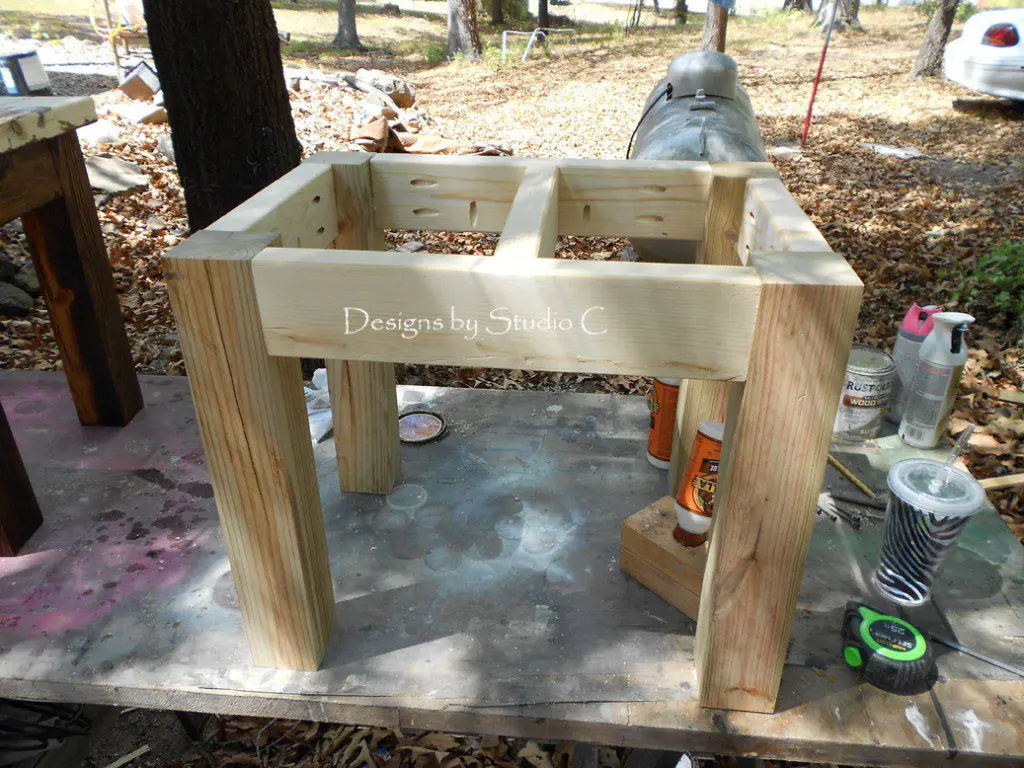
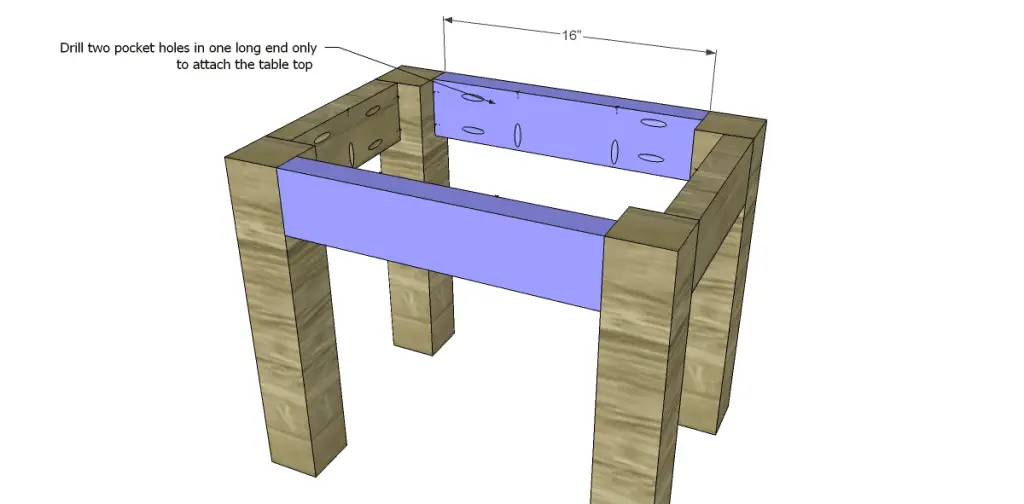
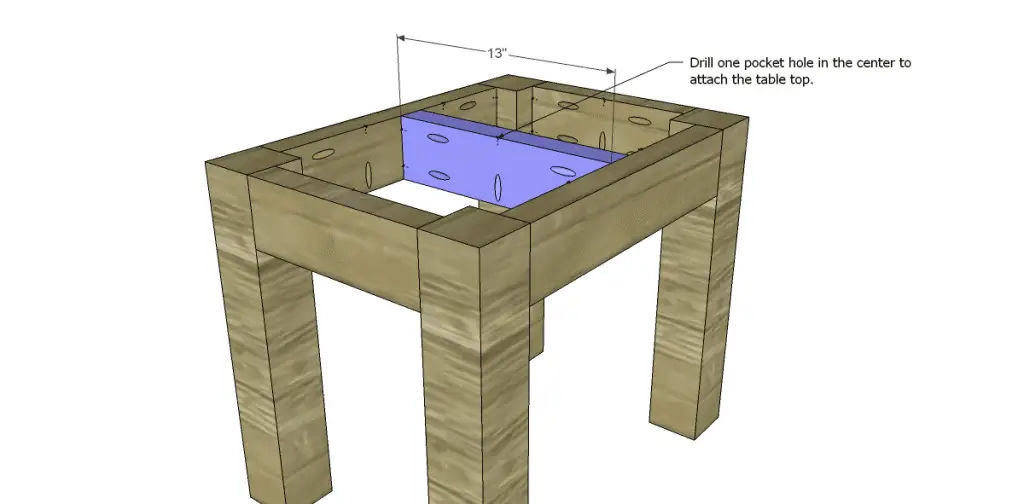
Next, I attached the longer aprons to the legs to connect everything together. After checking for square, I added the center support.
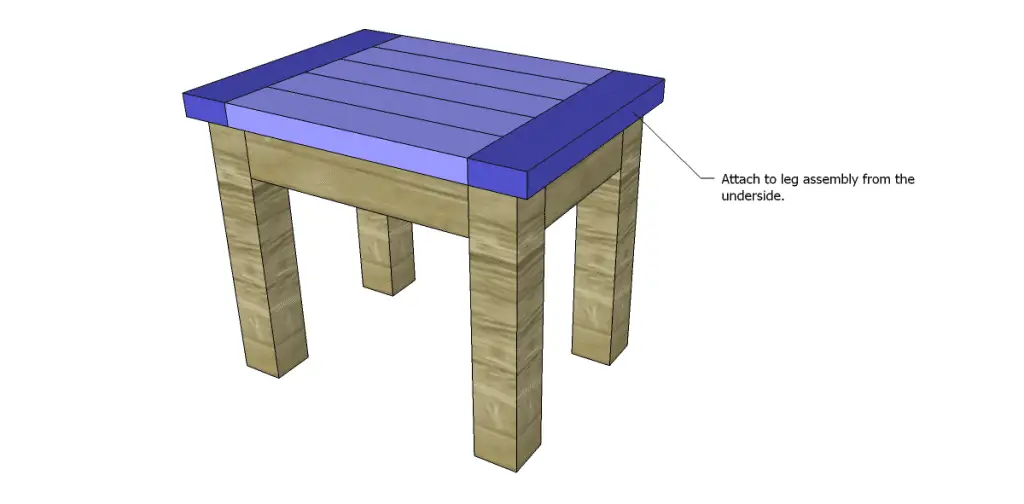
Last, I placed the table top face down, centered the leg assembly on it, and drilled screws through the pocket holes in the aprons and support into the top.
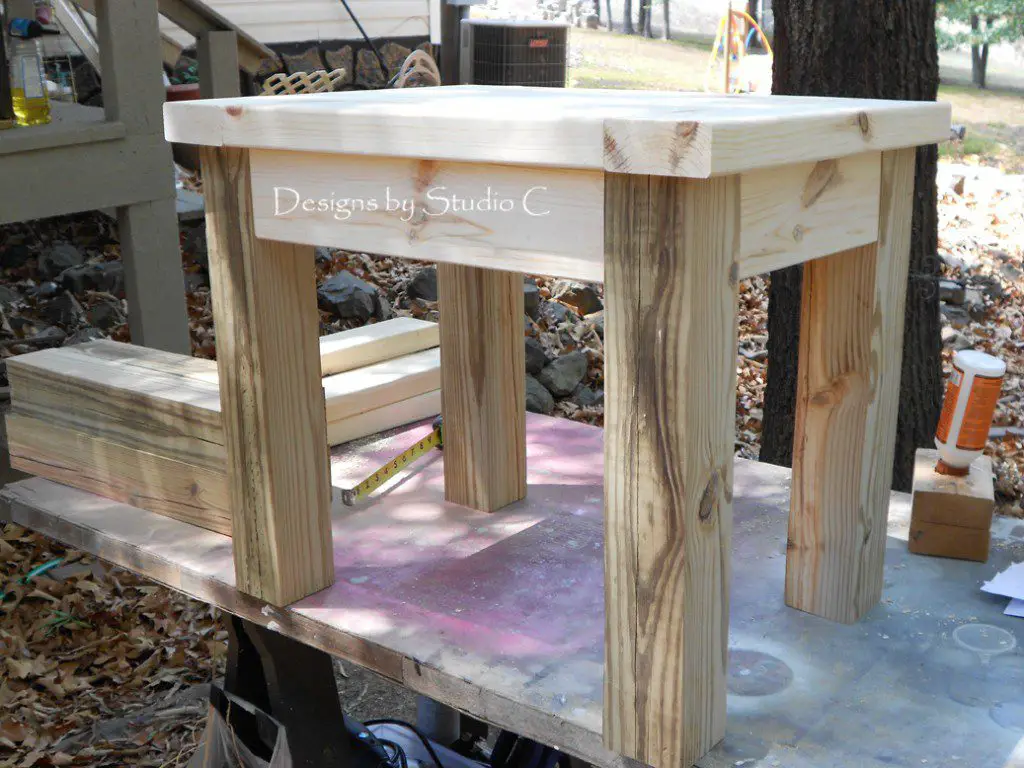
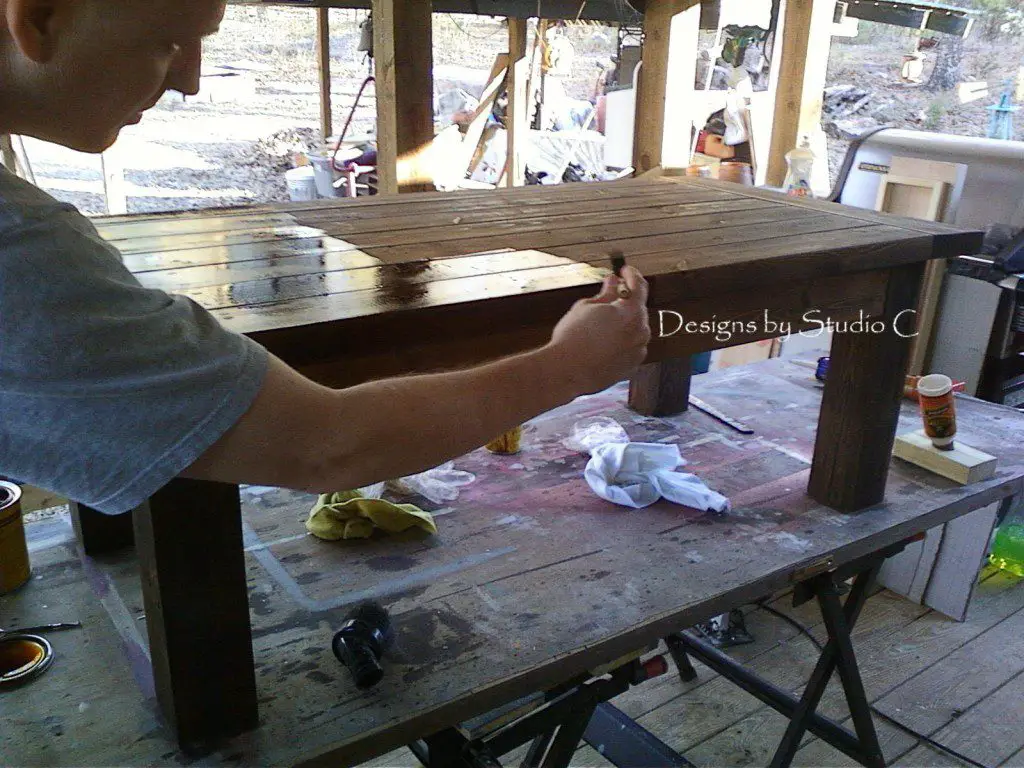
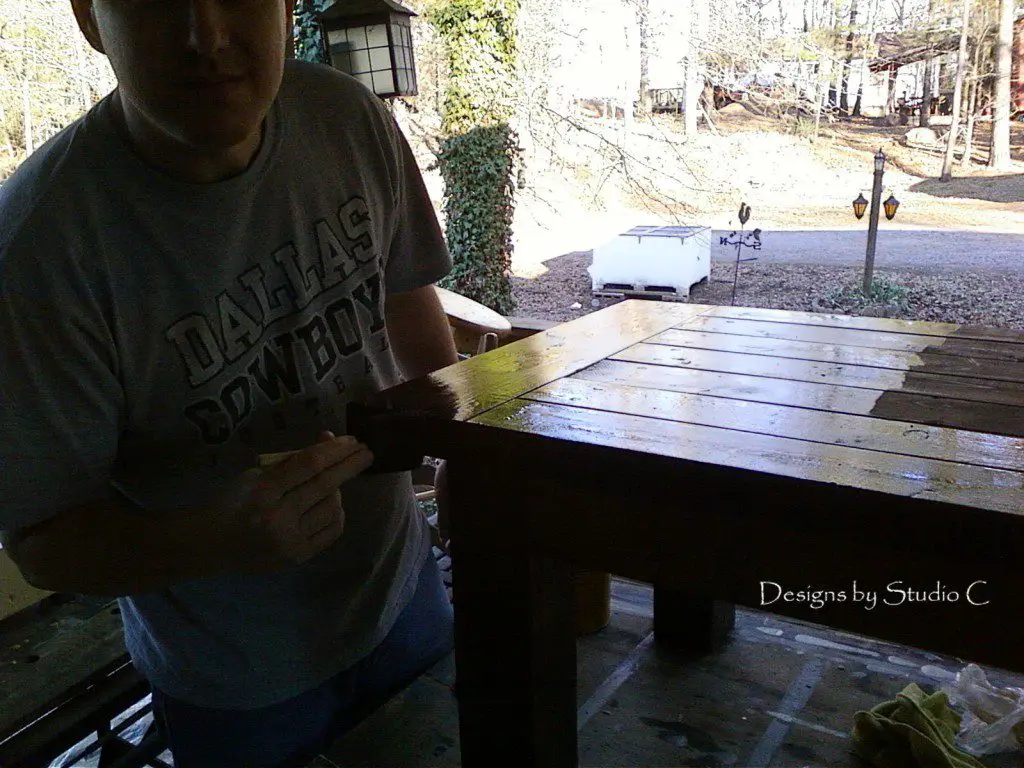
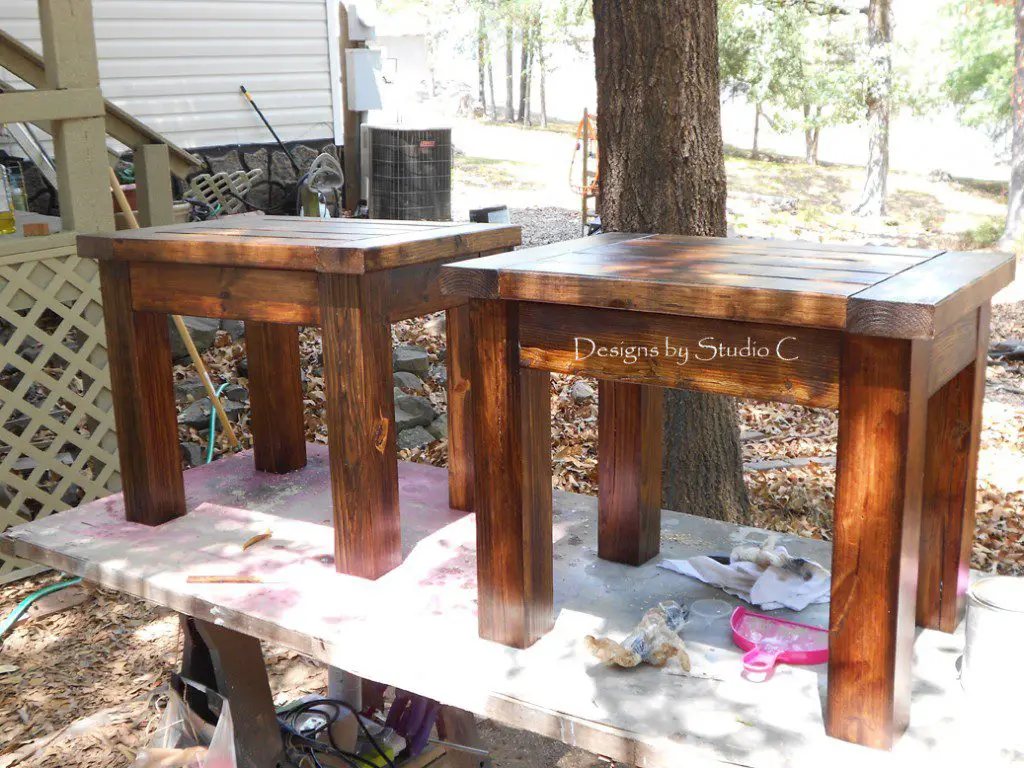
The tables were stained with Minwax stain in Provincial. After the stain was dry, I sealed the tables with Rust-Oleum’s Ultimate Polyurethane in Satin.
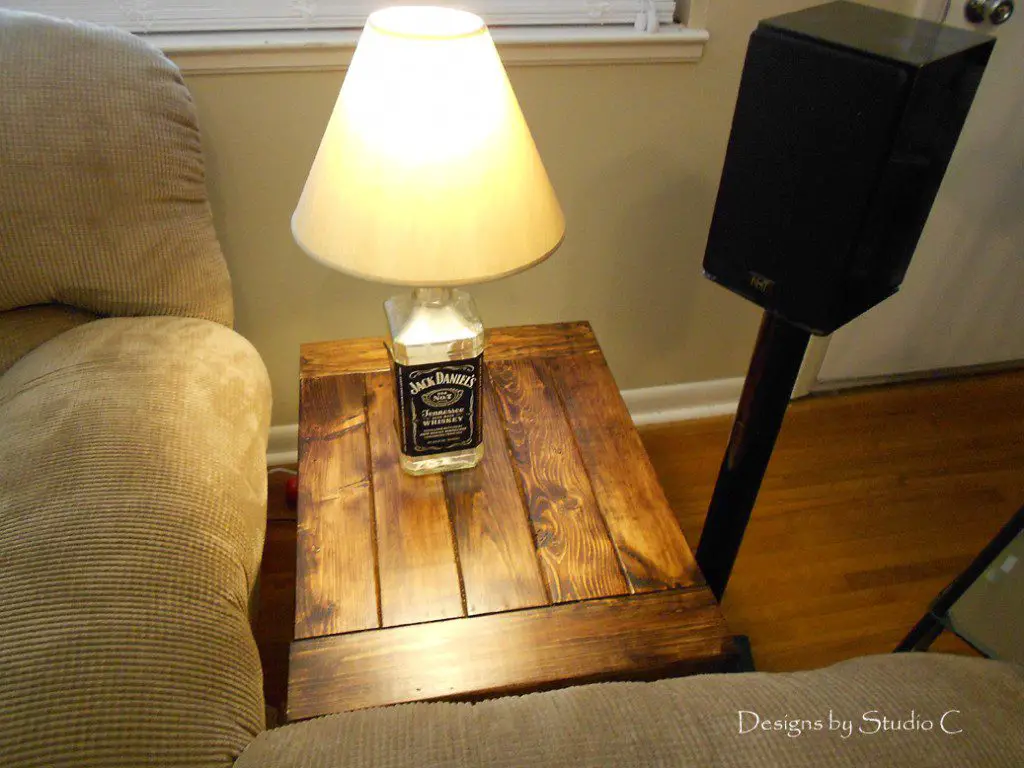
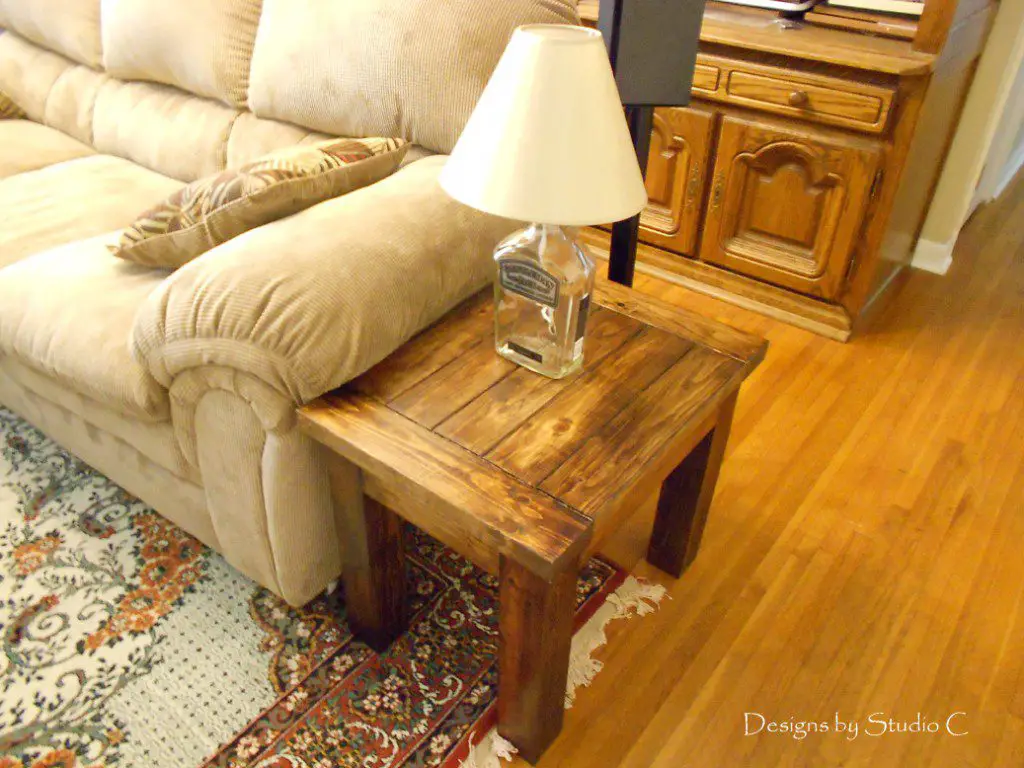
Wow! Fantastic work… Cheap, too!! (Featured with a lamp made using a liquor bottle!)
Plans to build the side tables:
Start by cutting all of the pieces to length. Drill pocket holes in the pieces as shown with the Kreg jig set for 1-1/2″ material. Attach the shorter aprons to the legs using glue and 2-1/2″ pocket hole screws.
Attach the longer aprons with glue and 2-1/2″ pocket hole screws. After checking for square and making any necessary adjustments, attach the support in the center of the longer aprons using glue and 2-1/2″ pocket hole screws.
Assemble the table top as shown using glue and 2-1/2″ pocket hole screws. Attach to the leg assembly using glue and 2-1/2″ pocket hole screws through the pocket holes drilled in the aprons and support.
If you have any questions about how to build a side table, leave a comment below!
Originally posted 2012-08-10 08:00:01.
[…] to Build a Side Table.Build your own side or end table and save a bundle doing […]