
The Hilton Media Stand Plans
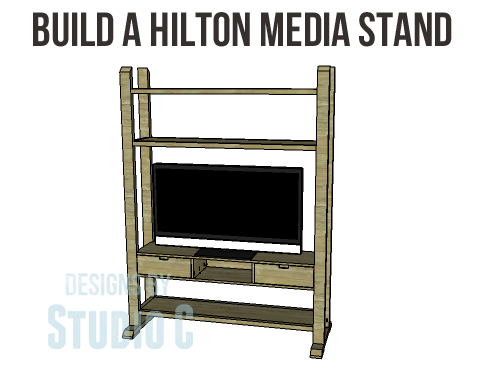
Build a Trendy Stand for a TV
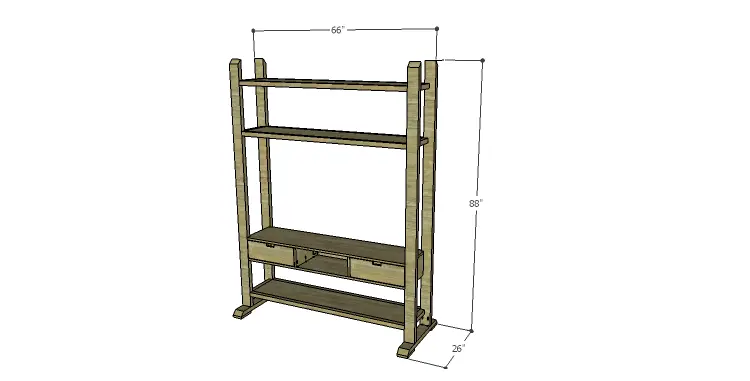
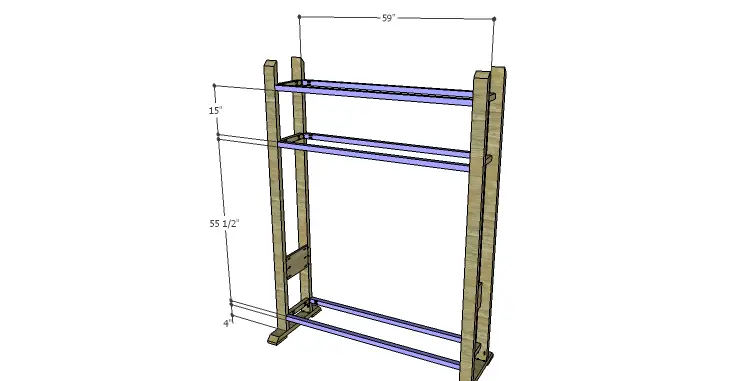
If you like the latest trends in furniture style, then the Hilton media stand plans are for you! Resembling a baker’s rack, the media stand features three large shelves with a cabinet shelf and two drawers for the TV. In a rustic or distressed finish, this media stand will look great in any décor!
Materials:
- 1-1/4″ pocket hole screws (<– affiliate link!)
- 2-1/2″ pocket hole screws
- 1-1/4″ brad nails
- Edge banding, optional
- 2 sets of 12″ Drawer slides
- Wood glue
- Sandpaper (100, 150, 220 grits)
- Finishing supplies (primer & paint, or stain, sealer)
Lumber:
- 1 – 1×4 at 4′
- 1 – 1×6 at 8′
- 1 – 1×8 at 8′
- 3 – 2×2 at 6′
- 3 – 2×2 at 8′
- 1 – 2×4 at 4′
- 2 – 2×2 at 8′
- 2 sheets of 3/4″ plywood
Cut List:
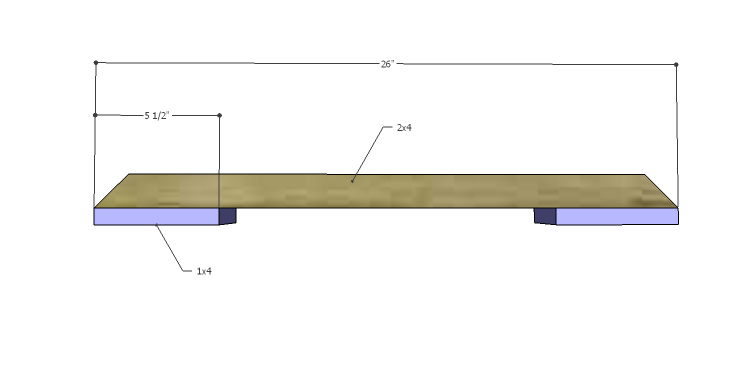
- 2 – 2×4 at 26″ – Feet
- 4 – 1×4 at 5-1/2″ – Feet
- 4 – 2×4 at 85-3/4″ – Legs
- 6 – 2×2 at 12″ – Side Stretchers
- 2 – 1×8 at 12″ – Cabinet Sides
- 6 – 2×2 at 59″ – Front & Back Stretchers
- 1 – 1×8 at 59″ – Cabinet Back
- 1 – 3/4″ plywood at 13-1/2″ x 59″ – Cabinet Bottom
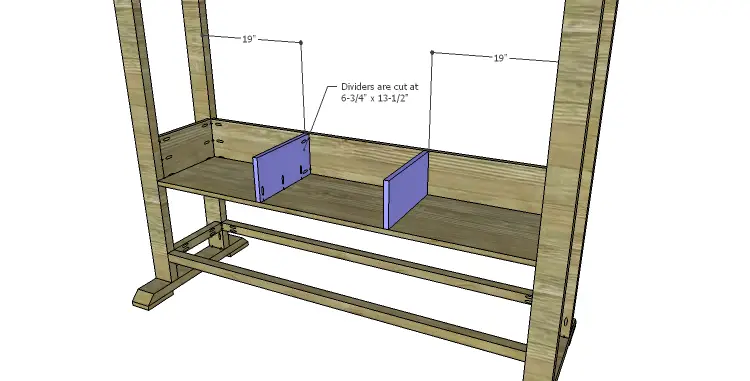
- 2 – 3/4″ plywood at 6-3/4″ x 13-1/2″ – Cabinet Dividers
- 1 – 3/4″ plywood at 14-1/4″ x 60-1/2″ – Cabinet Top
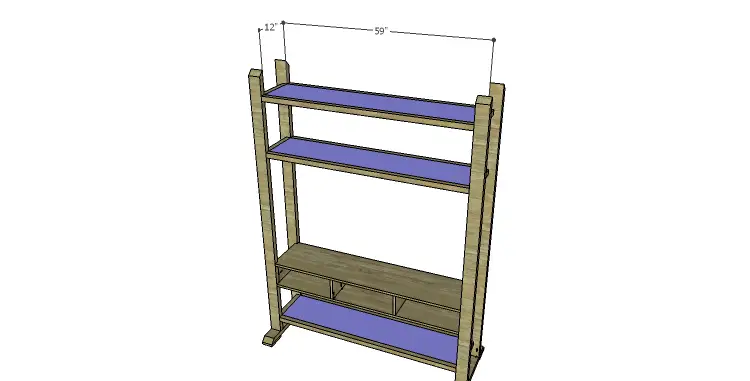
- 3 – 3/4″ plywood at 12″ x 59″ – Shelf Panels
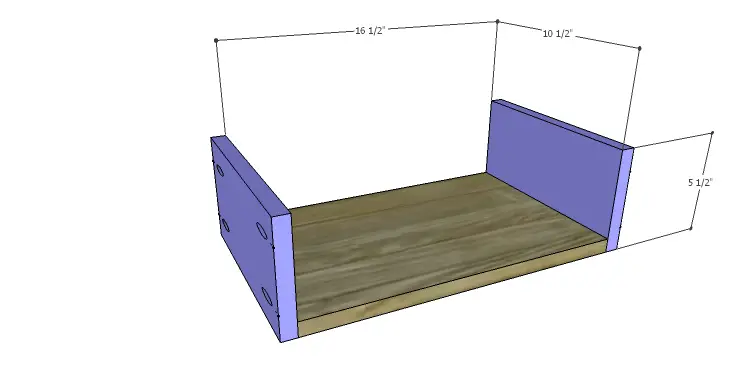
- 2 – 3/4″ plywood at 10-1/2″ x 16-1/2″ – Drawer Bottoms
- 4 – 1×6 at 10-1/2″ – Drawer Sides
- 2 – 1×6 at 18″ – Drawer Back
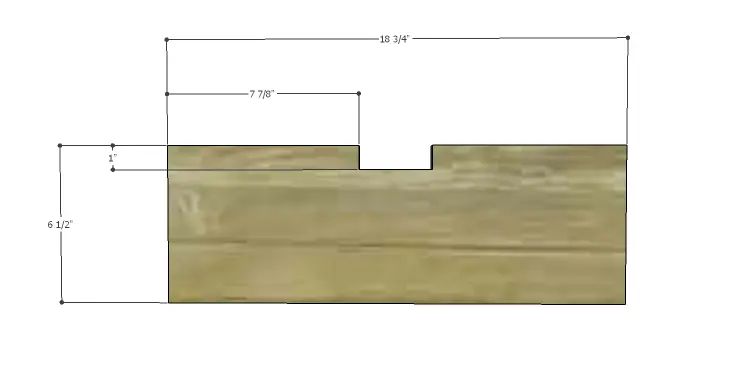
- 2 – 3/4″ plywood at 6-1/2″ x 18-3/4″ – Drawer Fronts
Step One
Edge banding will be applied to the exposed edges of the plywood prior to assembly.
Cut the pieces for the feet. Cut a 45° angle in each end of the 2×4 pieces. Secure the 1×4 pieces to the bottom using glue and 1-1/4″ brad nails.
Step Two
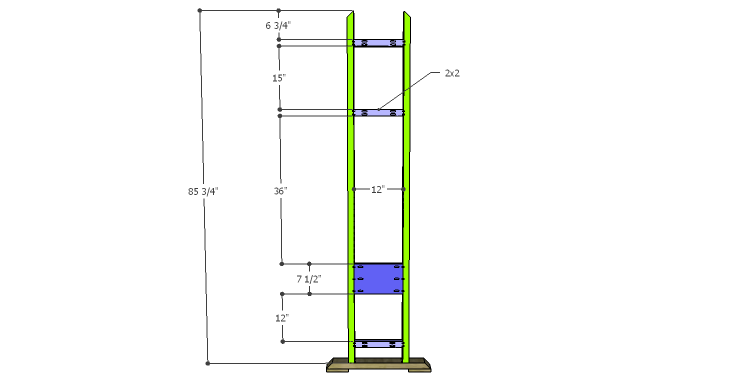
Cut the pieces for the legs, side stretchers, and cabinet sides. Cut a 45° bevel in the top edge of each of the legs. Set the pocket hole jig for 1-1/2″ material and drill pocket holes in the lower end of each leg, as well as each end of the 2×2 stretchers.
Set the pocket hole jig for 3/4″ material and drill pocket holes in each end of the 1×8 cabinet side pieces.
Secure the legs to the feet using glue and 2-1/2″ pocket hole screws. Secure the 2×2 stretchers using glue and 2-1/2″ pocket hole screws. Secure the 1×8 cabinet side using glue and 1-1/4″ pocket hole screws.
Step Three
Cut the pieces for the front and back stretchers, and the cabinet back. Set the pocket hole jig for 1-1/2″ material and drill pocket holes in each end of the 2×2 stretchers. Secure the stretchers to each leg assembly using glue and 2-1/2″ pocket hole screws.
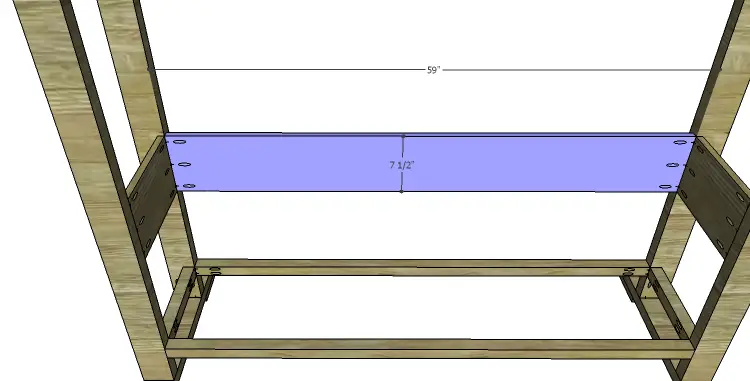
Set the pocket hole jig for 3/4″ material and drill pocket holes in each end of the 1×8 cabinet back piece. Secure to the legs using glue and 1-1/4″ pocket hole screws. The back face of the cabinet back will be flush with the inside face of the legs.
Step Four
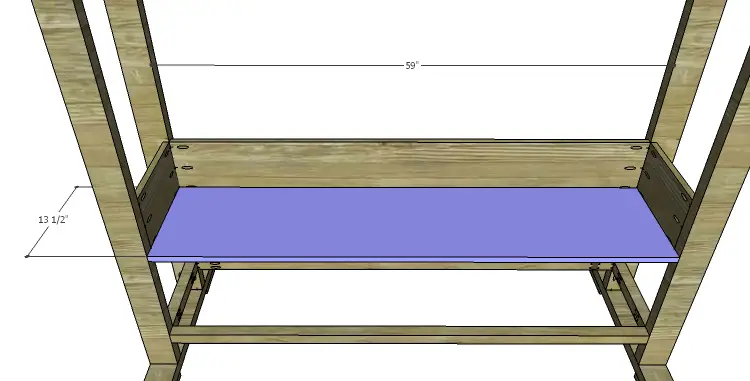
Cut the piece for the cabinet bottom and drill pocket holes in the side edges as well as one long edge. Secure to the cabinet sides and back using glue and 1-1/4″ pocket hole screws.
Step Five
Cut the pieces for the cabinet dividers and drill pocket holes in one shorter edge and one longer edge. If the pocket holes in each piece are drilled opposite each other (one left piece and one right piece), they will face to the inside of the drawer cabinets and will not have to be filled. Position the dividers as shown, then secure in place using glue and 1-1/4″ pocket hole screws.
Step Six
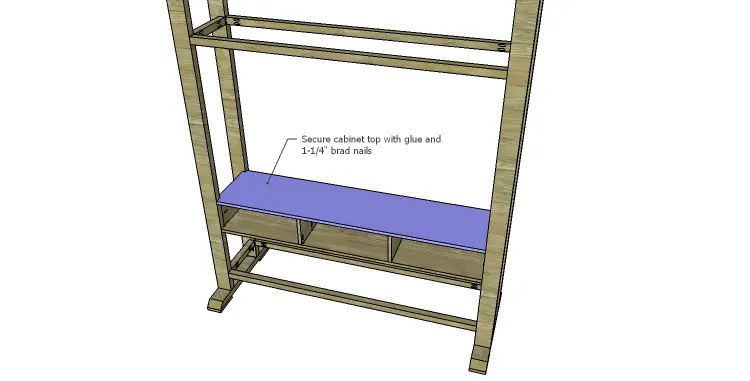
Cut the piece for the cabinet top and cut the notches using a jigsaw. Secure the top to the cabinet sides, back, and dividers using glue and 1-1/4″ brad nails.

Step Seven
Cut the pieces for the shelf panels and drill pocket holes in all four edges. Secure to the side stretchers as well as the front and back stretchers using glue and 1-1/4″ pocket hole screws. The top face of the shelves will be flush with the top face of the stretchers.
Step Eight
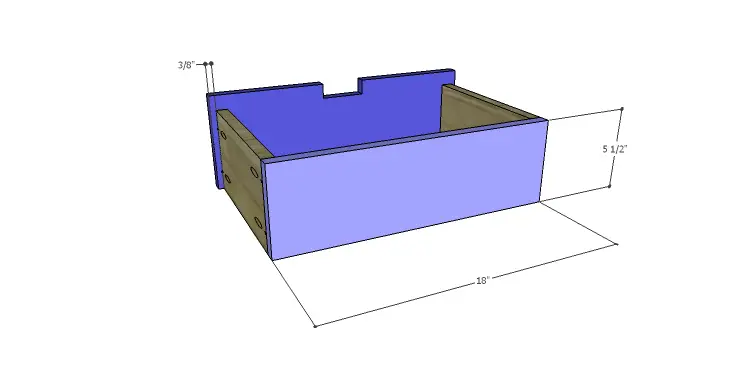
Cut the pieces for the drawer fronts and cut the notches using a jigsaw. Cut the remaining pieces for the drawer boxes. Drill pocket holes in all four edges of the bottom as well as each end of the sides. Assemble the drawer boxes as shown using glue and 1-1/4” pocket hole screws. Install the drawer slides according to the manufacturer’s installation instructions, locating them ¾” back from the front edge of the sides. This easy tutorial on installing drawer slides will be helpful.
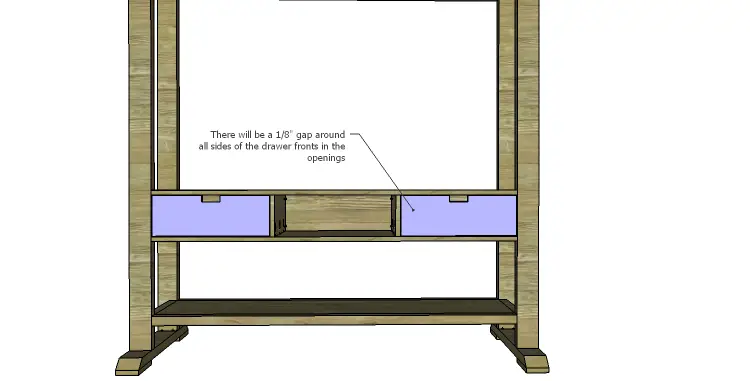
Install the drawer slides on the cabinet and install in the openings. Make any necessary adjustments.
Finish as desired.
The height of the cabinet where the TV will rest can also be adjusted for personal preference – just install the side and back pieces at the height desired minus 3/4″ for the top, then proceed with the plan. Any questions about the Hilton media stand plans? Leave a comment below or contact me at cher {at} designsbystudioc {dot} com!