
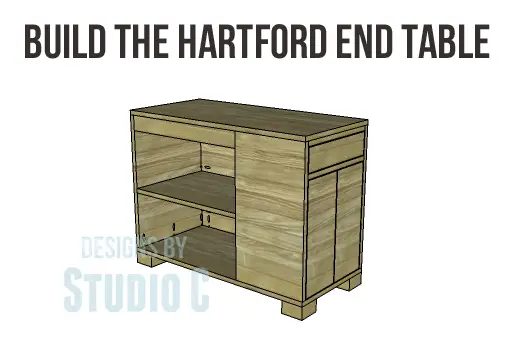
The Hartford End Table Plans
A Dual-Duty End Table plus Bookcase!
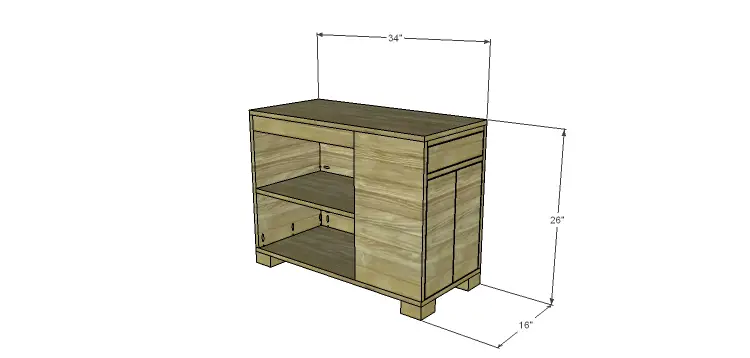
This is a great table for those who don’t want a lot of furniture pieces in a room… The Hartford end table plans are a bookcase and end table combo featuring a drawer and a cubby with a shelf and doors. The table can be built in a pair, as a right and left by switching the position of the bookcase back! Quick and easy!
Materials:
- 1-1/4″ pocket hole screws (<– affiliate link!)
- 1-1/4″ brad nails
- 2-1/2″ screws
- Edge banding, optional
- 2 sets of hinges
- 3 cabinet pulls
- Wood glue
- Sandpaper (100, 150, 220 grits)
- Finishing supplies (primer & paint, or stain, sealer)
Lumber:
- 1 – 1×2 at 4′
- 1 – 1×3 at 8′
- 1 – 4′ x 4′ sheet of 3/4″ plywood
- 1 – 4′ x 8′ sheet of 3/4″ plywood
- Scrap pieces of a 4×4 post
Cut List:
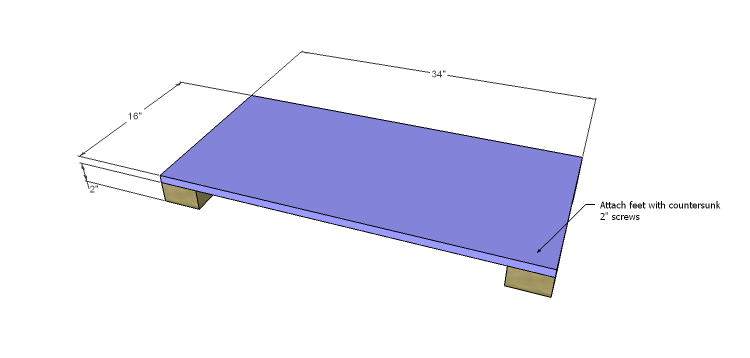
- 4 – 4×4 post at 2″ – Feet
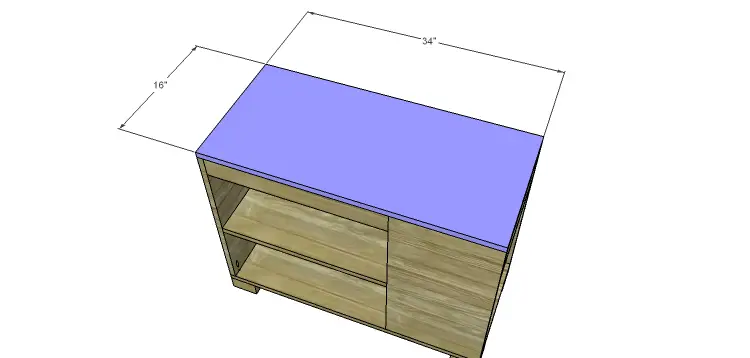
- 1 – 3/4″ plywood at 16″ x 34″ – Base
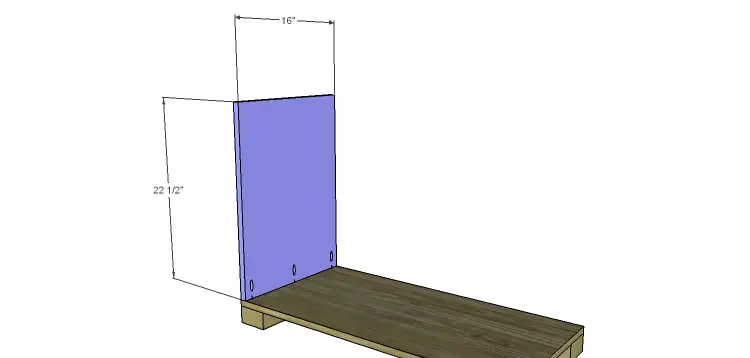
- 1 – 3/4″ plywood at 16″ x 22-1/2″ – Bookcase Side
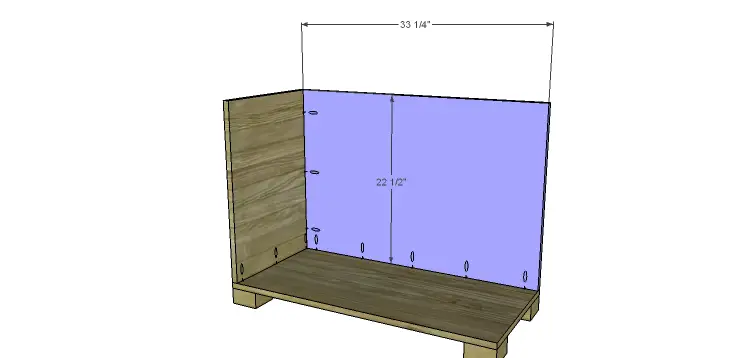
- 1 – 3/4″ plywood at 22-1/2″ x 33-1/4″ – Bookcase Back
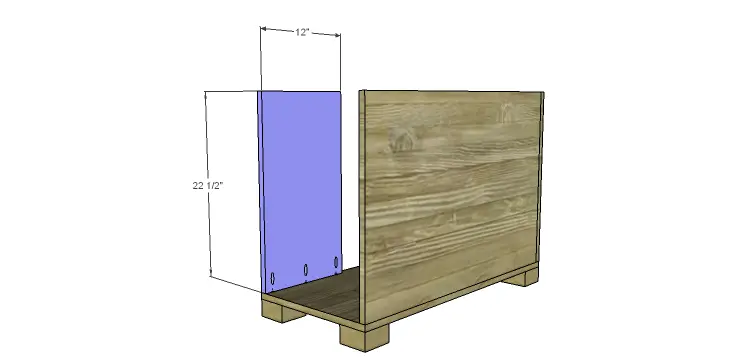
- 1 – 3/4″ plywood at 12″ x 22-1/2″ – Smaller Cabinet Side
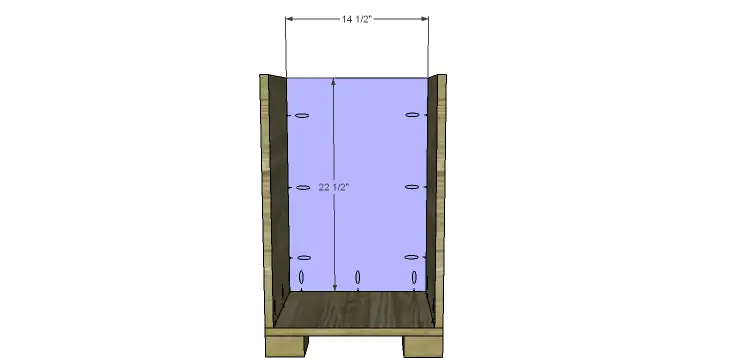
- 1 – 3/4″ plywood at 14-1/2″ x 22-1/2″ – Smaller Cabinet Back
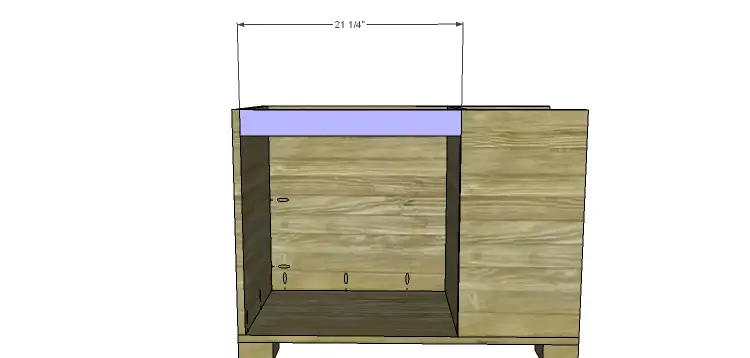
- 1 – 1×3 at 21-1/4″ – Bookcase Stretcher
- 1 – 3/4″ plywood at 15-1/4″ x 21-1/4″ – Larger Shelf
- 2 – 1×2 at 14-1/2″ – Smaller Cabinet Stretchers
- 2 – 1/2″ x 3/4″ x 10-1/2″ strips – Drawer Runner
- 1 – 3/4″ plywood at 10-1/4″ x 14-1/2″ – Smaller Shelf
- 1 – 3/4″ plywood at 16″ x 34″ – Top
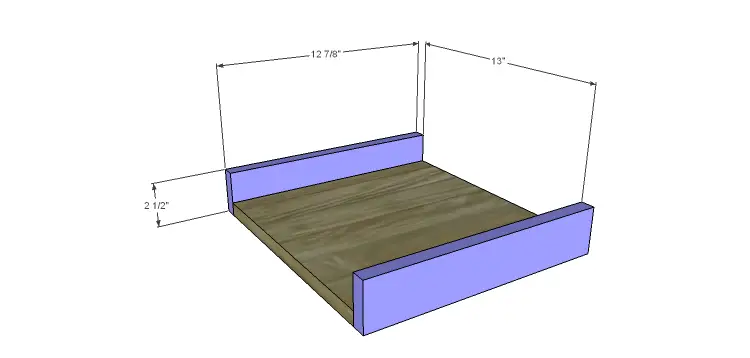
- 1 – 3/4″ plywood at 12-7/8″ x 13″ – Drawer Bottom
- 2 – 1×3 at 12-7/8″ – Drawer Box Front & Back
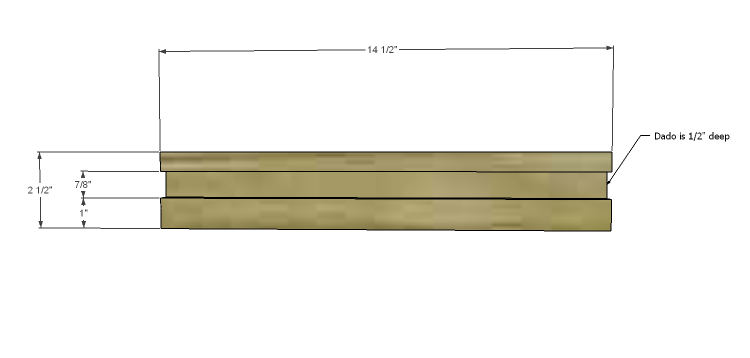
- 2 – 1×3 at 14-1/2″ – Drawer Box Sides
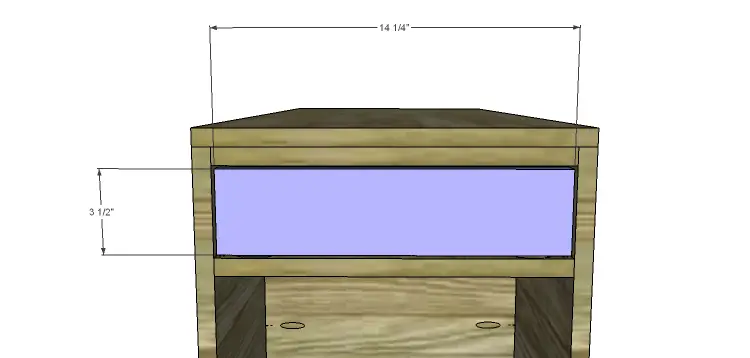
- 1 – 3/4″ plywood at 3-1/2″ x 14-1/4″ – Drawer Front
- 2 – 3/4″ plywood at 7-1/16 x 17″ – Doors
Step One
Edge banding will be applied to the exposed edges of the plywood prior to assembly.
Cut the pieces for the feet and the base. Secure the feet to the base using glue and countersunk 2-1/2″ screws through the base into the feet.
Step Two
Cut the piece for the bookcase side. With the pocket hole jig set for 3/4″ material, drill pocket holes in the lower edge of the side. Secure to the base using glue and 1-1/4″ pocket hole screws.
Step Three
Cut the piece for the bookcase back, and drill pocket holes in the bottom and one side edge. Secure to the side and base using glue and 1-1/4″ pocket hole screws.
Step Four
Cut the piece for the small cabinet side and drill pocket holes in the bottom edge. Secure to the base as shown using glue and 1-1/4″ pocket hole screws.
Step Five
Cut the piece for the smaller cabinet back, and drill pocket holes in the bottom and side edges. Secure to the bookcase back, the base, and the smaller cabinet sides using glue and 1-1/4″ pocket hole screws.
 Step Six
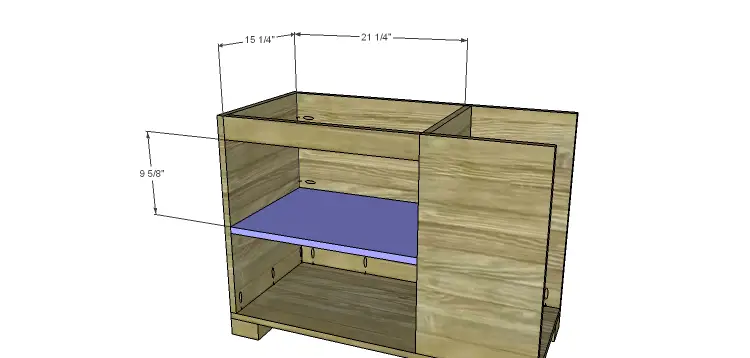
Cut the piece for the bookcase stretcher and drill pocket holes in each end. Secure as shown using glue and 1-1/4″ pocket hole screws.
Cut the piece for the bookcase shelf and drill pocket holes in the back and side edges. Secure to the bookcase using glue and 1-1/4″ pocket hole screws.
Step Seven
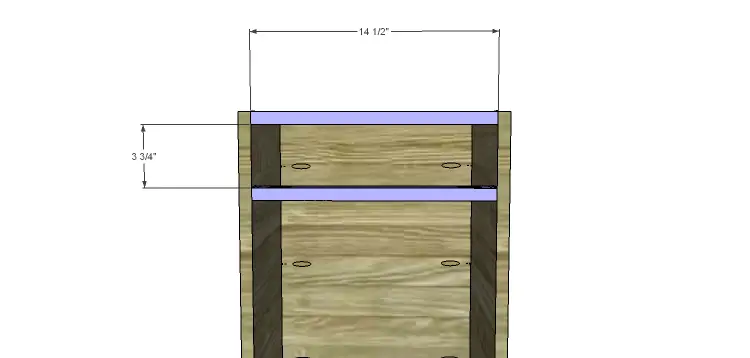
Cut the pieces for the smaller cabinet stretchers and drill pocket holes in each end. Secure as shown using glue and 1-1/4″ pocket hole screws.
Step Eight
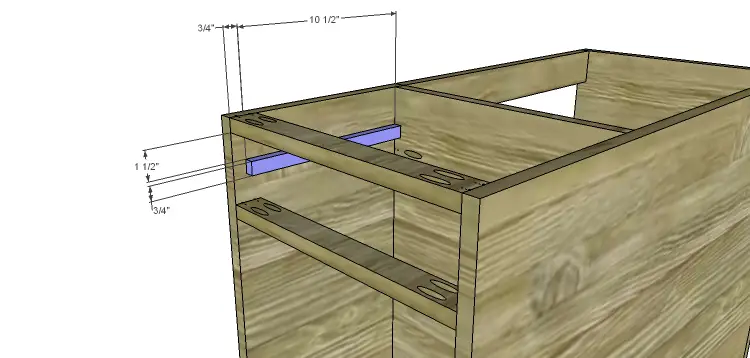
Cut the pieces for the drawer runners. Secure between the smaller cabinet stretchers as shown using glue and 1-1/4″ brad nails.
Step Nine
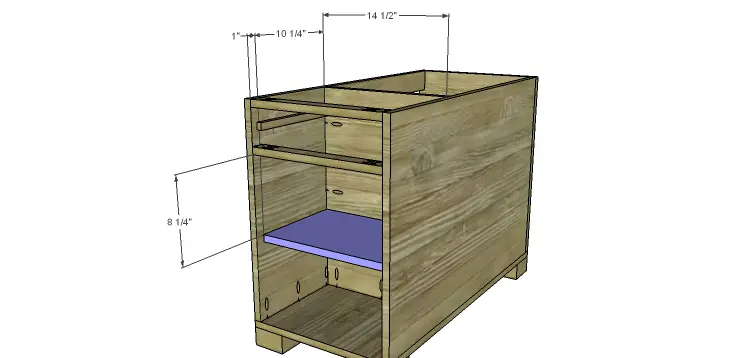
Cut the piece for the smaller cabinet shelf and drill pocket holes in the back and side edges. Secure as shown using glue and 1-1/4″ pocket hole screws.
Step Ten
Cut the piece for the top. Secure in place using glue and 1-1/4″ brad nails.
Step Eleven
Cut the pieces for the drawer. Secure the front and back to the bottom using glue and 1-1/4″ brad nails.
To cut the groove in the sides, set the depth of the table saw blade at 1/2″. Set the rip fence at 1-1/8″ from the blade and make a pass with each of the pieces. Move the rip fence toward the blade in 1/4″ increments and make a pass with each piece through the saw until the groove is 7/8″ wide. Remove any excess material in the groove with a wood chisel. Secure the sides to the drawer box using glue and 1-1/4″ brad nails. Check out this easy tutorial on creating wood drawer runners.
Cut the pieces for the drawer front. Mark the position for the cabinet pull and drill the holes. Shim the drawer front in the opening – there will be a 1/8” gap around all sides – then drive screws through the holes for the drawer pulls into the drawer box. Open the drawer, and secure the drawer front using countersunk 1-1/4” screws from the inside. Remove the screws from the holes for the drawer pull then finish drilling the holes. Install the drawer pull. This easy tutorial on installing drawer fronts will be quite helpful!

Step Twelve
Cut the pieces for the doors. There will be a 1/8″ gap around all sides as well as in between. Install the hinges on the doors, then install the doors in the cabinet.
 Finish as desired!
Though this table is a bit on the larger side, it would make a great nightstand! Have any questions about the Hartford end table plans? Contact me at cher {at} designsbystudioc {dot} com!
[…] DIY Plans to Build a Hartford End Table.This end table will possibly replace several other pieces of furniture since it features a generous top for a lamp and decor as well as a bookcase, a drawer and a shelf behind doors. Here are the free woodworking plans. […]