
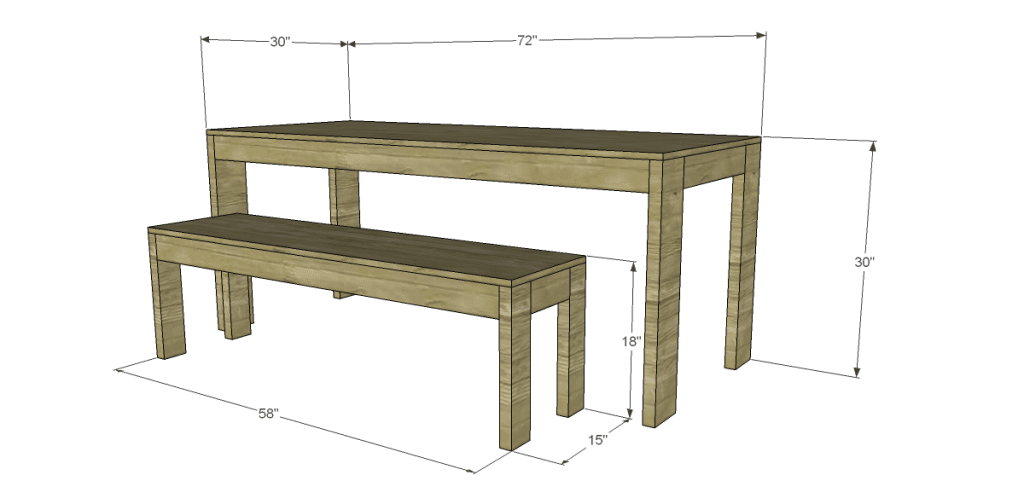
West Elm Inspired Boerum Dining Table and Benches
Easy to Build DIY Dining Table and Benches
Today’s plan is for a super-simple and stylish DIY dining table and benches. There are several pieces in this collection. I’ve posted plans for the nightstand and will post plans for other pieces in this collection soon.
The free plans to build a West Elm inspired Boerum dining table and benches will cost next to nothing to build. The simplicity will allow it to blend into any decor. If constructed out of pressure treated lumber or cedar, the set could also be used outdoors!
Materials:
- 1-1/4″ brad nails
- 2-1/2″ pocket hole screws
- Edge banding for plywood edges, optional
- Finishing supplies
Lumber:
(Includes materials for the table plus two benches)
- Two Sheets of 3/4″ plywood
- 2 – 2×6 at 8′
- 8 – 2×4 at 8′
Cut List:
- 4 – 2×6 at 29-1/4″ – Table Legs
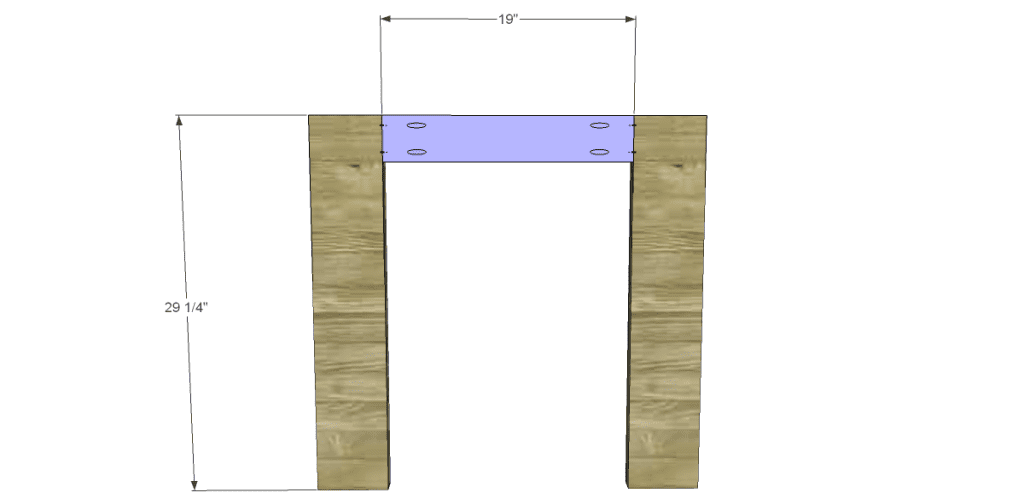
- 2 – 2×4 at 19″ – Side Frames
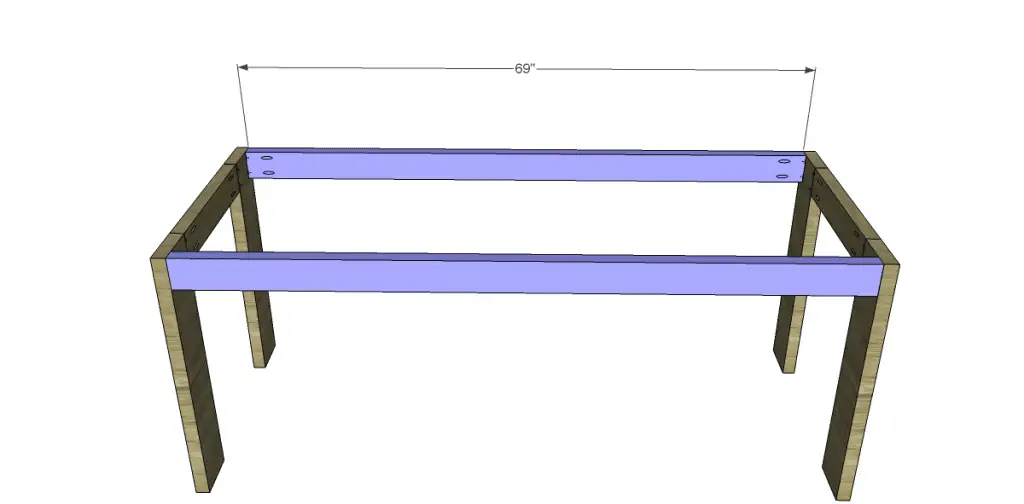
- 2 – 2×4 at 69″ – Table Aprons
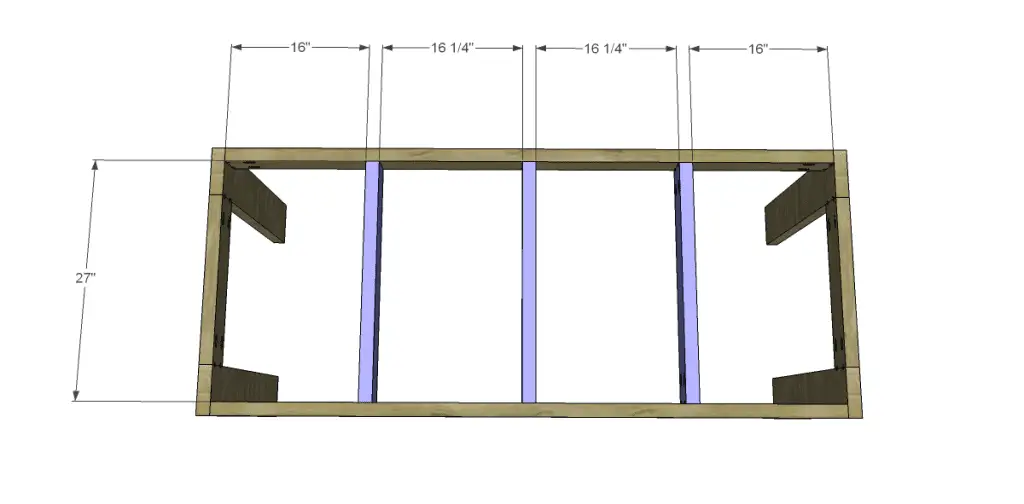
- 3 – 2×4 at 27″ – Top Supports
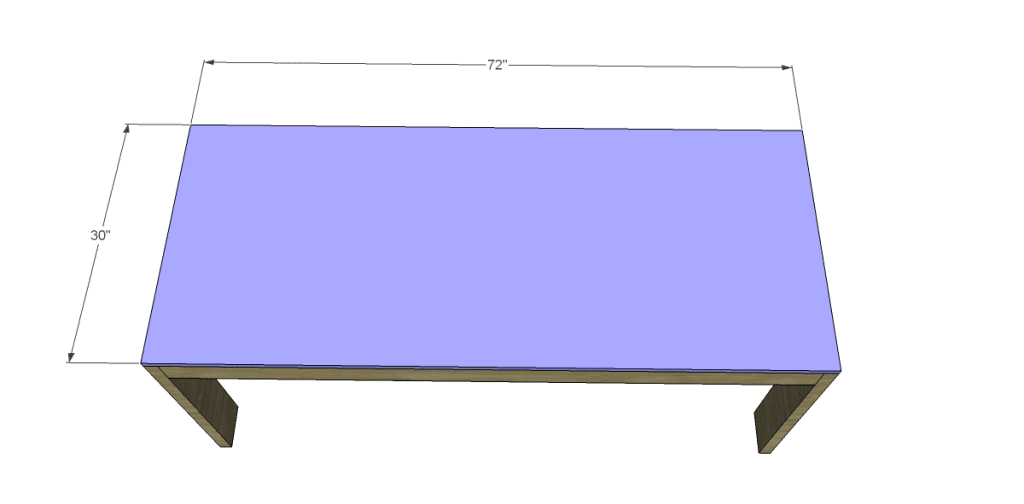
- 1 – 3/4″ plywood at 30″ x 72″ – Table Top
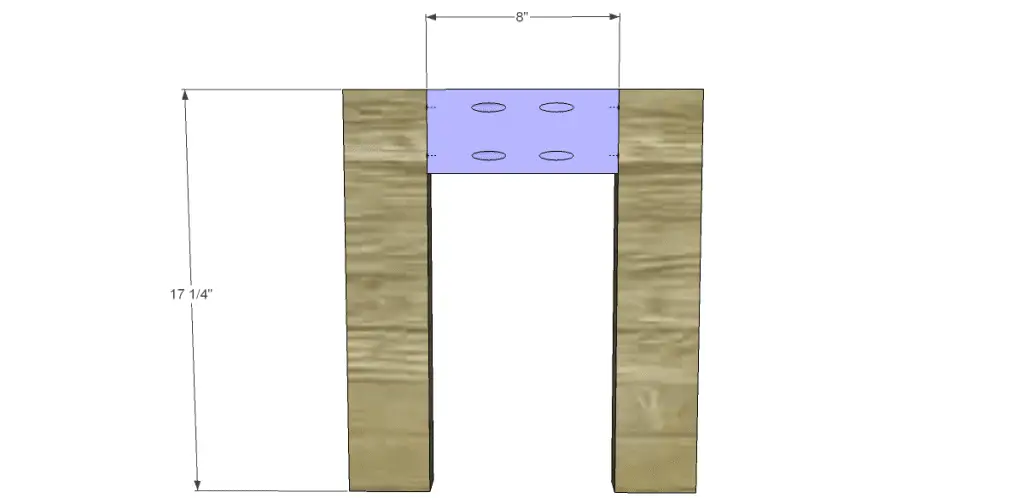
- 8 – 2×4 at 17-1/4″ – Bench Legs
- 4 – 2×4 at 8″ Bench Side Frames
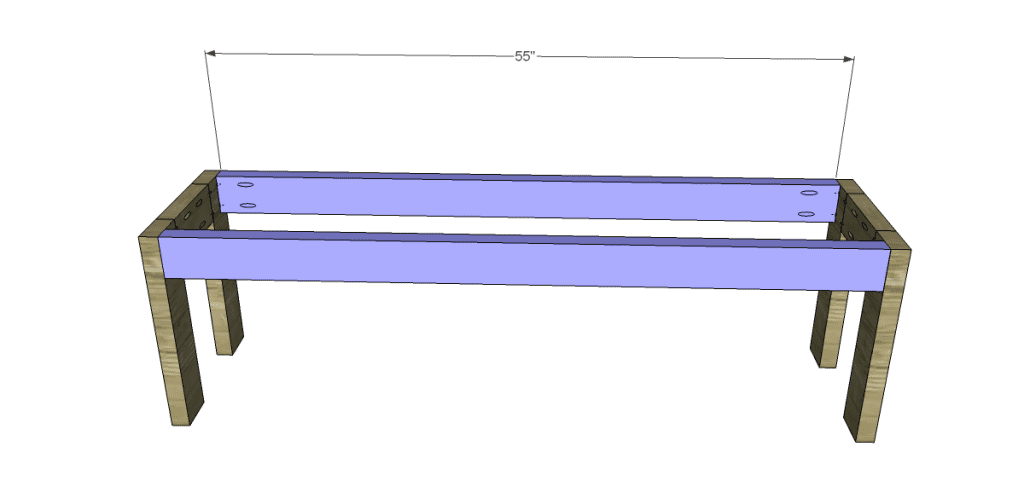
- 4 – 2×4 at 55″ – Bench aprons
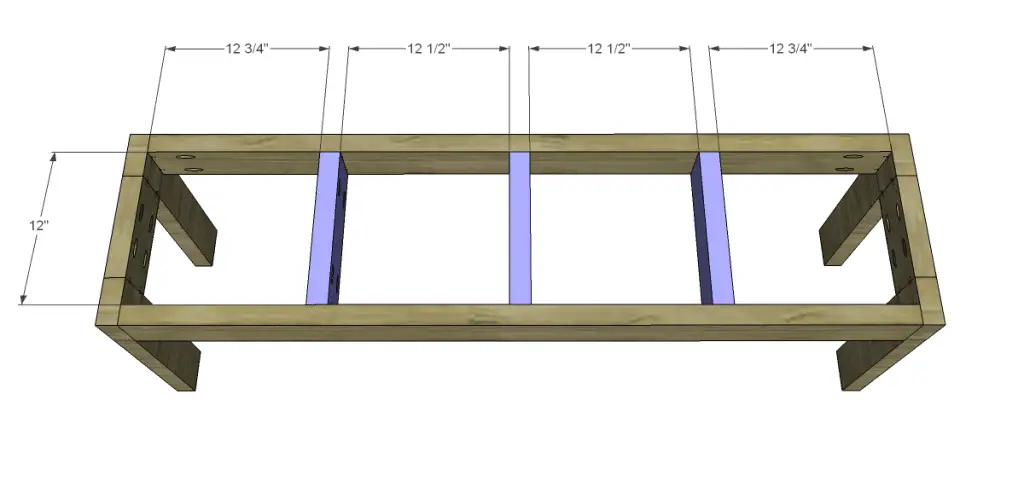
- 6 – 2×4 at 12″ – Bench Supports
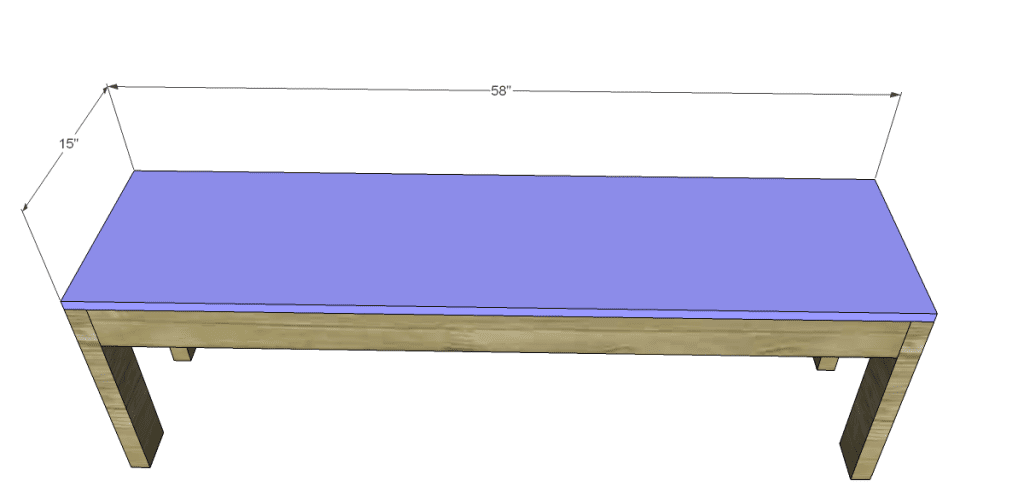
- 2 – 3/4″ plywood at 15″ x 58″ – Bench Top
Step One
Cut the pieces for the table side frames. Drill pocket holes in each end of the shorter pieces. Assemble using glue and 2-1/2″ pocket hole screws.
Step Two
Cut the pieces for the table aprons. Drill pocket holes in each end. Attach to the legs using glue and 2-1/2″ pocket hole screws.
Step Three
Cut the pieces for the top supports. Drill pocket holes in each end and position as shown. Attach using glue and 2-1/2″ pocket hole screws.
Step Four
Cut the piece for the table top. If using edge banding, apply it prior to attaching to the frame. Attach using glue and 1-1/4″ brad nails through the top into the side frames, aprons, and supports.
Step Five
Cut the pieces for the bench side frames. Drill pocket holes in each end of the shorter pieces. Assemble using glue and 2-1/2″ pocket hole screws.
Step Six
Cut the pieces for the bench aprons. Drill pocket holes in each end. Attach to the legs using glue and 2-1/2″ pocket hole screws.
Step Seven
Cut the pieces for the bench supports. Drill pocket holes in each end and position as shown. Attach using glue and 2-1/2″ pocket hole screws.
Step Eight
Cut the piece for the bench top. If using edge banding, apply it prior to attaching to the frame. Attach using glue and 1-1/4″ brad nails through the top into the side frames, aprons, and supports.
Finish as desired!
Have any questions about the West Elm inspired Boerum dining table and benches? Leave a comment below!