
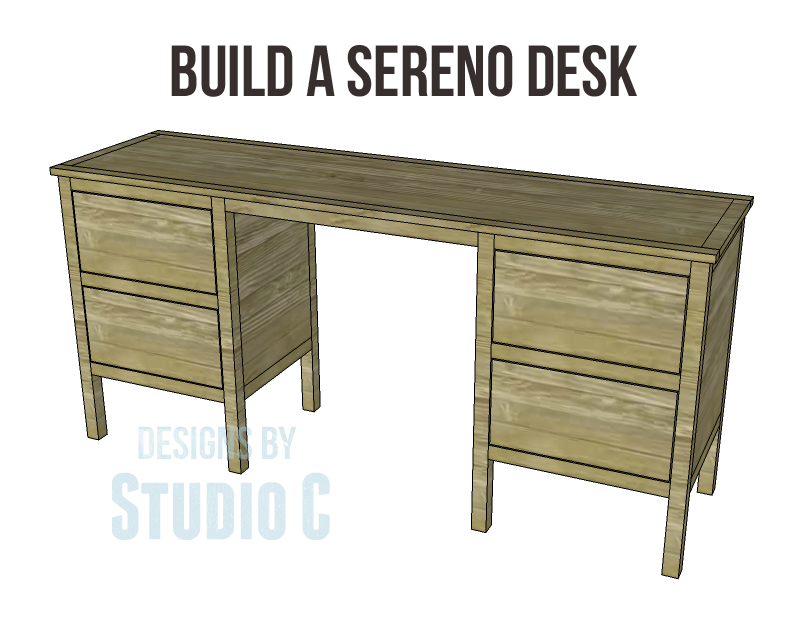
Build a One Kings Lane Sereno Desk
An Easy to Build Desk with Drawers on Each Side
This is a great desk with lots of storage! The free plans to build a One Kings Lane Sereno desk are perfect for a home office or craft studio, it can be finished in a way that is truly your own!
Materials:
- 1-1/4″ pocket hole screws
- 2-1/2″ pocket hole screws
- 1-1/4″ screws
- 1-1/4″ brad nails
- Edge banding
- 4 sets of 14″ drawer slides
- 4 cabinet pulls
- Finishing supplies
Lumber:
- 3 – 1×2 at 8′
- 6 – 2×2 at 8′
- 2 sheets of 3/4″ plywood
Cut List:
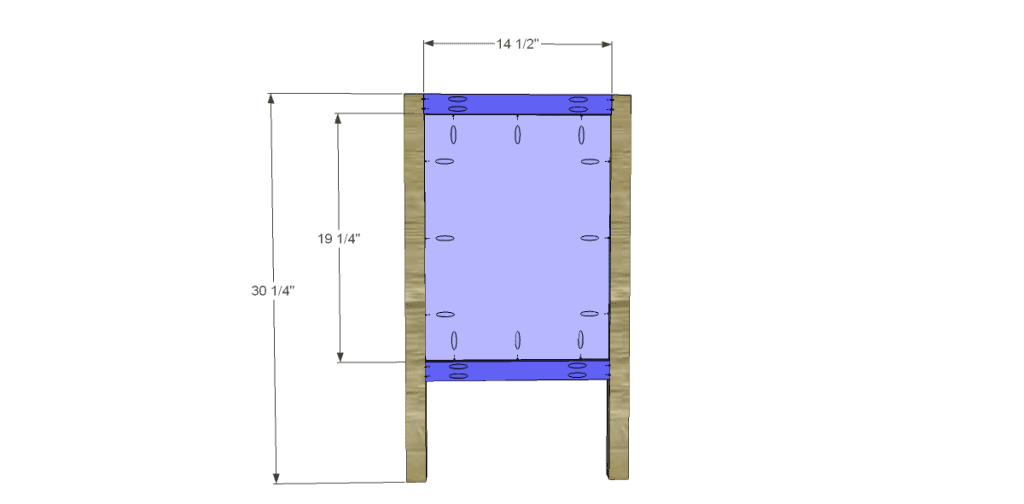
- 8 – 2×2 at 30-1/4″ – Legs
- 8 – 2×2 at 14-1/2″ – Side Frames
- 4 – 3/4″ plywood at 14-1/2″ x 19-1/4″- Side Panels
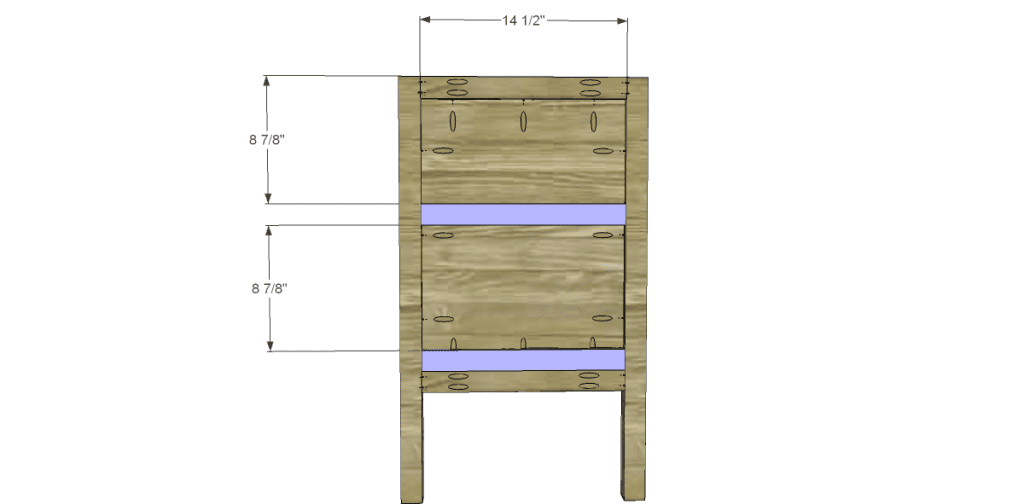
- 8 – 1×2 at 14-1/2″ – Spacers
- 4 – 2×2 at 17″ – Back Frame
- 2 – 3/4″ plywood at 17″ x 19-1/4″ – Back Panels
- 6 – 2×2 at 17″ – Front Stretchers
- 2 – 2×2 at 26″ – Stretchers
- 1 – 3/4″ plywood at 15-1/2″ x 64″ – Top
- 2 – 1×2 at 15-1/2″ – Top Frame
- 2 – 1×2 at 67″ – Top Frame
- 4 – 3/4″ plywood at 13-1/4″ x 14-1/2″ – Drawer Bottoms
- 8 – 3/4″ plywood at 7-5/8″ x 13-1/4″ – Drawer Sides
- 4 – 3/4″ plywood at 7-5/8″ x 16″ – Drawer Backs
- 4 – 3/4″ plywood at 8-5/8″ x 16-3/4″ – Drawer Fronts
Step One
Cut the pieces for the legs, side frames, and side panels. Drill pocket holes in each end of the frame pieces as well as all four edges of the panels. Attach the frame pieces to the panels using glue and 1-1/4″ pocket hole screws. The front face of the panels will be flush with the outside face of the frame pieces. Attach the sides to the legs using glue and 1-1/4″ pocket hole screws through the panel into the legs, and 2-1/2″ pocket hole screws through the frame pieces into the legs.
Step Two
Cut the pieces for the spacers and secure as shown using glue and countersunk 1-1/4″ screws.
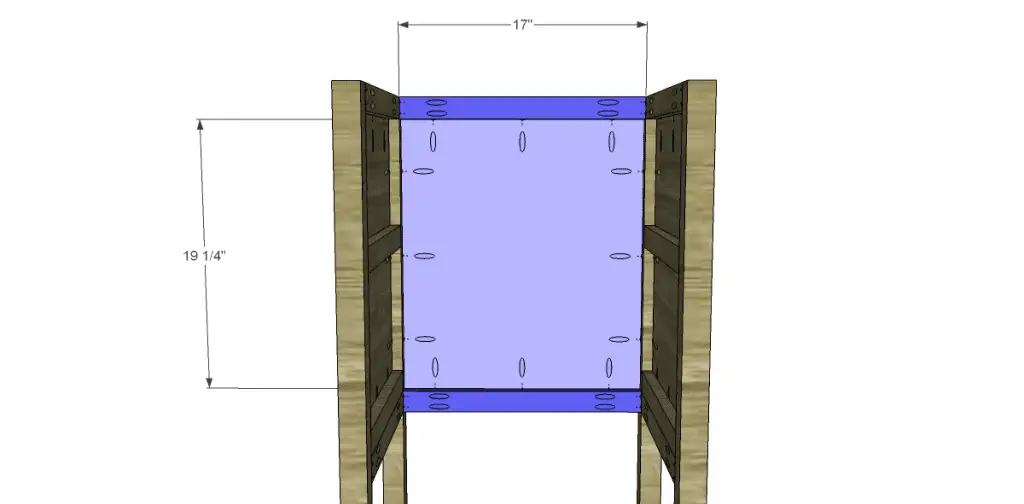
Step Three
Cut the pieces for the back frame pieces and panels. Drill pocket holes in each end of the frame pieces as well as all four edges of the panels. Attach the frame pieces to the panels using glue and 1-1/4″ pocket hole screws. The front face of the panels will be flush with the outside face of the frame pieces. Attach the backs to the legs using glue and 1-1/4″ pocket hole screws through the panel into the legs, and 2-1/2″ pocket hole screws through the frame pieces into the legs.
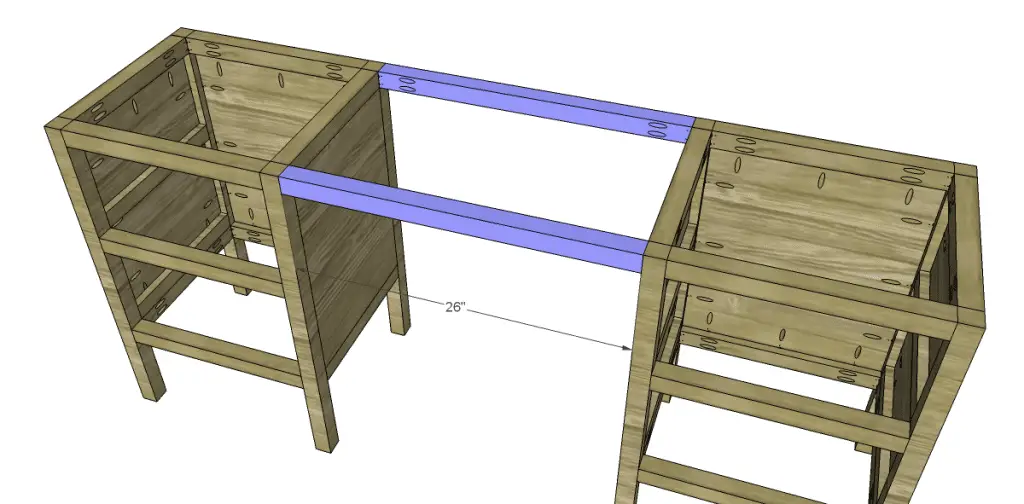
 Step Four
Cut the pieces for the stretchers and drill pocket holes in each end. Secure to the legs as shown using glue and 2-1/2″ pocket hole screws.

 Step Five
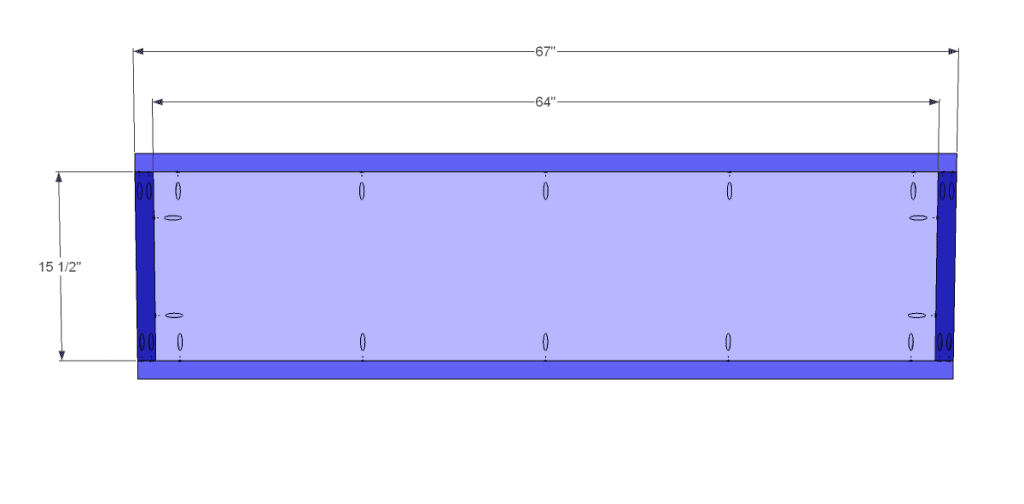
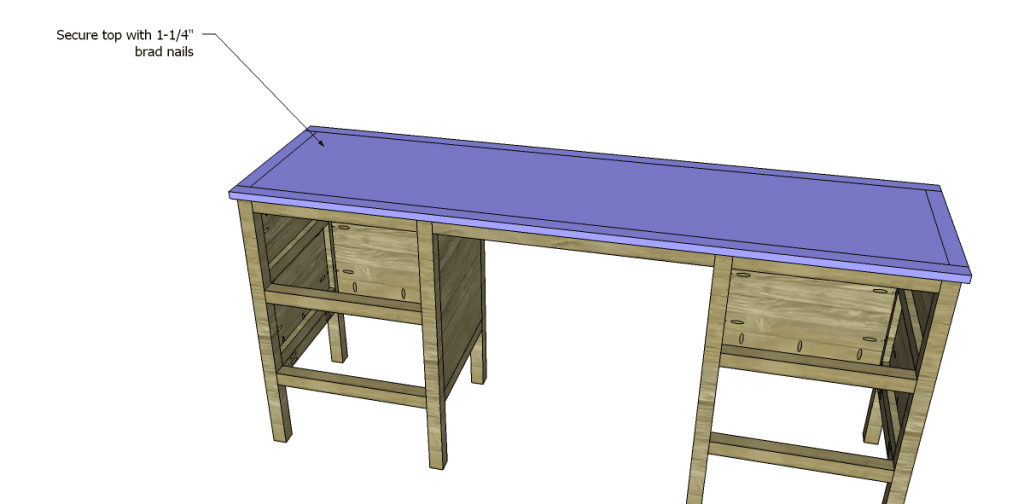
Cut the pieces for the top and drill pocket holes in all four edges of the plywood piece as well as each end of the shorter trim pieces. Attach the side trim pieces first, using glue and 1-1/4″ pocket hole screws, then attach the front and back trim pieces using glue and 1-1/4″ pocket hole screws. Position the top so that 1/2″ overlaps on all sides, then secure using glue and 1-1/4″ brad nails.
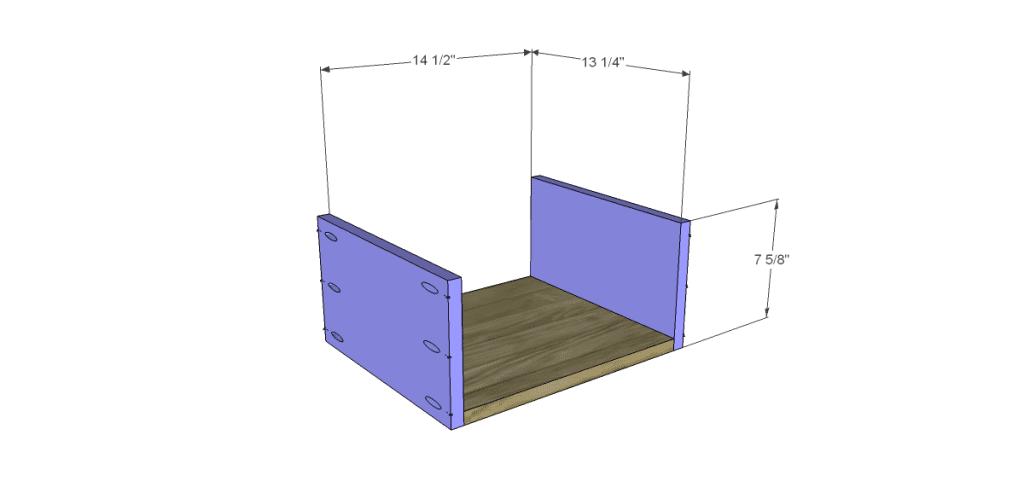
 Step Six
Cut the pieces for the drawers. Drill pocket holes in each end of the side pieces as well as all four edges of the bottom. Assemble as shown using glue and 1-1/4″ pocket hole screws. The fronts will overlap the drawer box by 3/8″ on each side.
Install the drawer slides according to the manufacturer’s instructions. Refer to this easy tutorial on installing drawer slides then make any necessary adjustments.

 Finish as desired!
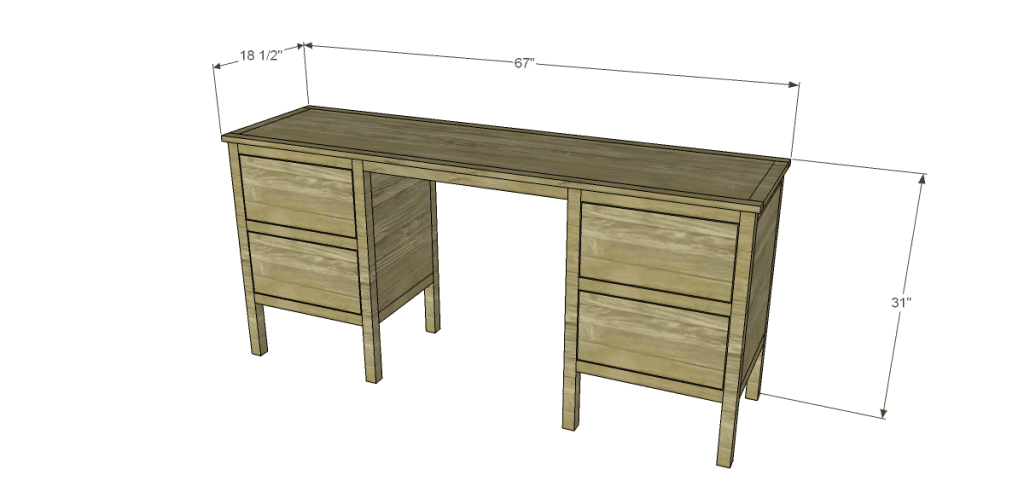
The plans to build a One Kings Lane Sereno desk are quite easy and will create stunning masterpiece, especially if finished in a dark stain with a wet-sanded finish – amazing! Of course, the desk can be finished however you like!
Originally posted 2013-05-15 08:00:25.
I just completed a desk using these plans and it came out perfect. I missed the instruction that said not to cut the pieces for the drawers until after the boxes were complete and luckily the drawers fit perfectly (great plans). I added a back panel to hide the many wires behind the desk. I also did not nail the top down so that it could be move more easily. I used a combination of pocket screws and brackets. I also added slide out panels to give temporary additional work surface. I extended the top several inches in the back to accommodate the electronics. I used walnut and walnut veneer plywood.
I bet it is absolutely beautiful, Scott! THANK YOU so much for using the plans – hope they were helpful!
[…] Desk free building plan.This desk features 4 drawers and a top measuring 67 inches in length, enough to spread out and get some serious work done. Build it with these free step-by-step woodworking plans. […]
[…] This desk features 4 drawers and a top measuring 67 inches in length, enough to spread out and get some serious work done. Build it with these free step-by-step woodworking plans. […]
I am building my first desk, I am using your plan as a reference but have done a few changes i am putting three drawers on one side , also a center draw and two file draws on the other . I am building mine a little larger 72×22. Instead of putting spacers in i inlaid the plywood so it is flush on the inside and will attach the drawer slides directly to it . Your plan called for pocket holes and 2-1/2″ pocket hole screws. I dont know how you did that and have it not come out through the side of the leg. Unless you have a long nosed pocket hole drill. I don’t use glue because of the wood needs room to move and if something happens to it you can’t get it apart. I am using Poplar for the frame work and drawers , 3/4 Maple 7ply plywood for the panels and the top. This is quite the project for me as i am 76 years young my FIRST desk build. Thank you
That is awesome, Harold! So glad you found the plans useful!