
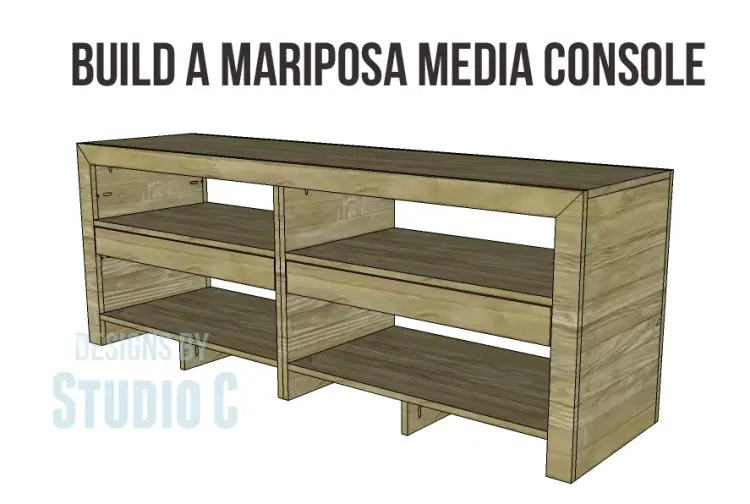
Free Plans to Build a Mariposa Media Console
An Easy to Build Media Console
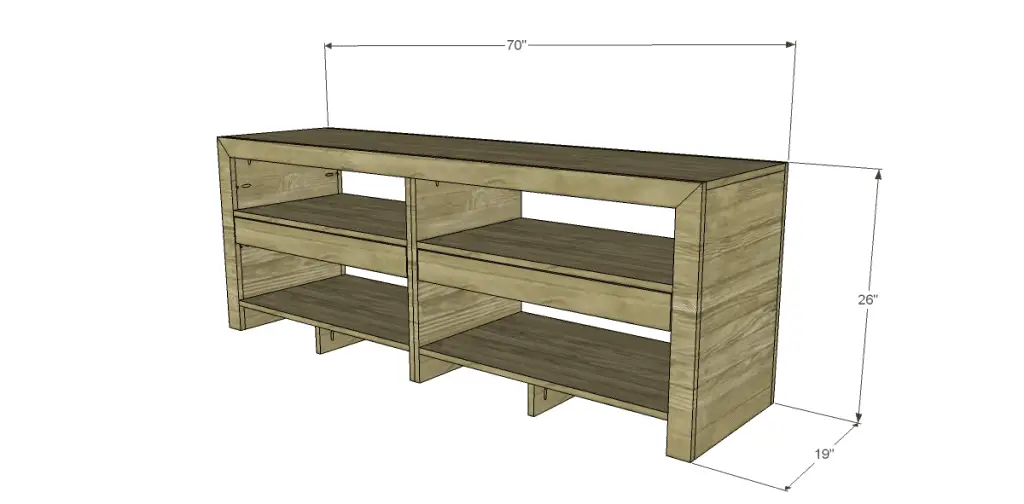
Here is a modern-looking media console complete with lots of shelf space and two large drawers! The free plans to build a Mariposa Media Console can be finished however you like and is sure to fit into any decor!
Materials:
- 1-1/4″ pocket hole screws
- 1-1/4″ brad nails
- Edge banding, optional
- 2 sets of 16″ drawer slides
- Finishing supplies
Lumber:
- 4 – 1×3 at 6′
- 1 – 1×3 at 4′
- 2 – 1×4 at 8′
- 2 sheets of 3/4″ plywood
Cut List:
- 4 – 1×3 at 26″ – Frames
- 2 – 1×3 at 70″ – Frames
- 2 – 3/4″plywood at 17-1/2″ x 25-1/4″ – Sides
- 5 – 1×3 at 17-1/2″ – Top Supports
- 1 – 3/4″ plywood at 17-1/2″ x 70″ – Top
- 2 – 3/4″ plywood at 19″ x 24-1/2″ – Center Divider
- 2 – 3/4″ plywood at 17-1/2″ x 24-1/2″ – Inner Sides
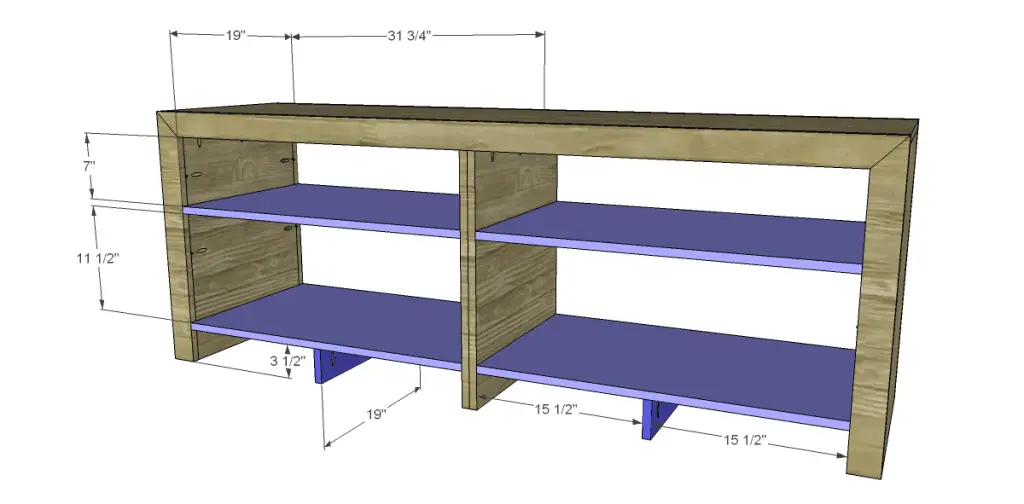
- 4 – 3/4″ plywood at 19″ x 31-3/4″ – Shelves
- 2 – 1×3 at 19″ – Bottom Supports
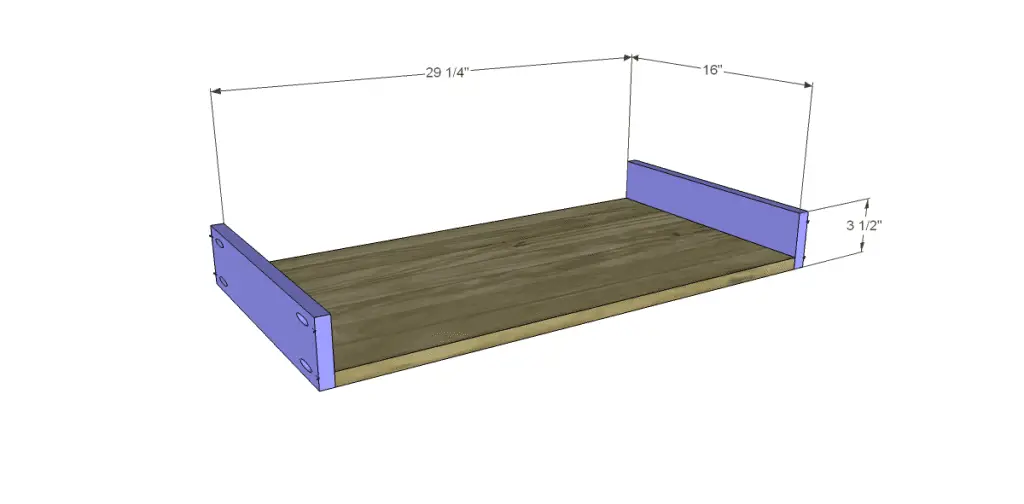
- 2 – 3/4″ plywood at 16″ x 29-1/4″ – Drawer Bottoms
- 4 – 1×4 at 16″ – Drawer Sides
- 2 – 1×4 at 30-3/4″ – Drawer Back
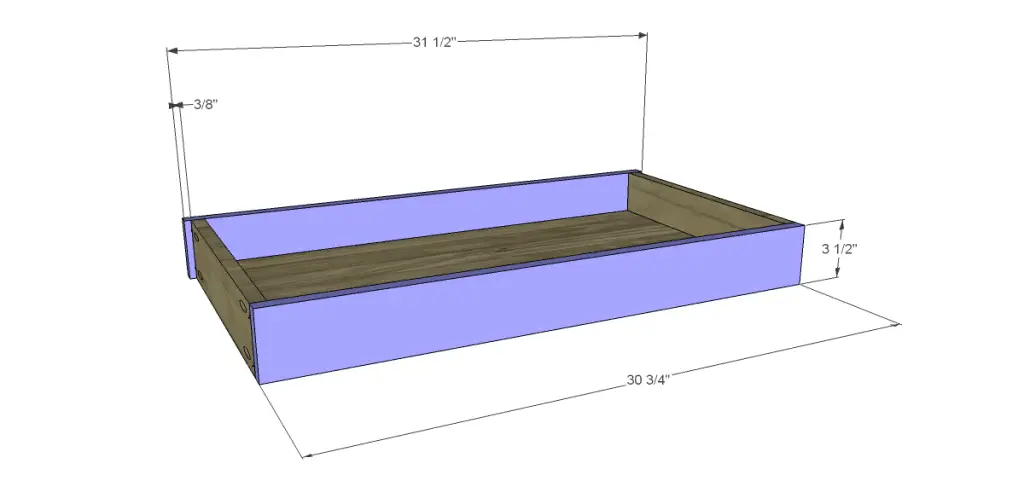
- 2 – 1×4 at 31-1/2″ – Drawer Front
Click on the drawings for a larger view!
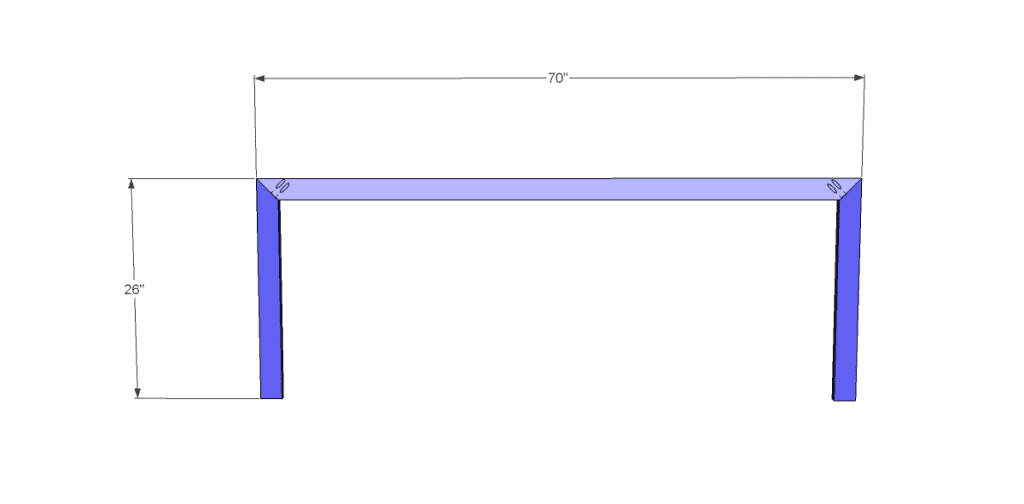
Step One
If using edge banding, it will be applied to the exposed edges of the plywood before assembly.
Cut the pieces for the frames. Cut the miters at 45 degrees and drill pocket holes in each end of the longer pieces. Assemble the frames using glue and 1-1/4″ pocket hole screws.
Step Two
Cut the pieces for the sides and drill pocket holes as shown. Attach to the frames with the outer face flush with the outer edge of the frames using glue and 1-1/4″ pocket hole screws.

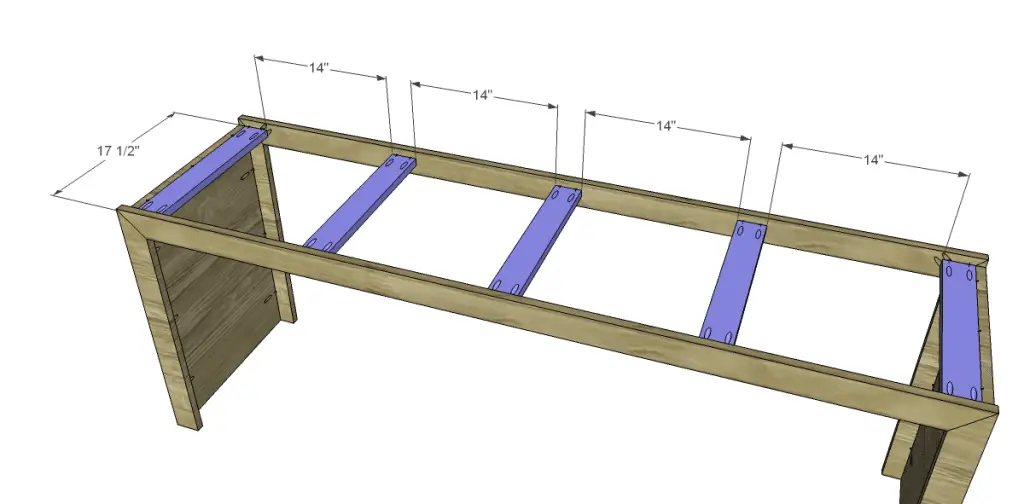
Step Three
Cut the pieces for the top supports and drill pocket holes in each end. Secure to the frame as shown with the bottom face flush with the bottom edge of the frame using glue and 1-1/4″ pocket hole screws.
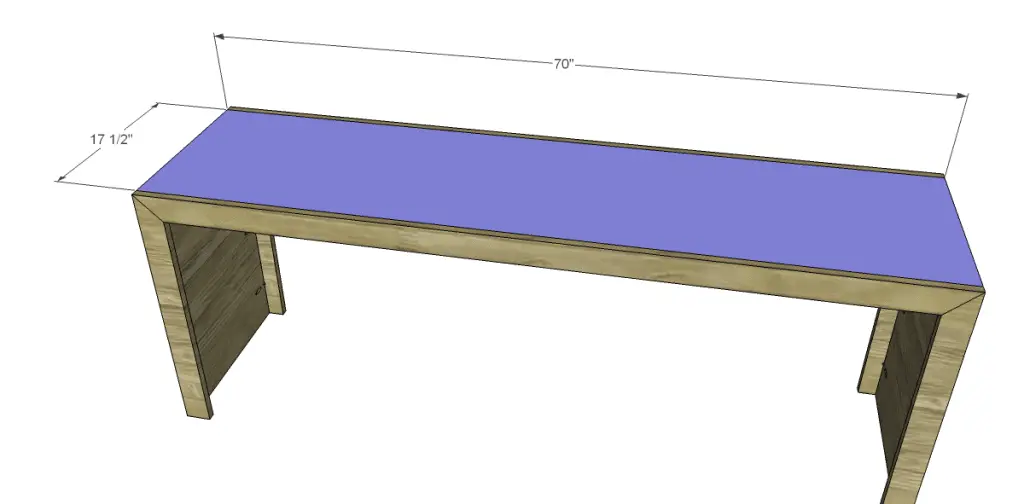
Step Four
Cut the piece for the top. Secure to the sides and top supports using glue and 1-1/4″ brad nails. The top will be flush with the top edge of the frames.
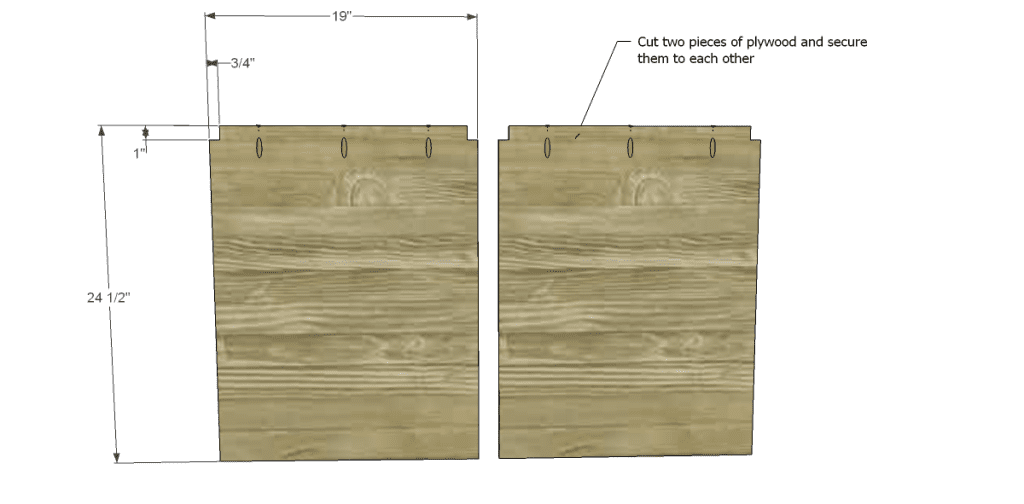
Step Five
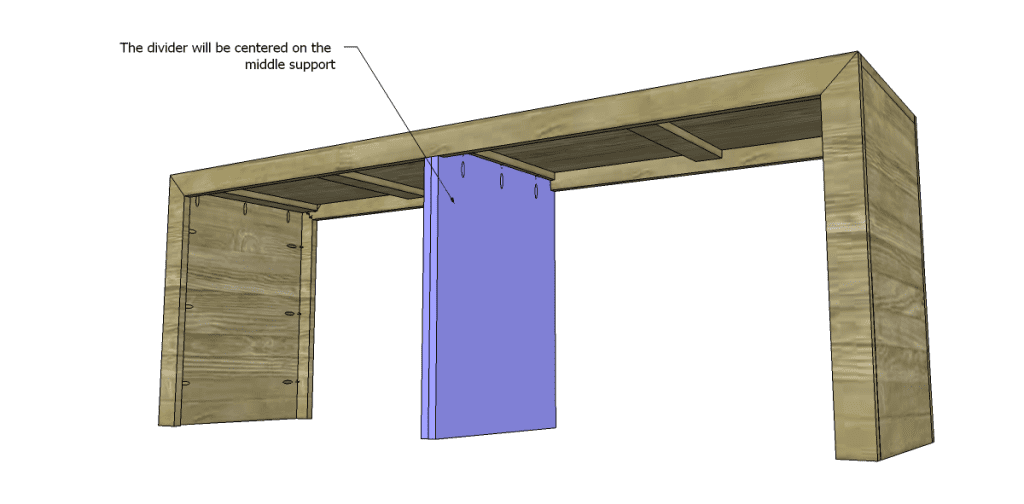
Cut the pieces for the dividers and cut the notches in the top using a jigsaw or bandsaw. Drill pocket holes in the top edge of each piece. Spread glue on one face of one piece (the face without pocket holes) and position the other piece on top of it (with the pocket holes facing out). Wiggle the piece to create suction, then secure using 1-1/4″ brad nails. Attach to the underside of the center top support using glue and 1-1/4″ pocket hole screws in each side.
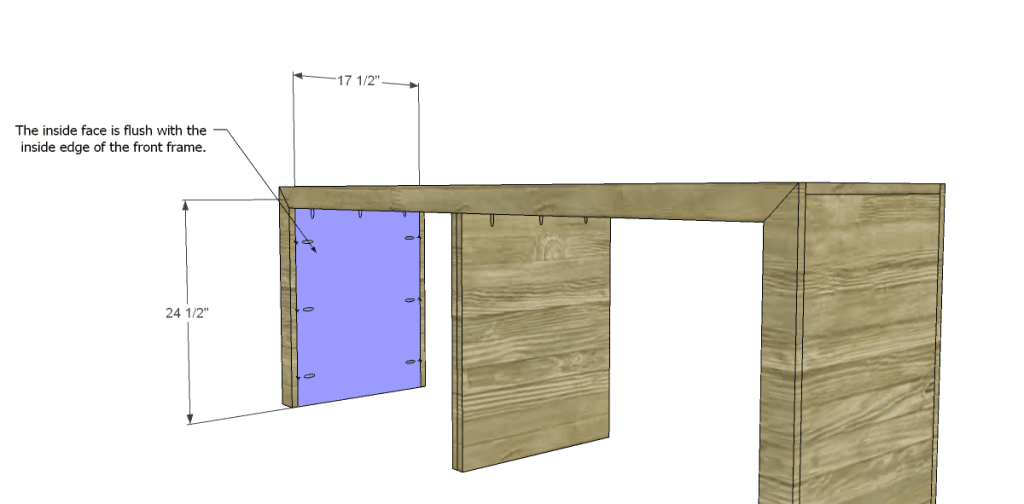
 Step Six
Cut the pieces for the inner sides and drill pocket holes as shown. Position the pieces so that the inside face is flush with the inside face of the frame. Secure using glue and 1-1/4″ pocket hole screws.
 Step Seven
Cut the pieces for the shelves and the bottom supports. Drill pocket holes in each end of the shelves, as well as one long edge of each support piece. Position the shelves and supports as shown then secure using glue and 1-1/4″ pocket hole screws.
 Step Eight
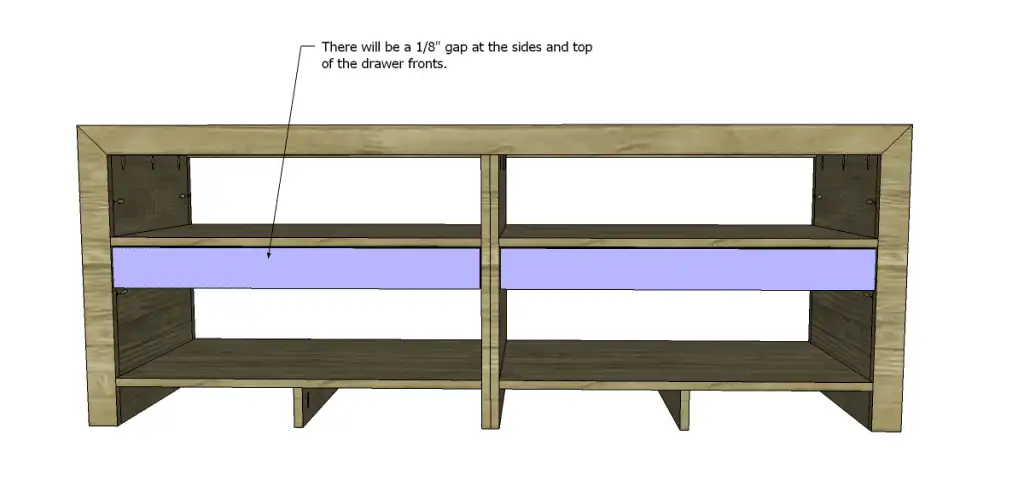
Cut the pieces for the drawers. Drill pocket holes in each end of the side pieces as well as all four edges of the bottom. Assemble as shown using glue and 1-1/4″ pocket hole screws. The fronts will overlap the drawer box by 3/8″ on each side.
Install the drawer slides according to the manufacturer’s instructions. The cabinet side hardware will be located 3-1/2″ below the upper shelf. Take a look at this easy tutorial on installing drawer slides. Make any necessary adjustments.
Finish as desired!
The free plans to build a Mariposa Media Console would be perfect as a first project plus it can be finished in a variety of ways – painted, stained, distressed, the possibilities are endless! Got a project you’ve completed using my plans? Share photos with me at cher {at} designsbystudioc {dot} com or designsbystudioc {at} gmail {dot} com. I would love to feature your work on DbSC!
Originally posted 2013-07-03 08:00:40.