
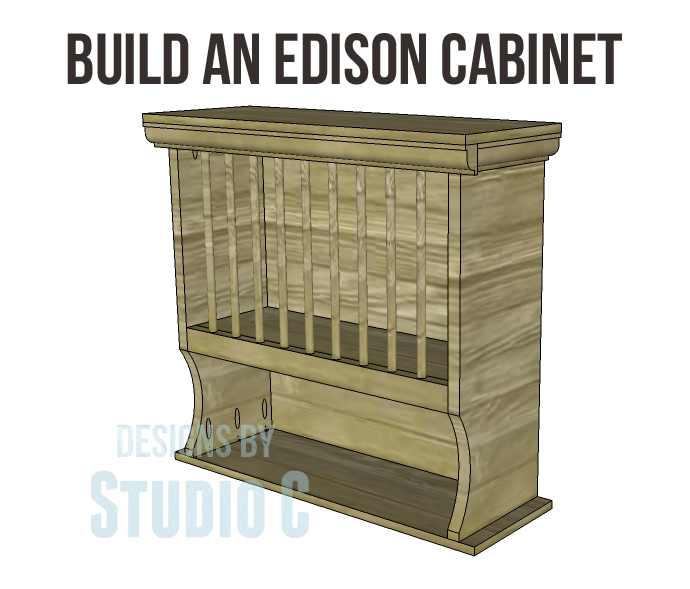
Free Plans to Build a Joss & Main Inspired Edison Cabinet
DIY Plans to Organize Plates or Craft Supplies
I swear, if I had the wall space, I would build this plate rack cabinet DIY to display my plates and bowls! I love it – it is such an easy and quick build, plus it can be stained or painted to match any decor! The easy to build Edison cabinet is the perfect way to display dinnerware in a farmhouse-style cabinet! The cabinet features trim at the top and vertical dowels to separate plates or serving trays, plus a shelf below for bowls or other pieces. This plate rack cabinet is a wall mount design, and is secured through the back into the wall studs.

Materials:
- 1-1/4″ pocket hole screws (<– affiliate link)
- 1-1/4″ brad nails
- Edge banding for plywood (<– affiliate link)
- Finishing supplies
Lumber:
- One half sheet of 3/4″ plywood
- 1 – 1×2 at 4′
- 5 – 3/8″ dowels at 3′
- Trim for the sides and front (under the top)
Cut List:
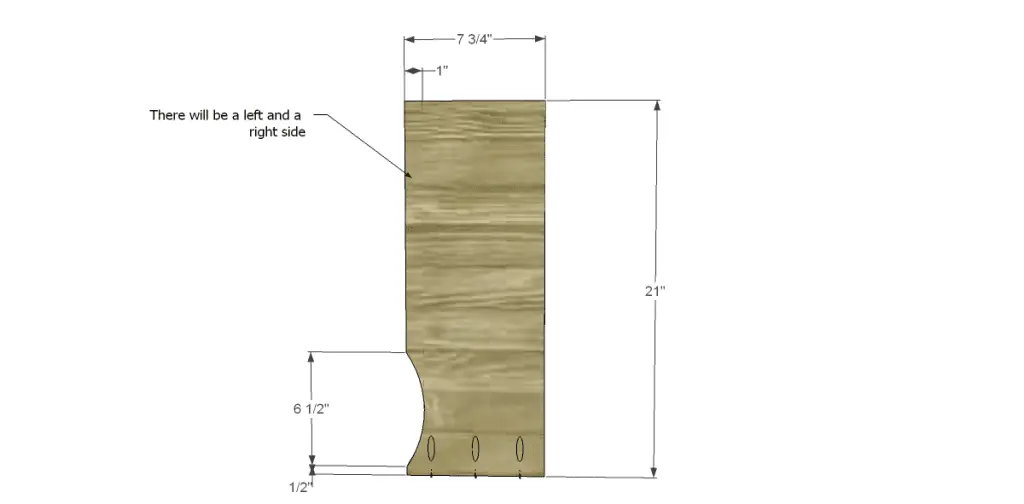
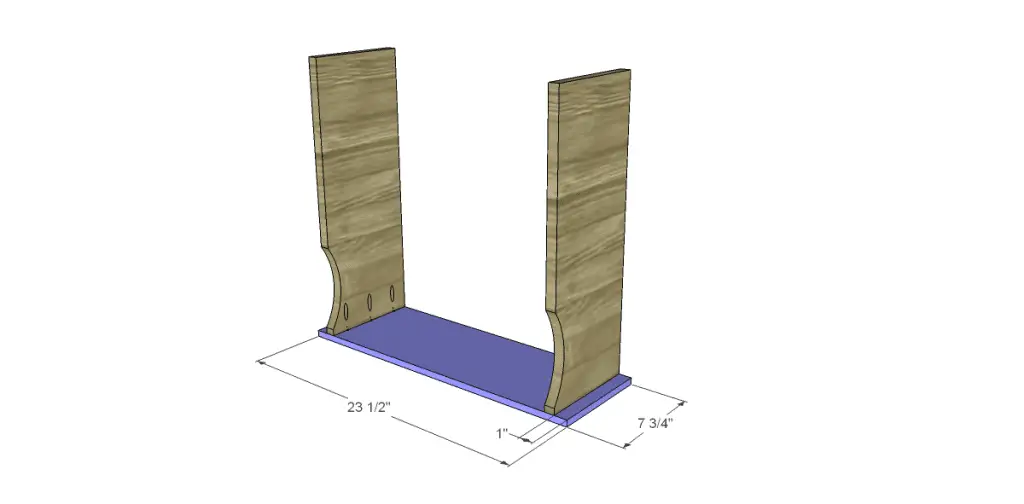
- 2 – 3/4″ plywood at 7-3/4″ x 21″ – Sides
- 1 – 3/4″ plywood at 7-3/4″ x 23-1/2″ – Bottom
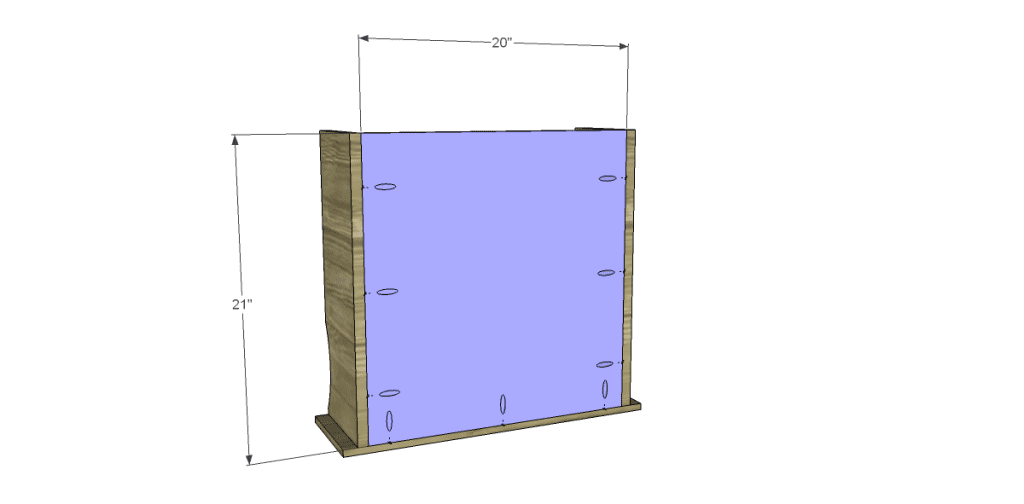
- 1 – 3/4″ plywood at 20″ x 21″ – Back
- 1 – 3/4″ plywood at 6-1/4″ x 20″ – Shelf
- 2 – 1×2 at 20″ – Front
- 9 – 3/8″ dowels at 12-1/2″ – Front Spindles
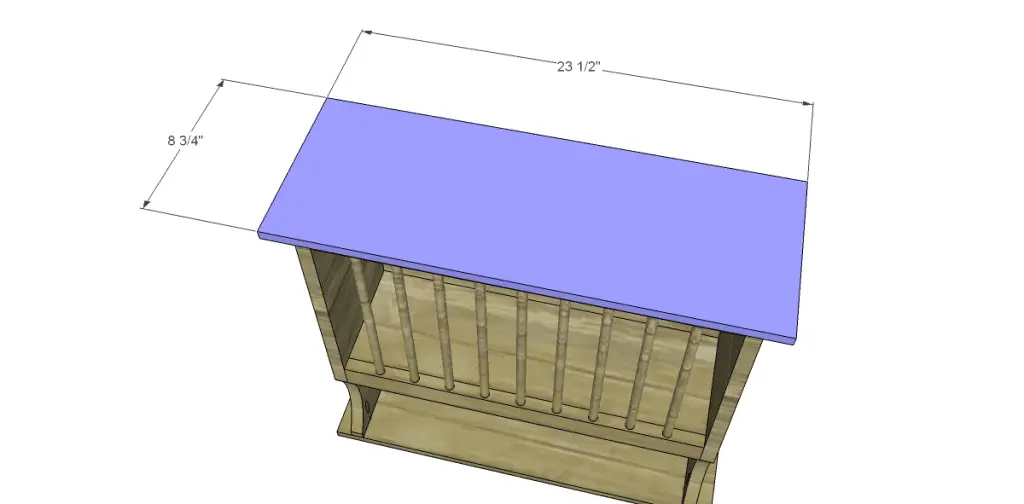
- 1 – 3/4″ plywood at 8-3/4″ x 23-1/2″ – Top
- Trim for sides and front (cut to fit)
Step One
Cut the pieces for the side. Cut the decorative arc as shown using a jigsaw or band saw. Drill pocket holes in in the bottom of each piece – there will be a left and a right!
Cut the piece for the bottom. Position the sides on the bottom as shown (located 1″ in from each end) and secure using glue and 1-1/4″ pocket hole screws.
Step Two
Cut the piece for the back and drill pocket holes in three edges as shown. Secure to the sides and the bottom using glue and 1-1/4″ pocket hole screws.
Step Three
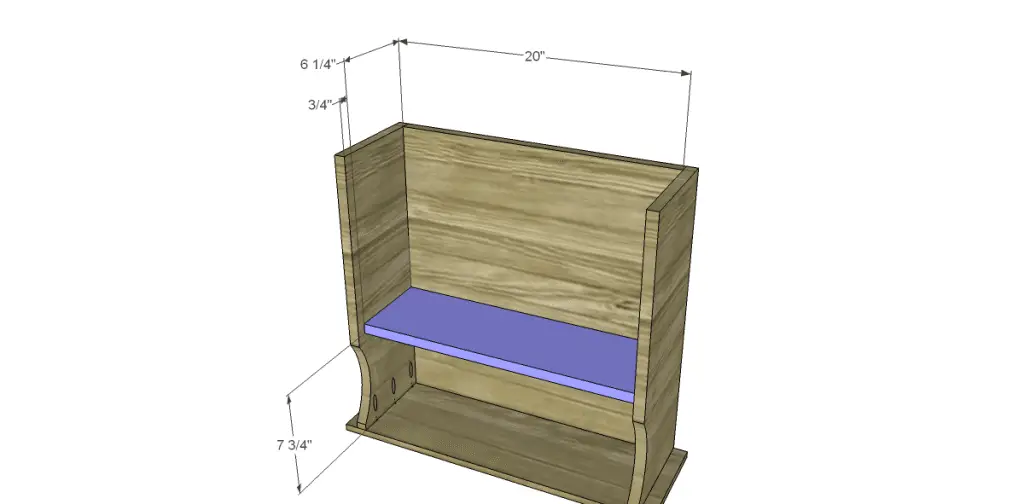
Cut the piece for the shelf and drill pocket holes in three edges. Position as shown (3/4″ back from the front edge of the sides) then secure using glue and 1-1/4″ pocket hole screws.
Step Four
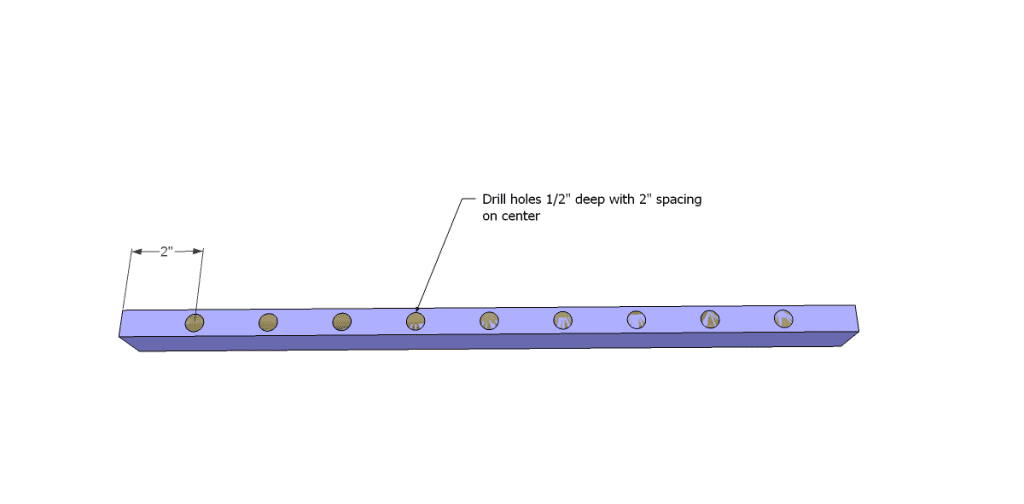
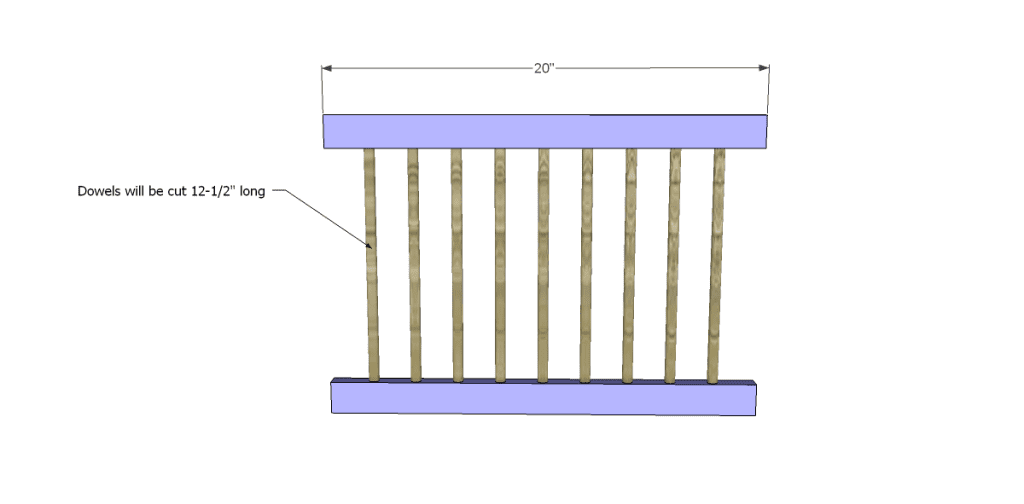
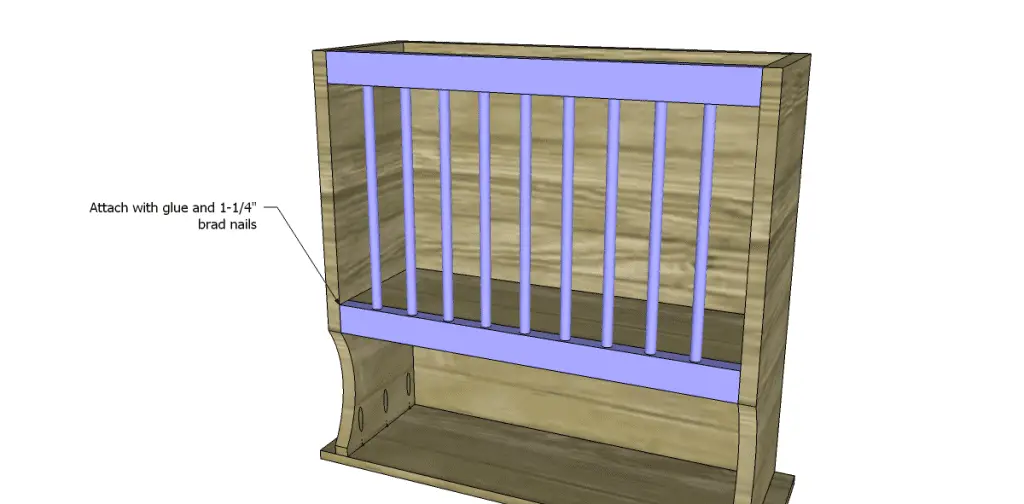
Cut the pieces for the front spindles. Mark and drill nine 3/8″ diameter holes at 1/2″ deep spaced 2″ on center along one edge of each board. Cut nine dowels at 12-1/2″. Fit the dowels into the holes, then secure the spindle and front pieces to the front of the cabinet using glue and 1-1/4″ brad nails . The top of the lower front piece (where the holes are drilled) will be flush with the shelf.
Step Five
Cut the piece for the top. The front and sides will overlap by 1″. Secure using glue and 1-1/4″ brad nails through the top into the sides and back.
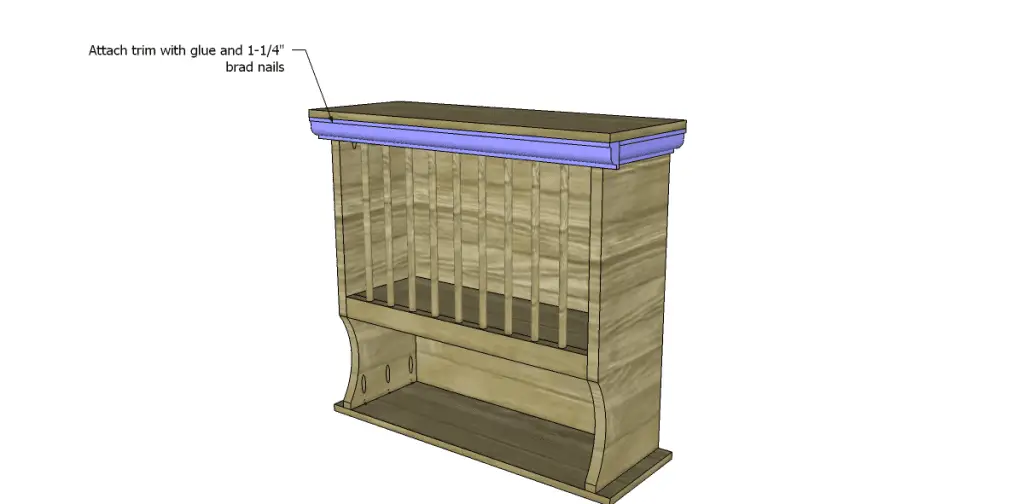
Measure and cut the side pieces for the trim. Secure using glue and 1-1/4″ brad nails, then cut and secure the front trim.
To hang on the wall, locate the studs in the wall and secure the cabinet with screws through the back into the studs.
Have questions about the free plans to build a Joss & Main Inspired Edison Cabinet? Leave a comment below!
Originally posted 2013-03-26 08:00:44.