
Free Plans to Build a Farmhouse Cabinet
An Easy and Inexpensive Piece to Build
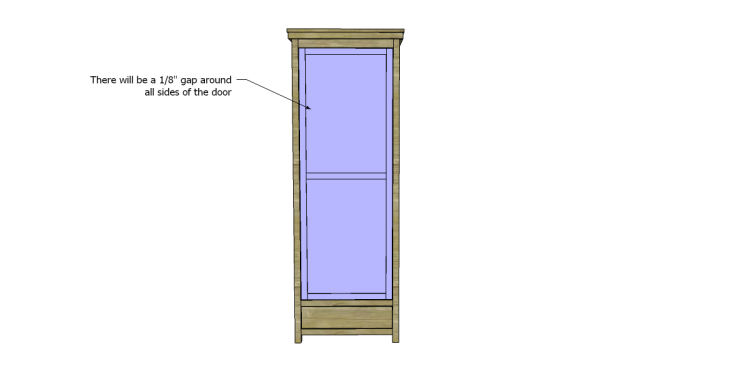
Hey there! This cabinet is seriously amazing and can fit in any room. The Farmhouse cabinet plans include a drawer at the bottom and three shelves that are perfect for storing all sorts of things like food or craft supplies. You can use it as a standalone piece or put two together to make an armoire (just leave out the side trim where they join and adjust the top width). It’s so versatile!
Materials:
- 1-1/4″ pocket hole screws
- 2-1/2″ pocket hole screws (<– affiliate link!)
- 1-1/4″ screws
- 1-1/4″ brad nails
- Edge banding for plywood edges
- 1 set of 14″ drawer slides
- Cabinet pulls
- Finishing supplies
Lumber:
Materials listed are to build one cabinet
- 4 – 1×2 at 8′
- 5 – 2×2 at 8′
- 1 – 2×4 at 8′
- Half sheet of 1/2″ plywood
- Half sheet of 3/4″ plywood
- Full sheet of 3/4″ plywood
Cut List:
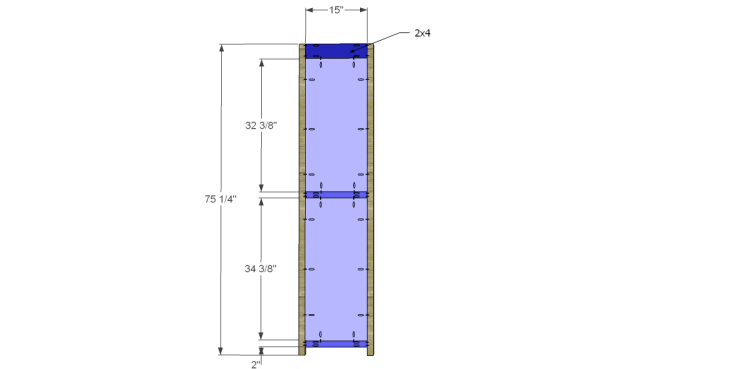
- 4 – 2×2 at 75-1/4″ – Legs
- 2 – 2×4 at 15″ – Side Frames
- 4 – 2×2 at 15″ – Side Frames
- 2 – 3/4″ plywood at 15″ x 32-3/8″ – Upper Side Panels
- 2 – 3/4″ plywood at 15″ x 34-3/8″ – Lower Side Panels
- 2- 2×4 at 22-1/2″ – Back Frame & Front Stretchers
- 4 – 2×2 at 22-1/2″ – Back Frame & Front Stretchers
- 1 – 3/4″ plywood at 22-1/2″ x 32-3/8″ – Upper Back Panel
- 1 – 3/4″ plywood at 22-1/2″ x 34-3/8″ – Lower Back Panel
- 1 – 3/4″ plywood at 15″ x 22-1/2″ – Bottom Shelf
- 4 – 1×2 at 15″ – Shelf Frame Sides
- 2 – 1×2 at 21″ – Shelf Frame Backs
- 2 – 1×2 at 22-1/2″ – Shelf Frame Fronts
- 2 – 3/4″ plywood at 15-3/4″ x 22-1/2″ – Shelves
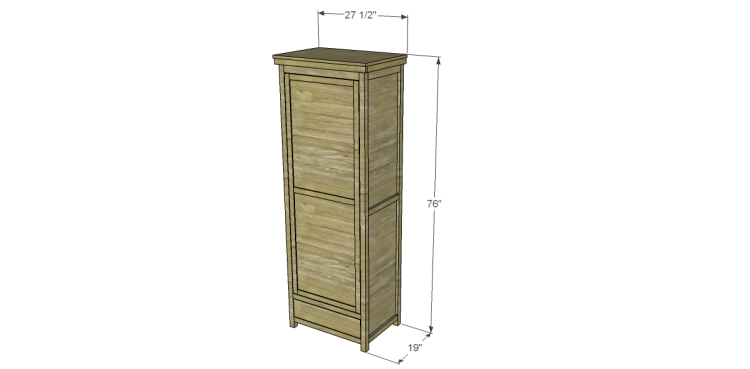
- 1 – 3/4″ plywood at 19″ x 27-1/2″ – Top
- 2 – 1×2 at 18″ – Top Side Trim
- 1 – 1×2 at 27″ – Top Front Trim
- 1 – 3/4″ plywood at 13-1/4″ x 20″ – Drawer Bottom
- 2 – 3/4″ plywood at 5-1/2″ x 13-1/4″ – Drawer Sides
- 1 – 3/4″ plywood at 21-1/2″ – Drawer Back
- 1 – 3/4″ plywood at 22-1/4″ – Drawer Front
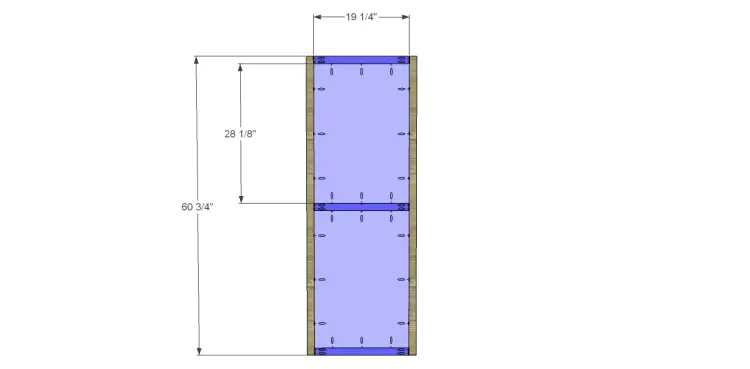
- 3 – 1×2 at 19-1/4″ – Door Frame
- 2 – 1×2 at 60-3/4″ – Door Frame
- 2 – 1/2″ plywood at 19-1/4″ x 28-1/8″ – Door Panels
Click on the drawings for a larger view!
Step One
Cut the pieces for the legs, side frames, and side panels. Drill pocket holes in each end of the frame pieces as well as all four edges of the panels. Attach the frame pieces to the panels using glue and 1-1/4″ pocket hole screws. The back face of the panels will be flush with the back face of the frame pieces. Attach the legs to the side assembly using glue and 2-1/2″ pocket hole screws through the 2x material, and 1-1/4″ pocket hole screws through the 1x material.
Step Two
Cut the pieces for the back frames and back panels. Drill pocket holes in each end of the frame pieces as well as all four edges of the panels. Attach the frame pieces to the panels using glue and 1-1/4″ pocket hole screws. The back face of the panels will be flush with the back face of the frame pieces. Attach back assembly to the legs using glue and 2-1/2″ pocket hole screws through the 2x material, and 1-1/4″ pocket hole screws through the 1x material. 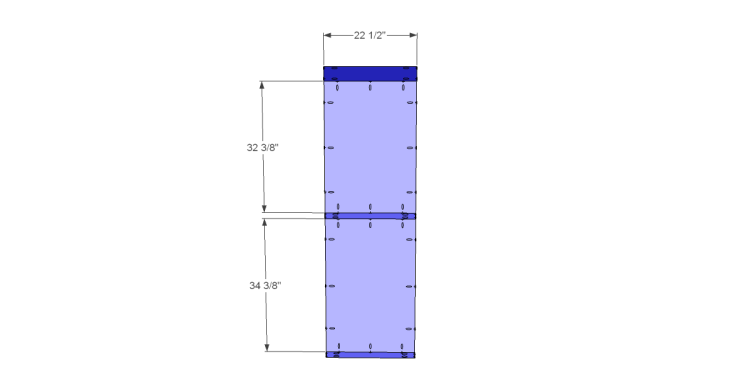
Step Three
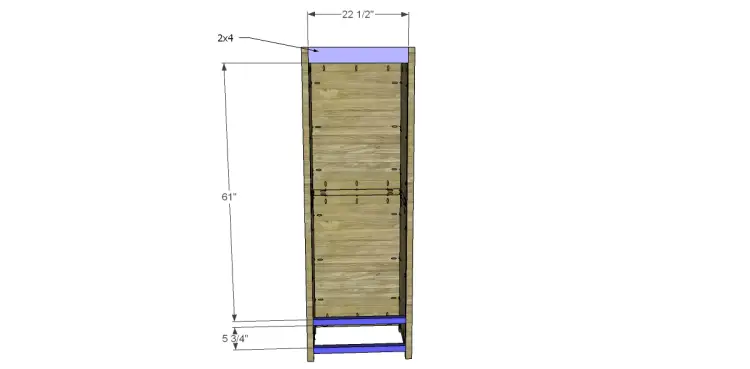
Cut the pieces for the front stretchers and drill pocket holes in each end. Attach as shown using glue and 2-1/2″ pocket hole screws.
Step Four
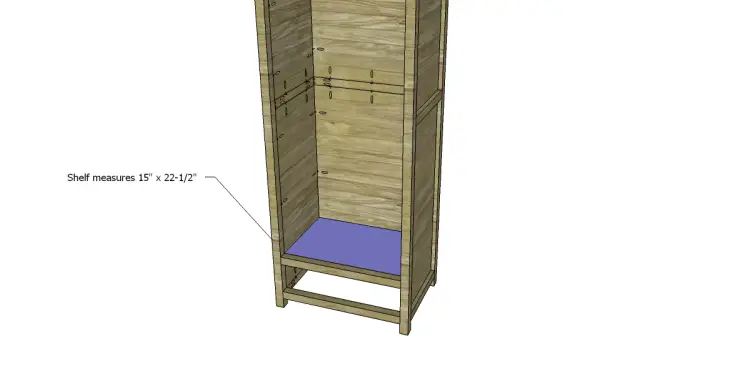
Cut the piece for the bottom shelf and drill pocket holes in all four edges. Attach as shown using glue and 1-1/4″ pocket hole screws. The top of the shelf will be flush with the top face of the upper 2×2 stretcher.
Step Five
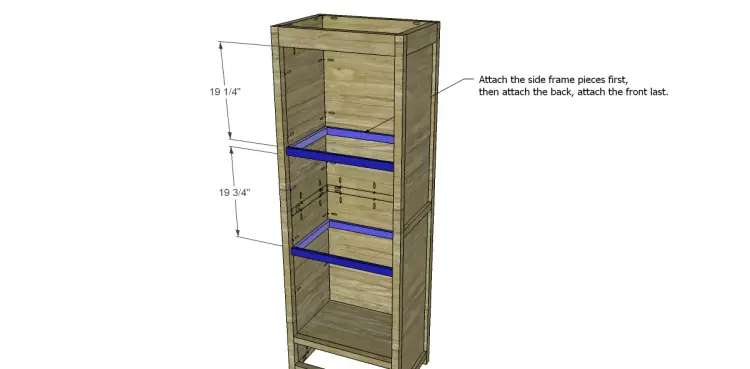
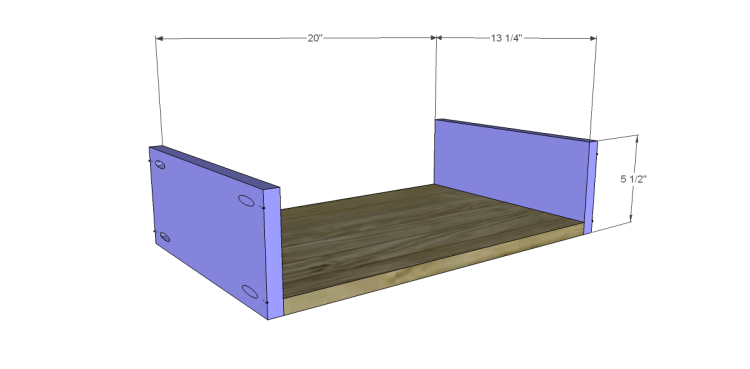
Cut the pieces for the shelf frames. Attach the sides first using glue and countersunk 1-1/4″ screws. Attach the back piece locating it between the side pieces and secure with glue and countersunk 1-1/4″ screws, then attach the front piece with countersunk screws through the front ends into the edges of the side pieces.
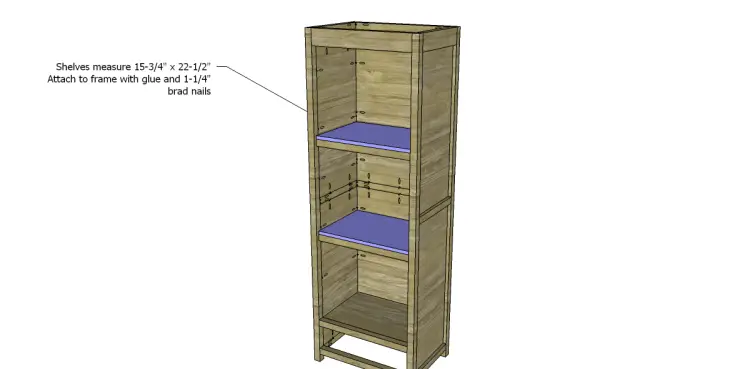
Cut the pieces for the shelves and secure them to the frames using glue and 1-1/4″ brad nails.
Step Six
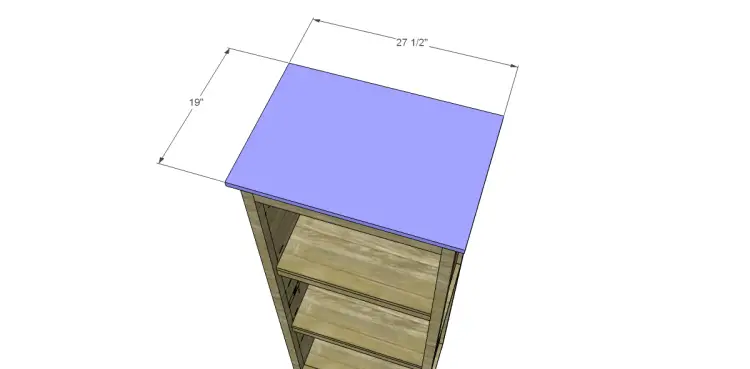
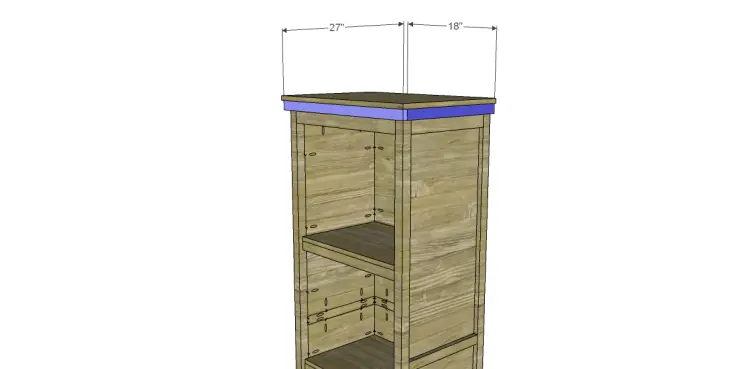
Cut the pieces for the top. The sides and front will overlap by 1″ while the back remains flush. Secure using glue and 1-1/4″ brad nails.
Cut the pieces for the trim. Attach the side pieces first using glue and 1-1/4″ brad nails, then attach the front in the same manner.
Step Seven
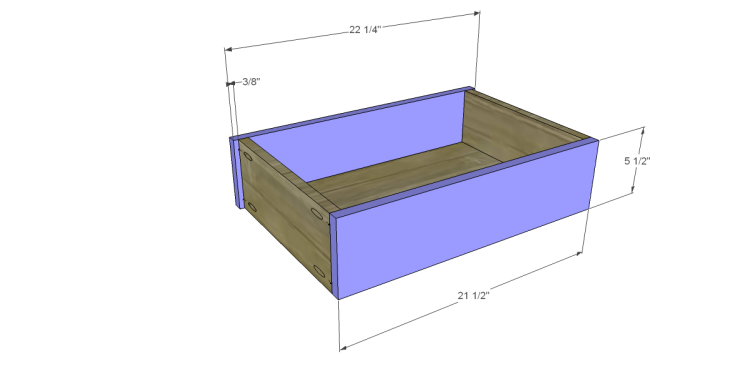
Cut the pieces for the drawers. Drill pocket holes in each end of the side pieces as well as all four edges of the bottom. Assemble as shown using glue and 1-1/4″ pocket hole screws. The fronts will overlap the drawer box by 3/8″ on each side.
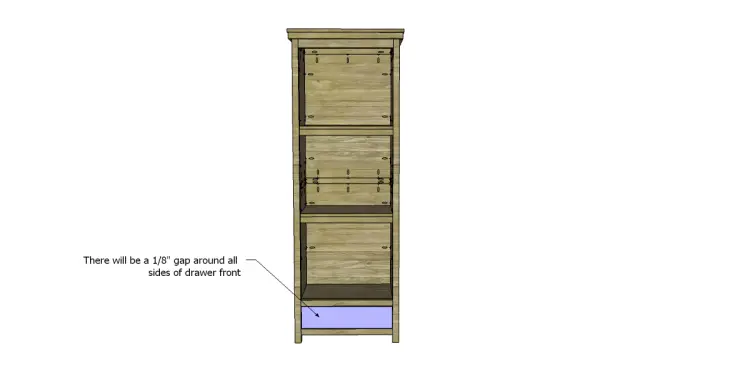
Install the drawer slides according to the manufacturer’s instructions. See my tutorial on how to install drawer slides. Make any necessary adjustments.
Step Eight
Cut the pieces for the door frame and panels. Drill pocket holes in each end of the frame pieces as well as all four edges of the panels. Attach the frame pieces to the panels using glue and 1″ pocket hole screws. The back face of the panels will be flush with the back face of the frame pieces. Attach door assembly to the frame sides using glue and 1-1/4″ pocket hole screws through the 1x material, and 1″ pocket hole screws through the 1/2″ material. Install the hinges according to the manufacturer’s instructions and make any necessary adjustments.
Finish as desired.
Have questions about the plans to build a Farmhouse cabinet? Leave a comment below!
Originally posted 2013-04-01 08:00:41.