
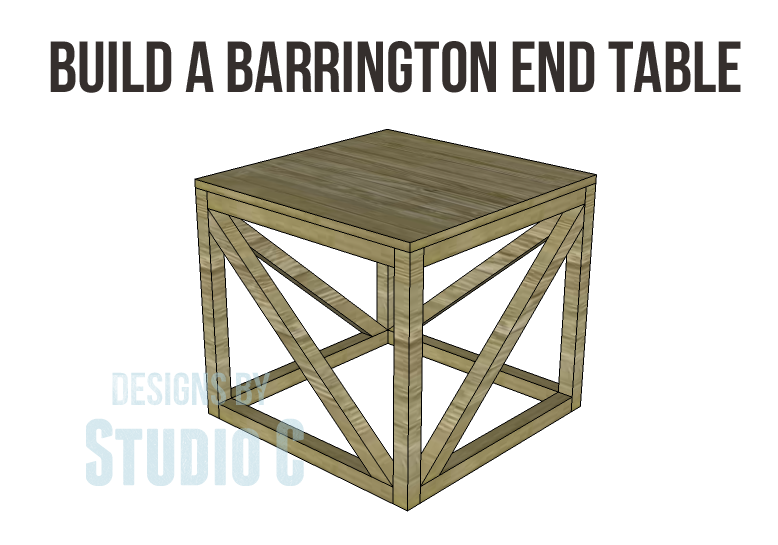
Build a Barrington End Table
An Easy to Build End Table
Need an end table that is easy to construct yet ultra-stylish? The free furniture plans to build a Barrington End Table are for you! The table features a roomy top with an angled brace piece at each end that is so popular right now. The plans can be assembled in two ways – using a pocket hole jig and pocket hole screws or by using countersunk screws. Either way, these plans are sure to please!
Materials:
- 1-1/4″ pocket hole screws OR
- 2-1/2″ screws
- 1-1/4″ brad nails
- Edge banding, optional (<– affiliate link!)
- Wood glue
- Sandpaper (100, 150, 220 grits)
- Finishing supplies (primer & paint, or stain, sealer)
Lumber:
- 4 – 2×2 at 8′ (or 2 – 2×4 at 8′ cut in half)
- 1 – 2′ x 2′ piece of 3/4″ plywood
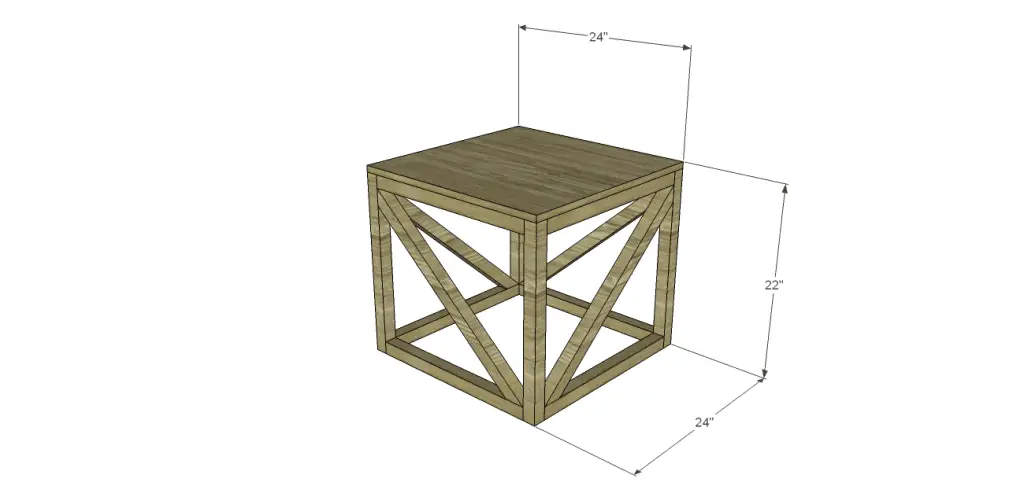
Cut List:
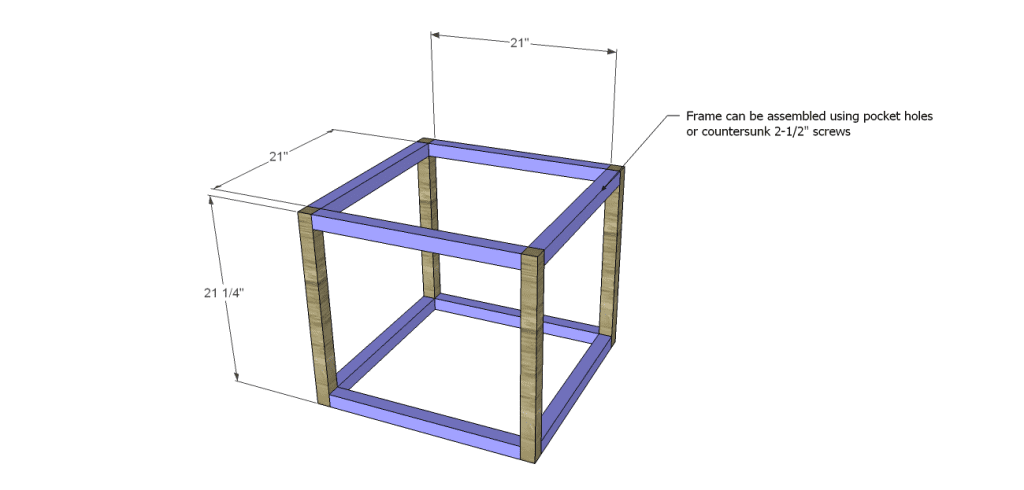
- 4 – 2×2 at 21-1/4″ – Legs
- 8 – 2×2 at 21″ – Frame
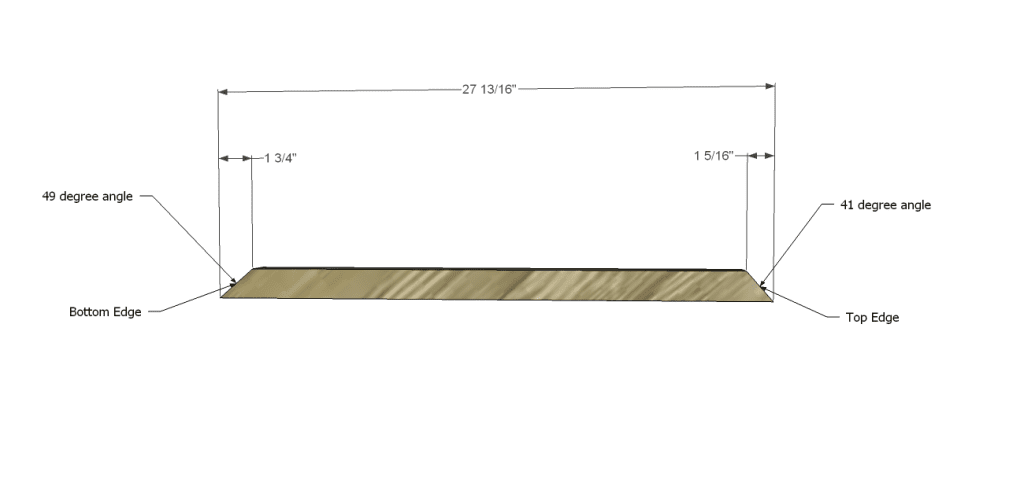
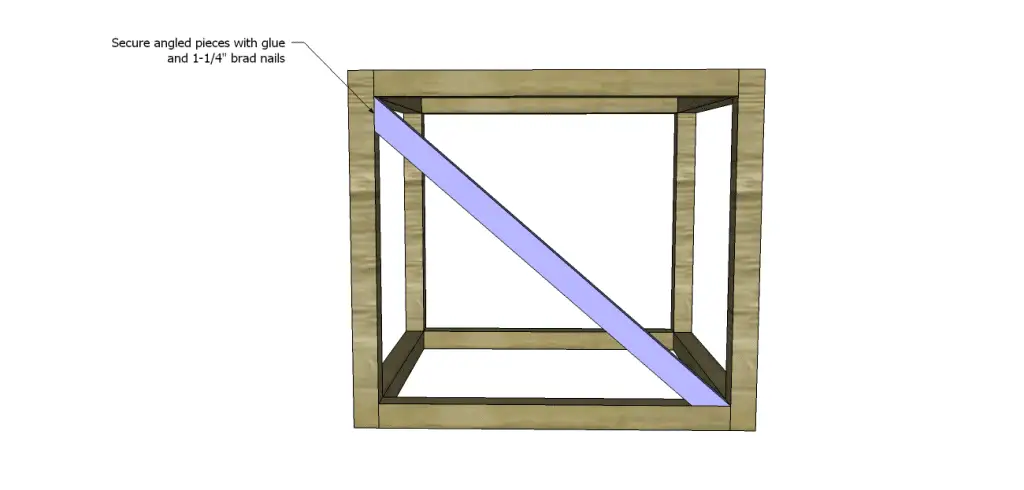
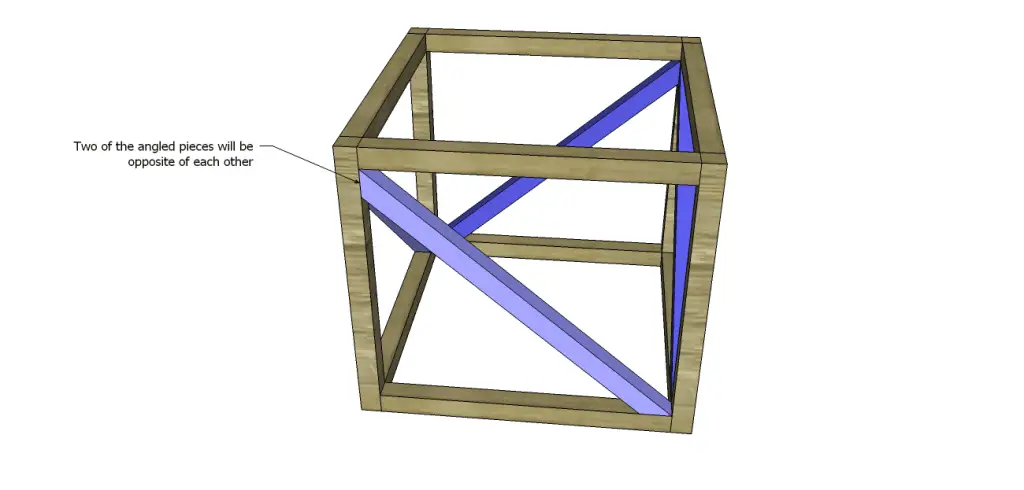
- 4 – 2×2 at 27-13/16″ – Angled Pieces
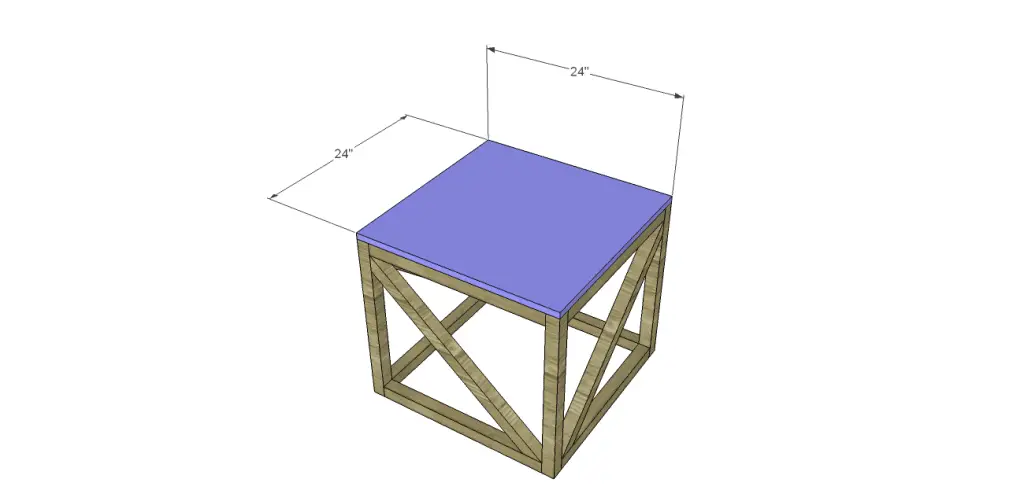
- 1 – 3/4″ plywood at 24″ x 24″ – Top
Notes About the Project:
Edge banding will be applied to the exposed edges of the plywood prior to assembly.
Step One
Cut the pieces for the legs and frame pieces. If using pocket holes to join the pieces, set the pocket hole jig for 1-1/2″ material and drill pocket holes in each end of the frame pieces. Orient the pieces so that the pocket holes face down (and won’t have to be filled) then secure using glue and 2-1/2″ pocket hole screws.
If using the countersunk screw method, assemble the frame using countersunk 2-1/2″ screws through the legs into the frame pieces. Stagger the screws so they don’t conflict with each other.
Step Two
Cut the angled pieces. I have given the degree of each angle as well as the measurement. The longer angle will be positioned on the bottom frame piece, and the pieces will be positioned so they are opposite each other – see the drawings. Secure the pieces using glue and 1-1/4″ brad nails through the angle into the leg or frame piece.
Step Three
Cut the piece for the top. Spread glue on the top of the upper frame pieces and top of the legs then secure the top using 1-1/4″ brad nails.
Finish as desired!
This table would be perfect constructed out of cedar or treated wood for the outdoors… Wouldn’t a couple of these tables look great on a porch or patio? Need help with the free furniture plans to build a Barrington End Table? Contact me at cher {at} designsbystudioc {dot} com!
Originally posted 2014-01-13 08:00:03.
Love the design!
Thank you, Linda! I love the design as well!
I love the look of this table!
Thanks so much, Jessica!
Where do you get these ideas from Cher Seems you have so many different styles, all equally lovely.
Thank you so much, Elle! Sometimes I see an actual piece of furniture I like and figure out how to build it!
These could be SO different depending on the wood you used.
Absolutely! I may be adding this to the “build-just-because” list!
[…] & Deals: West Elm | Austin Interior Design by Room Fu Knockout Interiors. Free furniture plans build barrington end table. Need an end table that is easy to construct yet […]