
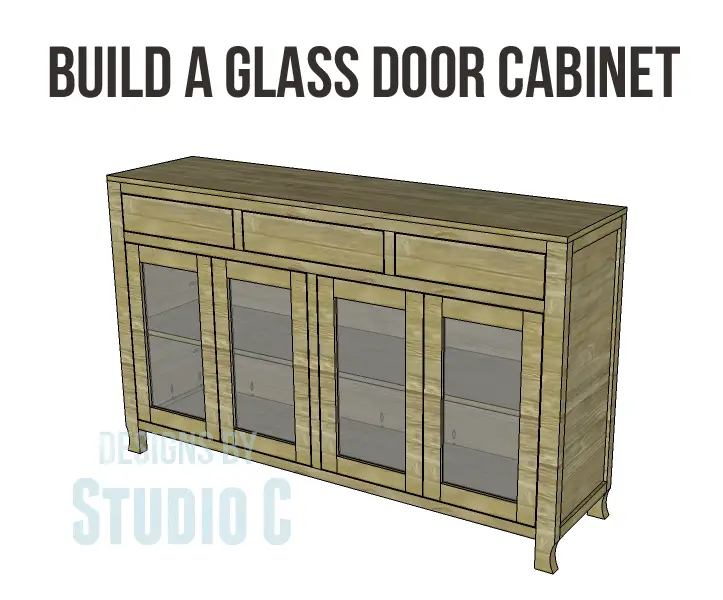
Build a Glass Door Cabinet
Craft Your Own Stylish Glass Door Cabinet
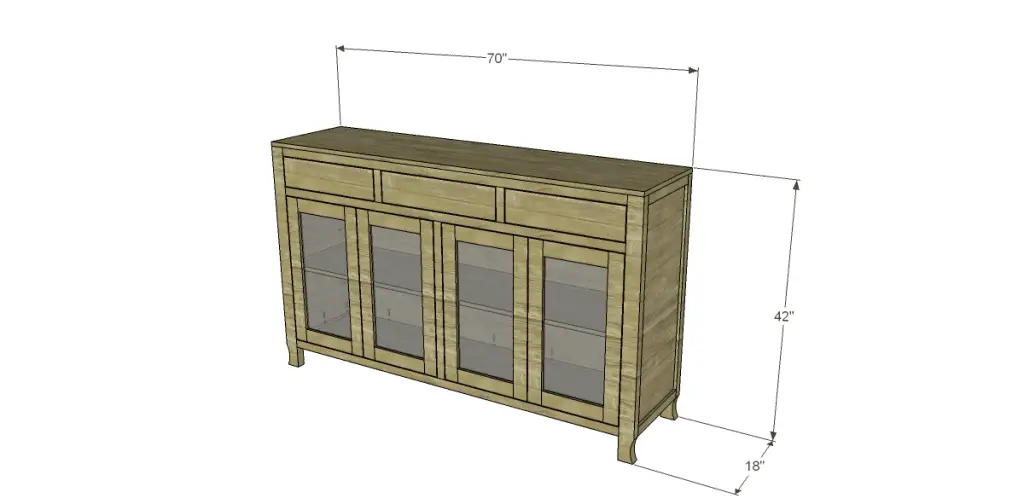
Hey there! I’m excited to share some awesome DIY woodworking plans with you today! You can use these plans to build a beautiful Glass Door Cabinet that has three drawers and a big shelf with four doors. The best part is that you can customize the doors with any material you like – glass, 1/4″ plywood, mirrors, punched aluminum, and more! So get ready to unleash your creativity and build a stunning cabinet that’s perfect for your home.
Materials:
- 1-1/4″ pocket hole screws
- 2″ pocket hole screws
- 2-1/2″ pocket hole screws
- 2-1/2″ screws
- 1-1/4″ brad nails
- Edge banding, if desired (<– affiliate link!)
- 3 sets of 14″ drawer slides (<– affiliate link!)
- 4 sets of hinges
- 7 cabinet pulls
- Glass or other material for the doors
- Mirror clips (to hold material for door in place) (<– affiliate link!)
- Finishing supplies
Lumber:
- 1 – 1×2 at 6′
- 4 – 1×3 at 8′
- 5 – 2×2 at 8′
- 2 – 2×3 at 8′
- 2 sheets of 3/4″ plywood (PureBond plywood would be perfect!!)
Cut List:
- 4 – 2×3 at 41-1/4″ – Legs
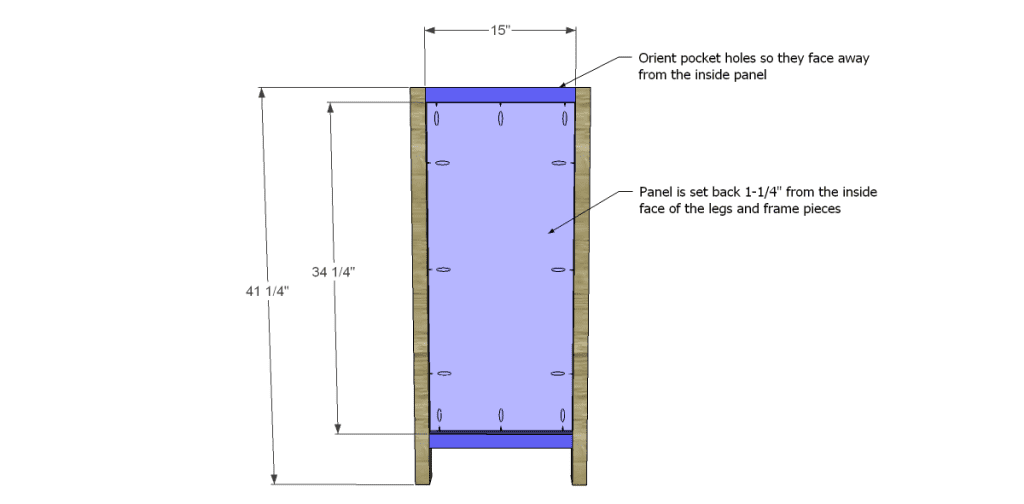
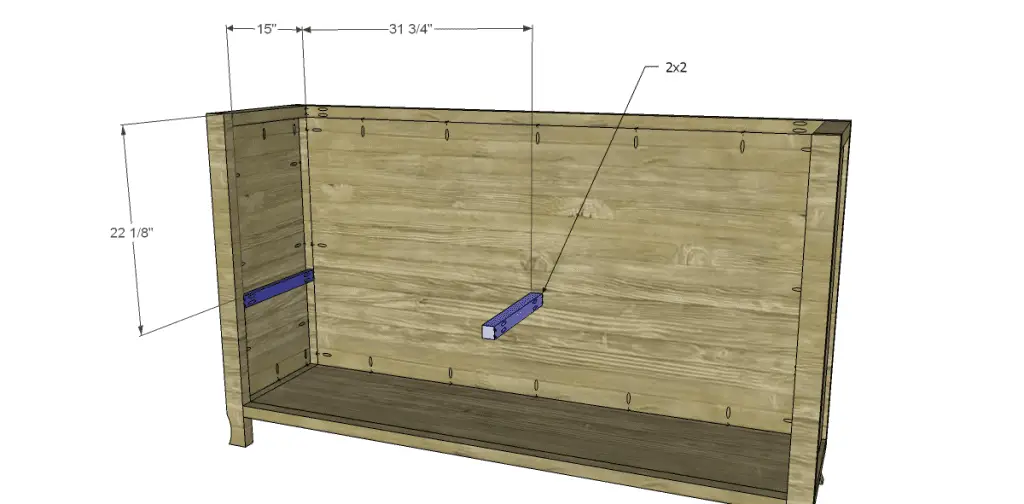
- 5 – 2×2 at 15″ – Side Frames & Center Shelf Support
- 2 – 3/4″ plywood at 15″ x 34-1/4″ – Side Panels
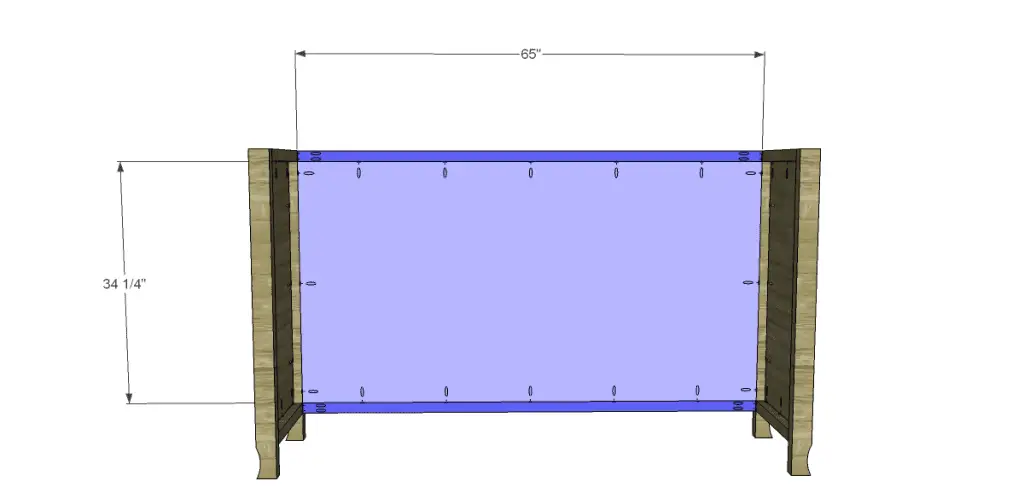
- 5 – 2×2 at 65″ – Back & Bottom Frame, Front Stretchers
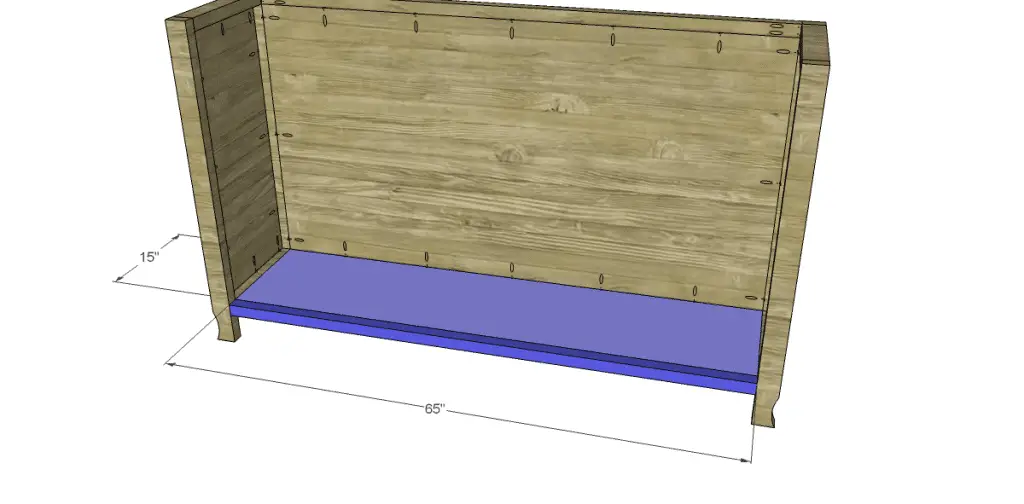
- 1 – 3/4″ plywood at 34-1/4″ x 65″ – Back Panel
- 1 – 3/4″ plywood at 15″ x 65″ – Bottom
- 4 – 1×2 at 15″ – Shelf Supports & Drawer Slide Spacers
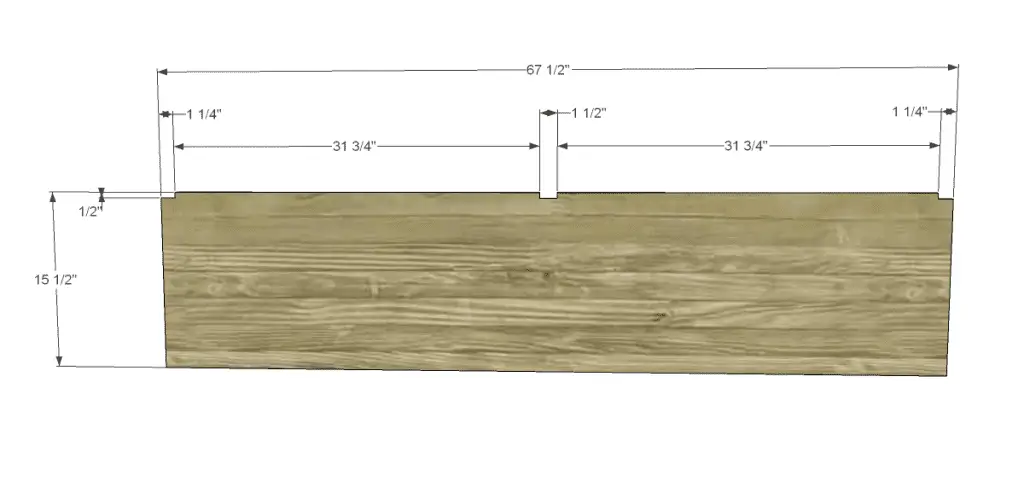
- 1 – 3/4″ plywood at 15-1/2″ x 67-1/2″ – Shelf
- 1 – 2×2 at 27-1/4″ – Front Divider
- 2 – 2×2 at 5-1/2″ – Drawer Dividers
- 2 – 2×2 at 15″ – Drawer Slide Supports
- 1 – 3/4″ plywood at 18″ x 70″ – Top
- 8 – 1×3 at 10-11/16 – Door Frame Rails
- 8 – 1×3 at 27″ – Door Frame Stiles
- 2 – 3/4″ plywood at 12-1/2″ x 17-1/2″ – Drawer Bottoms
- 1 – 3/4″ plywood at 12-1/2″ x 19-1/2″ – Center Drawer Bottom
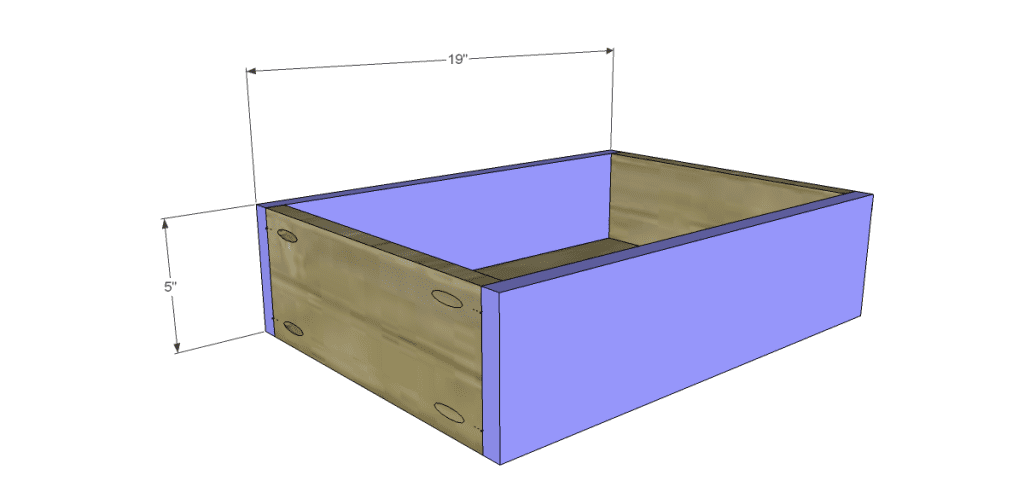
- 6 – 3/4″ plywood at 5″ x 12-1/2″ – Drawer Box Sides
- 4 – 3/4″ plywood at 5″ x 19″ – Drawer Box Front & Back
- 2 – 3/4″ plywood at 5″ x 21″ – Center Drawer Box Front & Back
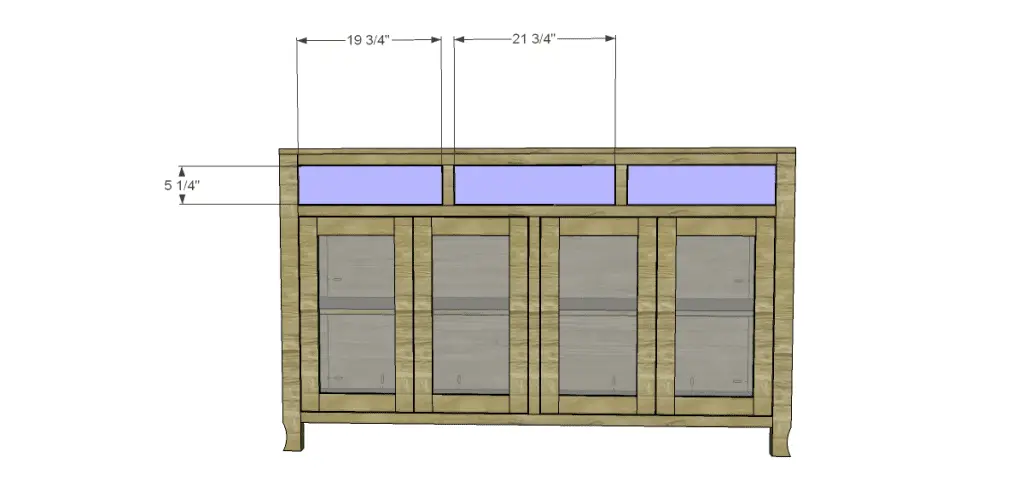
- 2 – 3/4″ plywood at 19-3/4″ – Drawer Fronts
- 1 – 3/4″ plywood at 21-3/4″ – Center Drawer Front
Step One
Cut the pieces for the legs. Cut the decorative arc as desired using a jigsaw or bandsaw.
Cut the pieces for the side frames and panels. Drill pocket holes in each end of the frame pieces as well as all four edges of the panels. Attach the frame pieces to the panels using glue and 1-1/4″ pocket hole screws. The panel will be located 1-1/4″ away from the inside edge of the frame pieces. Secure the panel assembly to the legs using glue and pocket hole screws. Use 2-1/2″ pocket hole screws through the frame pieces, and 1-1/4″ pocket hole screws through the panels.

Step Two
Cut the pieces for the back frame and panel. Drill pocket holes in each end of the frame pieces as well as all four edges of the panel. Attach the frame pieces to the panel using glue and 1-1/4″ pocket hole screws. The panel will be located 1-1/4″ away from the inside edge of the frame pieces. Secure the panel assembly to the legs using glue and pocket hole screws. Use 2-1/2″ pocket hole screws through the frame pieces, and 1-1/4″ pocket hole screws through the panel.
Step Three
Cut the pieces for the bottom frame piece and panel. Drill pocket holes in each end of the frame piece as well as all four edges of the panel. Attach the frame piece to the panel using glue and 1-1/4″ pocket hole screws. The panel will be flush with the top edge of the frame piece. Secure the bottom to the legs and sides using glue and pocket hole screws. Use 2-1/2″ pocket hole screws through the frame pieces, and 1-1/4″ pocket hole screws through the panel.
Step Four
Cut the pieces for the shelf supports and drill pocket holes in each end. The 1×2 pieces will be located so that they are flush with the inside of the legs. Secure the supports as shown using glue and pocket hole screws. Use 1-1/4″ pocket hole screws through the 1×2 pieces into the legs and 2″ pocket hole screws through the 2×2 piece into the back.
Step Five
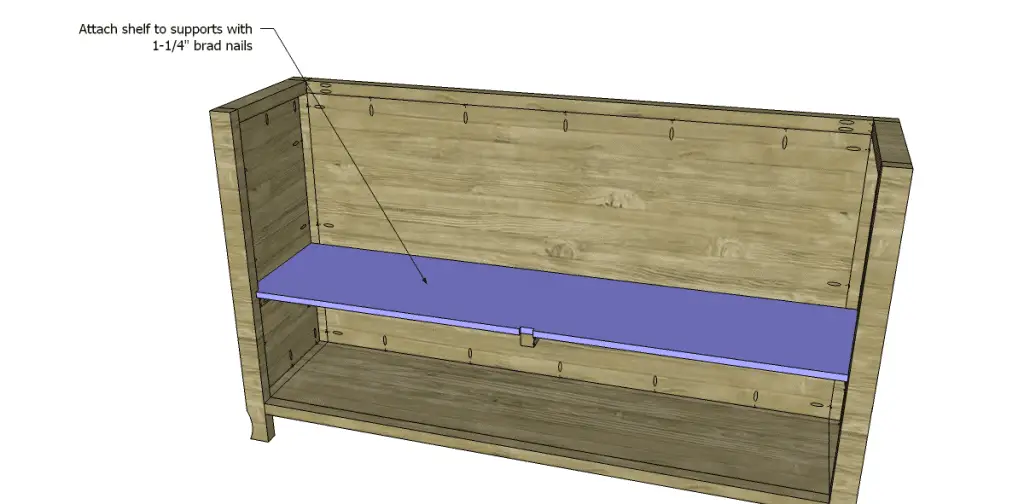
Cut the piece for the shelf and cut the notches using a jigsaw. Position the shelf on the supports then secure using glue and 1-1/4″ brad nails.
Step Six
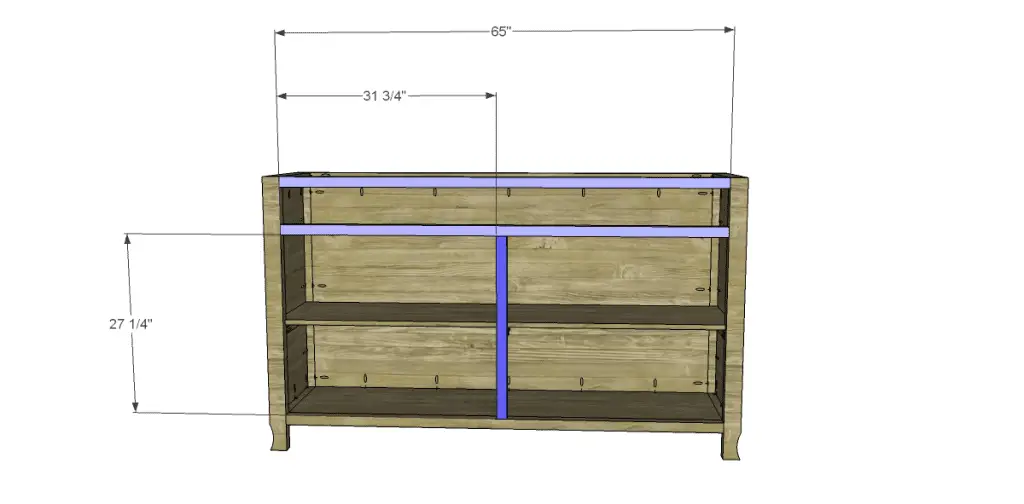
Cut the pieces for the stretchers and the divider. Drill pocket holes in each end of the pieces. Secure the stretchers first, using glue and 2-1/2″ pocket holes, then secure the divider to the lower stretcher using glue and 2-1/2″ pocket hole screws.
Step Seven
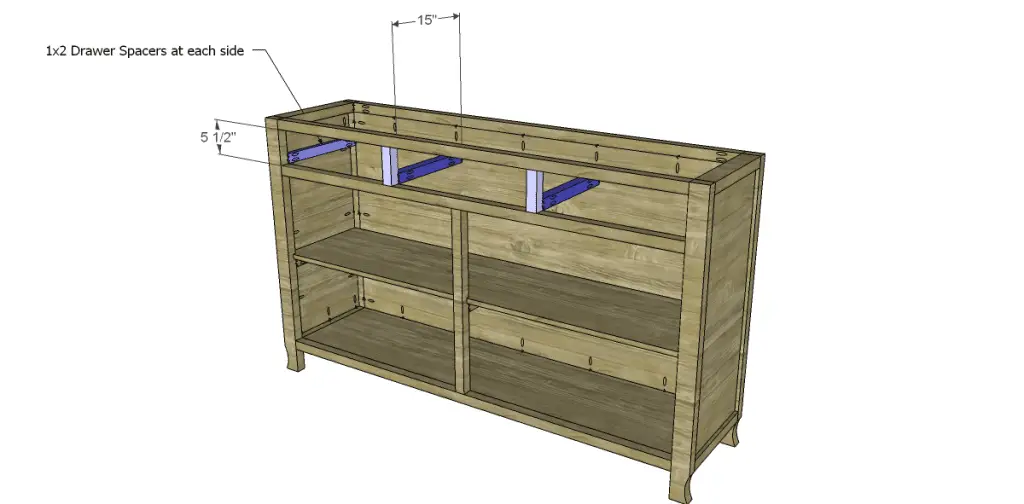
Cut the pieces for the drawer slide spacers, supports, and dividers. Drill pocket holes in each end of each piece. Position the dividers first, securing them with glue and 2-1/2″ pocket hole screws, then position and secure the spacers and supports. Use 1-1/4″ pocket hole screws to secure the 1×2 spacers (they are flush with the legs like the shelf supports), and 2-1/2″ pocket hole screws to secure the front end of the 2×2 supports then 2″ pocket hole screws to support the back end of the supports.
Step Eight
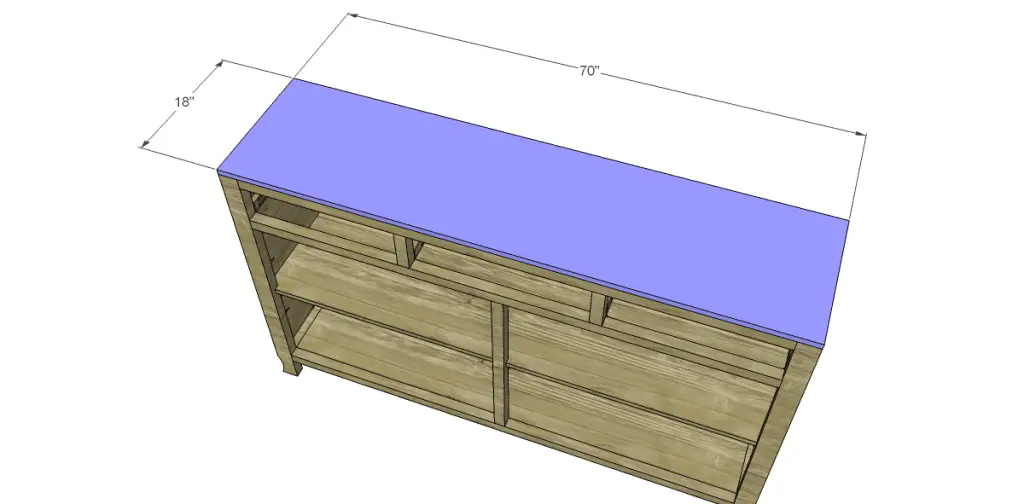
Cut the piece for the top. Secure to the cabinet using glue and 1-1/4″ brad nails.
Step Nine
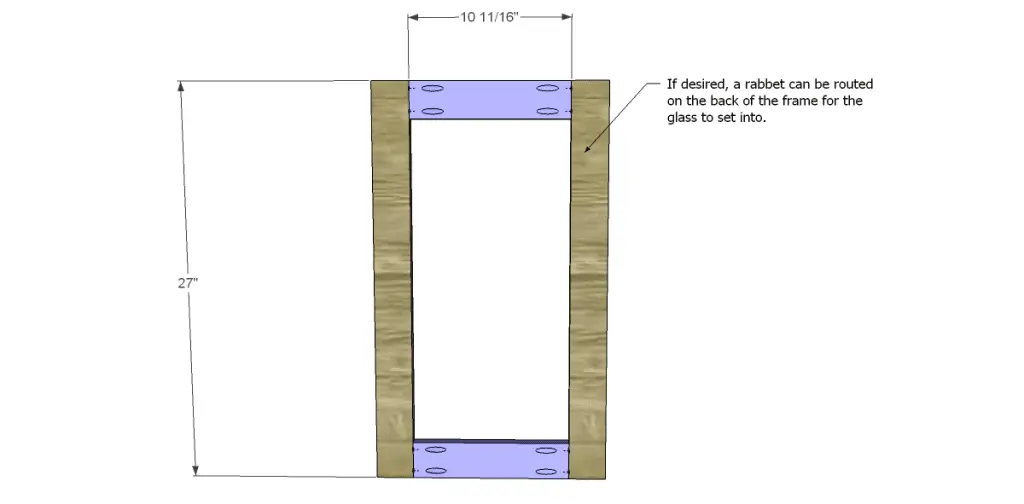
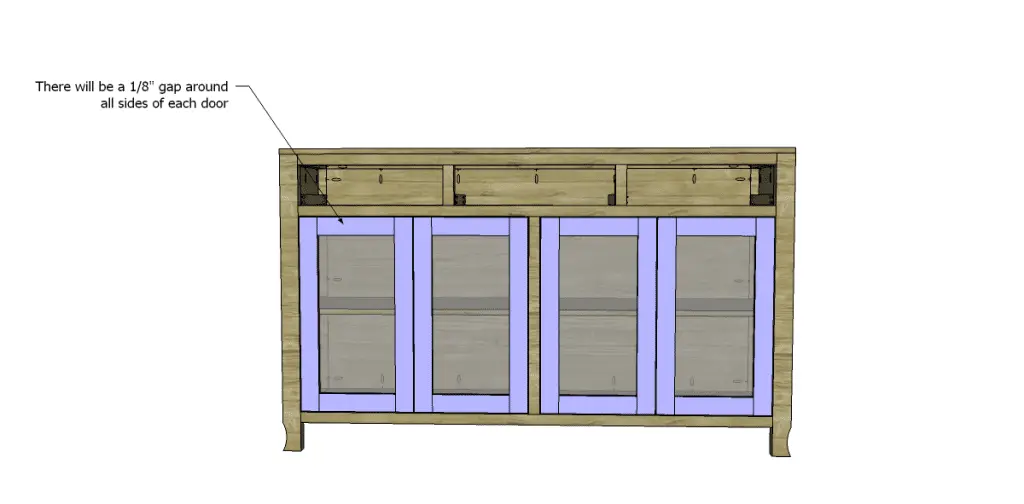
Cut the pieces for the door frames. Drill pocket holes in each end of the rail (shorter) pieces, then assemble using glue and 1-1/4″ pocket hole screws. The glass or other medium can be secure to the frames in one of two ways – by using mirror clips on the back frame of the door, or by using a router and a rabbeting bit to cut a rabbet to allow the glass to sit inside the frame. Attach the hinges to the doors, the install the doors. There will be a 1/8″ gap around all sides of the doors as well as in between them.
Step Ten
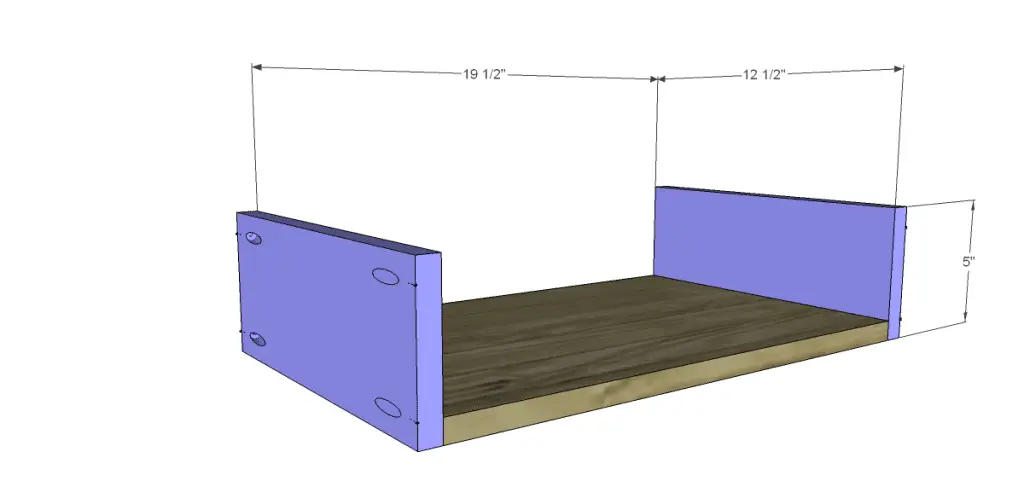
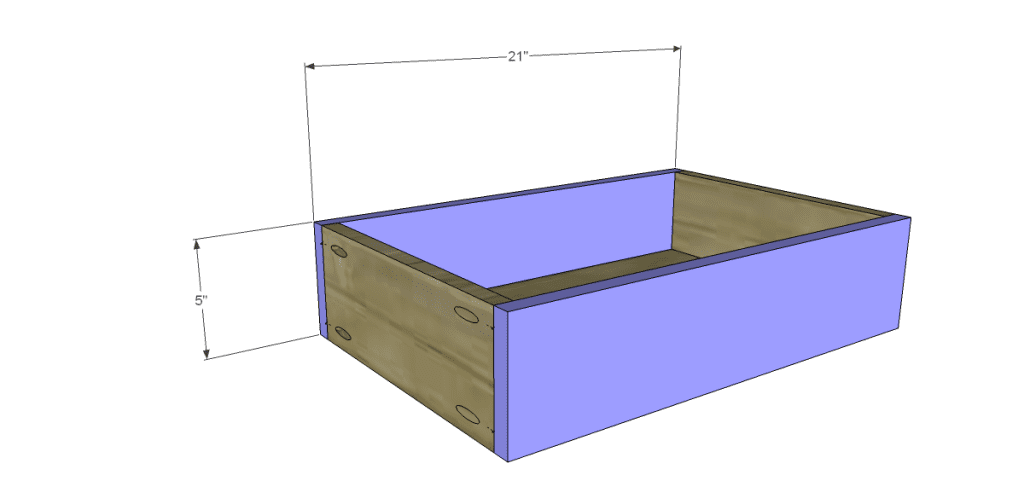
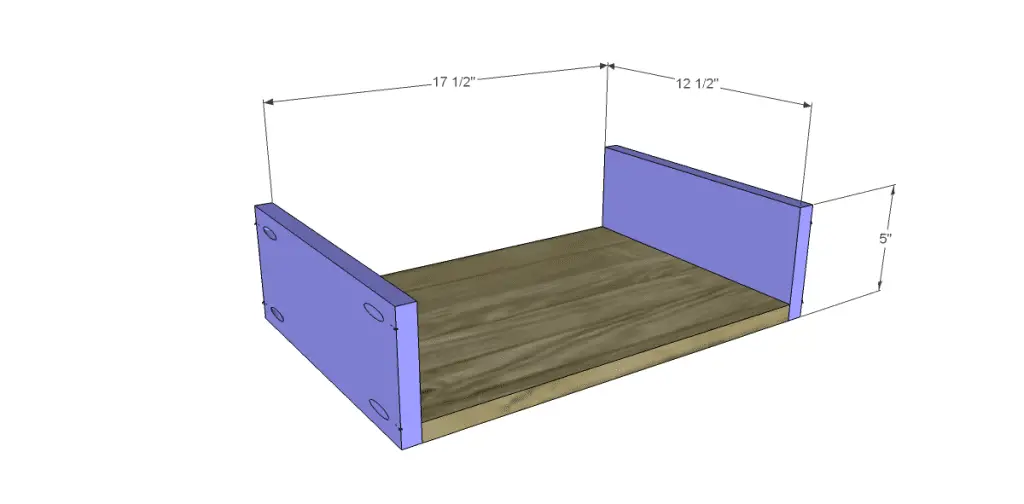
Cut the pieces for the drawers. The center drawer is wider than the other two. Drill pocket holes in each end of the side pieces as well as all four edges of the bottoms. Assemble as shown, then install the drawer slide hardware according to the manufacturer’s instructions. This easy tutorial on installing drawer slides will be helpful. Make any necessary adjustments. The cabinet side slide hardware will be installed 3/4″ away from the front edge.
Step Eleven
Cut the pieces for the drawer fronts. Mark the position for the cabinet pulls, and drill the holes. Take a look at this ceasy tutorial on installing drawer fronts. Make any necessary adjustments, then install the cabinet pulls.
Finish as desired!
Use these free DIY woodworking plans to build a Glass Door Cabinet to create a gorgeous piece of furniture for entertaining, storing and displaying linens, or even for books! If you have any requests for plans, contact me at cher {at} designsbystudioc {dot} com!
Originally posted 2013-08-05 08:00:16.
[…] Tutorial: designsbystudioc.com […]
[…] Tutorial: designsbystudioc.com […]
[…] Glass Door Cabinet […]