
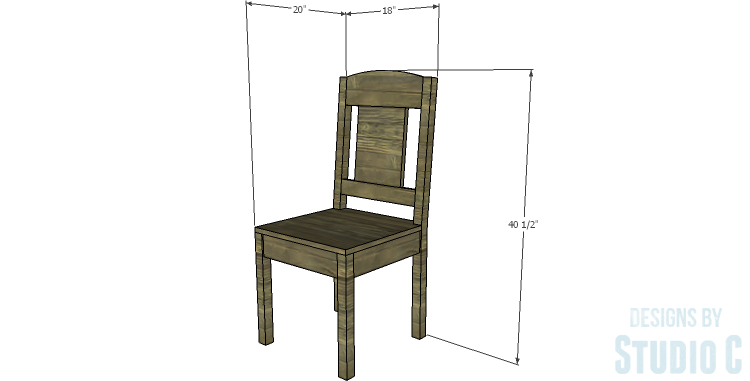
DIY Plans to Build a Weatherford Dining Chair
An Easy Chair to Build for Any Occasion
I’ve said it many times before – chairs are so easy to construct and this chair is no exception! Need extra seating for the upcoming holidays? The DIY plans to build a Weatherford Dining Chair are quick and easy! Several can be constructed over the course of a weekend providing extra seating for a fabulous dinner party!

Materials:
- 1-1/2″ pocket hole screws
- 1-1/4″ brad nails
- Edge banding, optional (<– affiliate link!)
- Wood glue
- Sandpaper (100, 150, 220 grits)
- Finishing supplies (primer & paint, or stain, sealer)
Lumber:
To build ONE chair:
- 1 – scrap 1×2 at 16″
- 1 – scrap 1×3 at 15″
- 1 – 1×4 at 6′
- 1 – scrap 1×6 at 15″
- 1 – scrap 1x1o at 12″
- 1 – 2×2 at 4′
- 1 – 2×4 at 8′
- 1 – 2′ x 2′ sheet of 3/4″ plywood
Cut List:
- 2 – 2×4 at 39-1/2″ – Back Legs
- 4 – 1×4 at 15″ – Stretchers
- 2 – 2×2 at 17-1/4″ – Front Legs
- 1 – 1×2 at 16″ – Seat Support
- 1 – 1×3 at 15″ – Back Frame
- 1 – 1×6 at 15″ – Back Frame
- 1 – 1×10 at 12″ – Back
- 1 – 3/4″ plywood at 18″ x 18″ – Seat
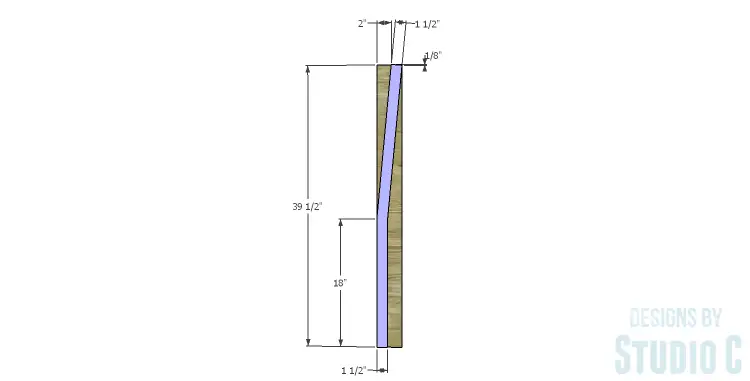
Step One
Cut the pieces for the back legs. Draw the back legs on each 2×4 piece as shown in the drawing, then cut out using a jigsaw or a bandsaw.
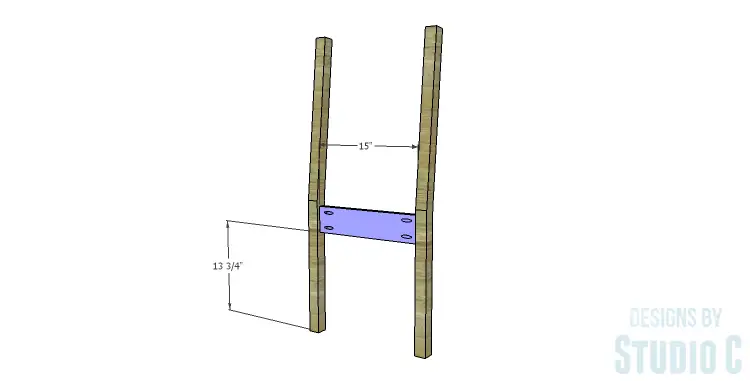
Step Two
Cut the pieces for the stretchers. With the pocket hole jig set for 3/4″ material, drill pocket holes in each end of the stretchers. Secure on of the stretchers to the back legs as shown using glue and 1-1/2: pocket hole screws. The stretcher will be positioned 1/4″ back from the back face of the legs.
Step Three
Cut the pieces for the front legs. Secure one of the stretchers to the front legs using glue and 1-1/2″ pocket hole screws. The stretcher will be positioned 1/4″ back from the front face of the legs.

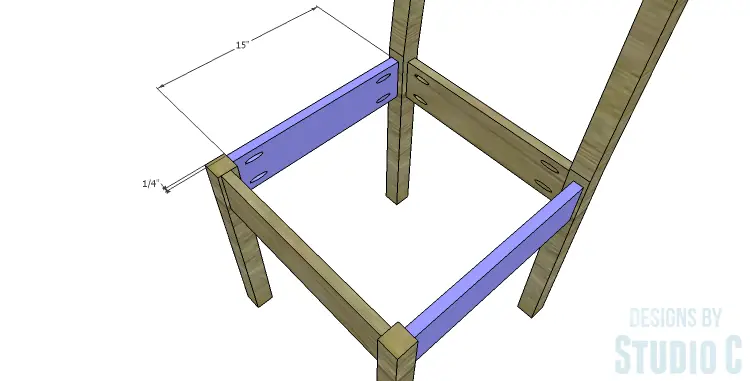
Step Four
Secure the two remaining stretchers to the front and back legs using glue and 1-1/2″ pocket hole screws. The stretchers will be positioned 1/4″ back from the side faces of the legs.
Step Five
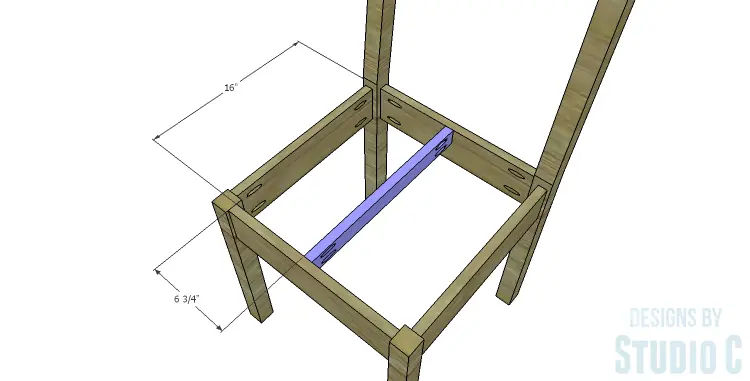
Cut the piece for the seat support and drill pocket holes in each end. Secure the support to the front and back stretchers using glue and 1-1/2″ pocket hole screws. The top edge of the support will be flush with the top edges of the stretchers.
Step Six
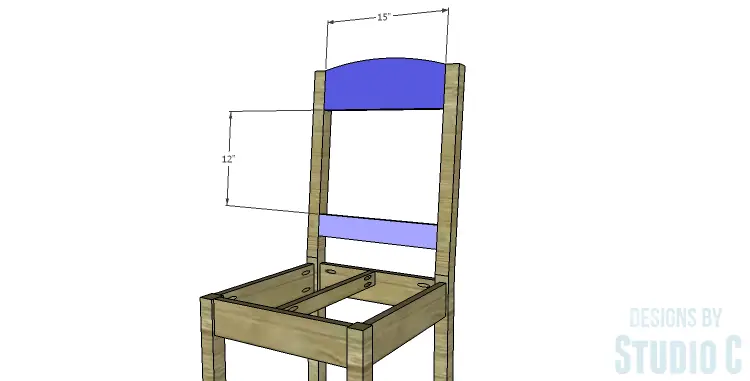
Cut the pieces for the back. Cut the arc in the upper back piece (the 1×6) using a jigsaw. Drill pocket holes in each end of each piece. Secure the back pieces to the legs as shown using glue and 1-1/2″ pocket hole screws.
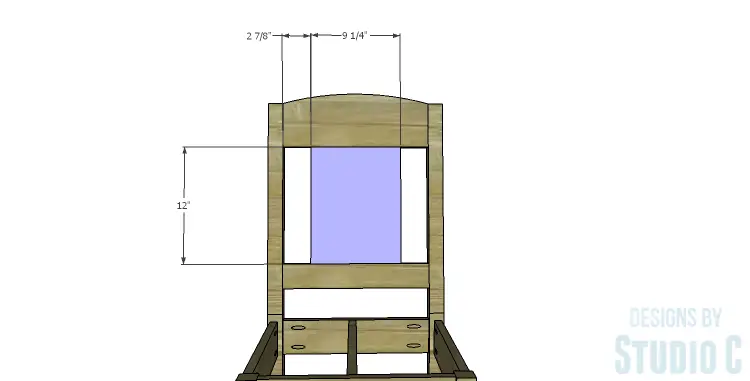
Cut the 1×10 piece for the back and drill pocket holes in each end. Secure to the back frame pieces using glue and 1-1/2″ pocket hole screws.
Step Seven
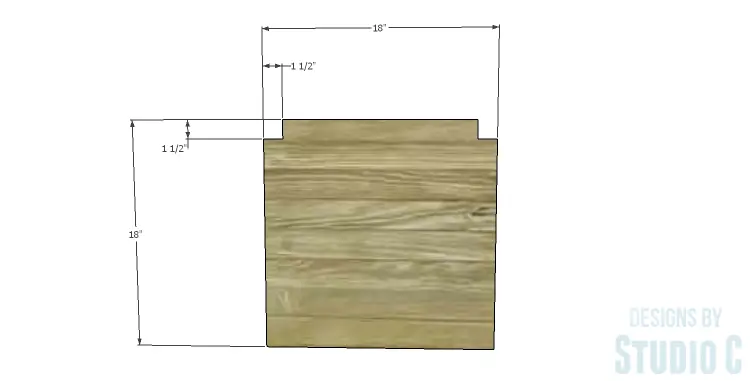
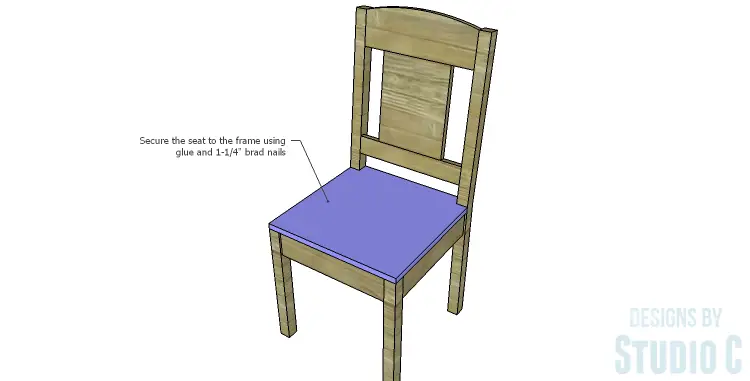
Cut the piece for the seat. Apply the edge banding to the exposed edges of the plywood then cut the notches using a jigsaw or a bandsaw.
Secure the seat to the frame using glue and 1-1/4″ brad nails.
Finish as desired.
The chairs would look fabulous with a dark stain or each painted a different color. If a high gloss finish is your thing, it would look great as well! Several frames can be built with one long piece for the seat to create a bench, if desired! Have any questions about the DIY plans to build a Weatherford Dining Chair? Leave a comment below!