
DIY Plans to Build a Tall Diagonal Face Upper Corner Cabinet
Another Cabinet for a Kitchen Remodel!
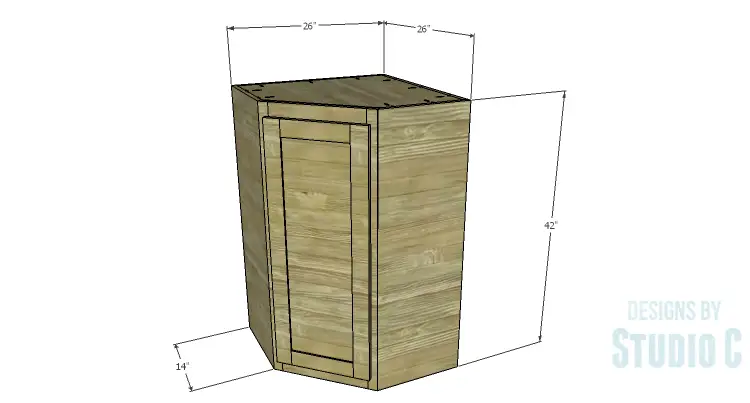
A reader contacted me and asked if I could help draft plans for an upper corner cabinet. The DIY plans to build a tall upper corner cabinet feature two shelves with 20″ Lazy Susans attached to the shelves (more shelves can be added easily as needed) and a tall paneled door. The cabinet has a diagonal front and is 2″ deeper than standard upper cabinets, making this corner kitchen cabinet have a sort of reveal on each side. Basically, this cabinet rests on the countertop and extends to the ceiling. If it is not desirable to have the cabinet resting on the countertop, the height of the cabinet is easily adjustable according to ceiling height or personal preference.

Materials:
- 1″ pocket hole screws
- 1-1/4″ pocket hole screws (<– affiliate link!)
- 1-1/4″ brad nails
- 2 sets of Lazy Susan hardware
- 1 set of hinges
- 1 cabinet pull
- Wood glue
- Sandpaper (100, 150, 220 grits)
- Finishing supplies (primer & paint, or stain, sealer)
Lumber:
- 1 – 1×2 at 8′
- 3 – 1×3 at 8′
- 1 – 4′ x 8′ sheet of 1/2″ plywood
- 3 – 4′ x 8′ sheets of 3/4″ plywood
Cut List:
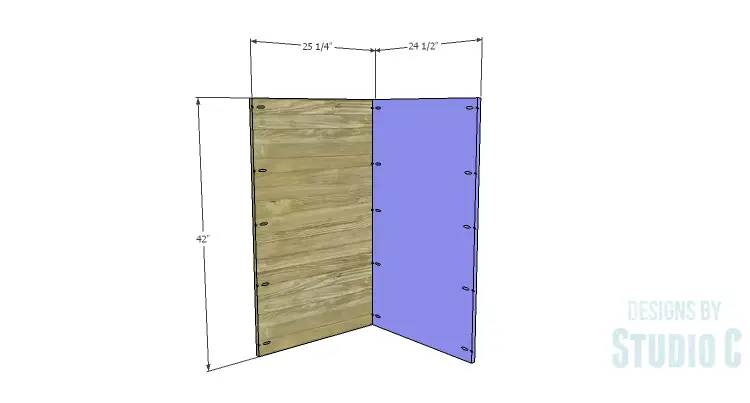
- 1 – 3/4″ plywood at 24-1/2″ x 42″ – Back
- 1 – 3/4″ plywood at 25-1/4″ x 42″ – Back
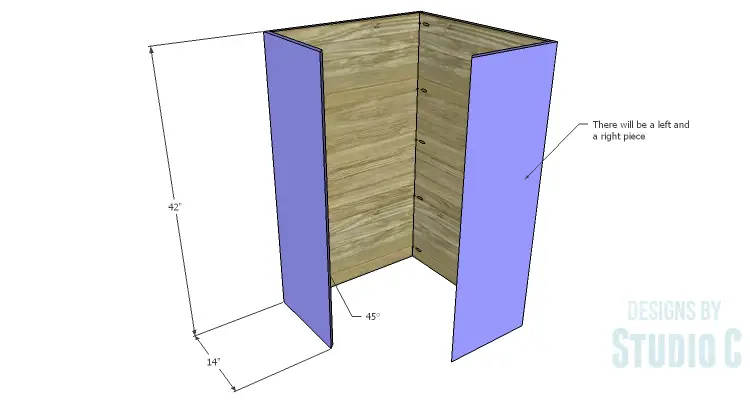
- 2 – 3/4″ plywood at 14″ x 42″ – Sides
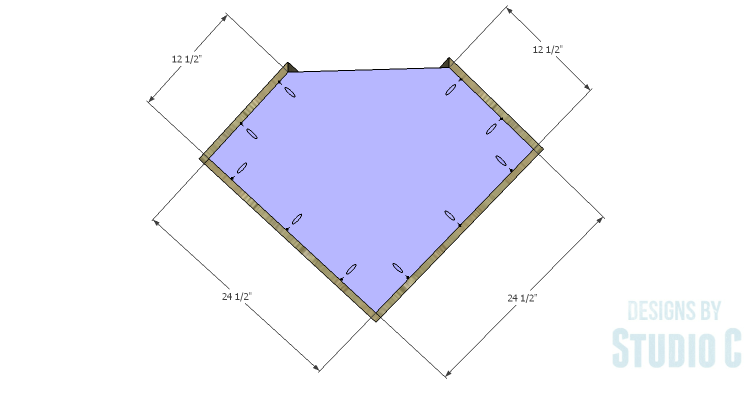
- 3 – 3/4″ plywood at 24-1/2″ x 24-1/2″ – Shelves
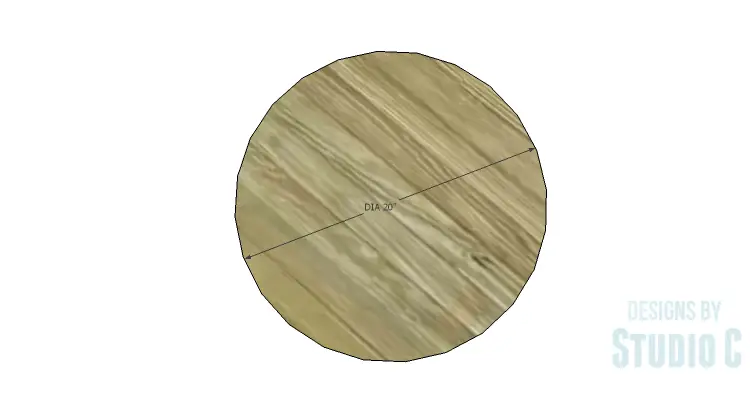
- 2 – 3/4″ plywood circles at 20″ in diameter
- 2 – 1×3 at 14″ – Face Frame Rails
- 2 – 1×2 at 42″ – Face Frame Stiles
- 2 – 1×3 at 10″ – Door Rails
- 2 – 1×3 at 38″ – Door Stiles
- 1 – 1/2″ plywood at 10″ x 33″ – Door Panel
Click on the drawings for a larger view!
Step One
Cut the two pieces for the back. With the pocket hole jig set for 3/4″ material, drill pocket holes in each long edge of the 24-1/2″ wide piece, and in one long edge of the 25-1/4″ piece. Assemble the back using glue and 1-1/4″ pocket hole screws as shown.
Step Two
Cut the pieces for the sides. Cut a 45° bevel in one long edge of each piece. Secure the sides to the back using glue and 1-1/4″ pocket hole screws. The bevels will face to the inside.
Step Three
Cut the pieces for the shelves and drill pocket holes in the pieces as shown. Secure the bottom shelf to the bottom of the sides and back using glue and 1-1/4″ pocket hole screws.
Step Four
Cut the pieces for the Lazy Susans using a jigsaw or a bandsaw. For an easy tutorial on cutting circles on a bandsaw, click here.
Install the Lazy Susan hardware on the shelf and the circle. This tutorial is very helpful!

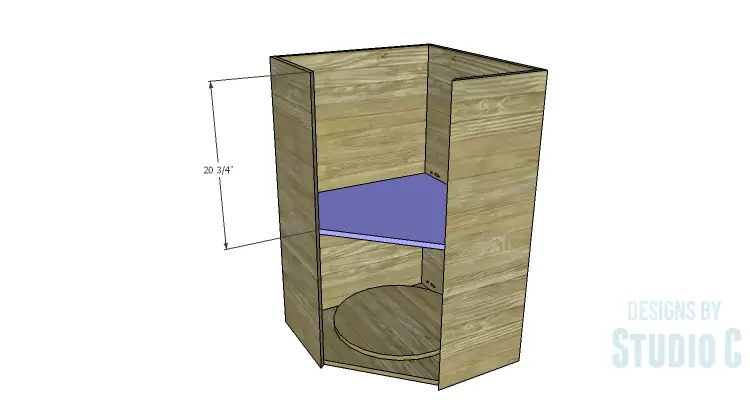
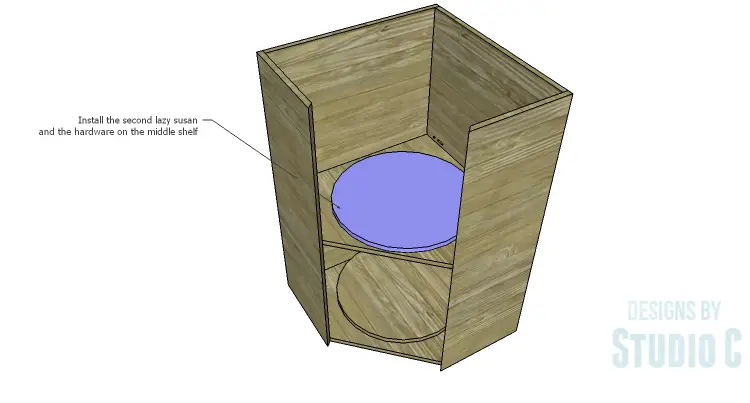
Step Five
Install the middle shelf using glue and 1-1/4″ pocket hole screws. Install the Lazy Susan hardware and the second circle.
Step Six
Install the remaining shelf as the top using glue and 1-1/4″ pocket hole screws.

Step Seven
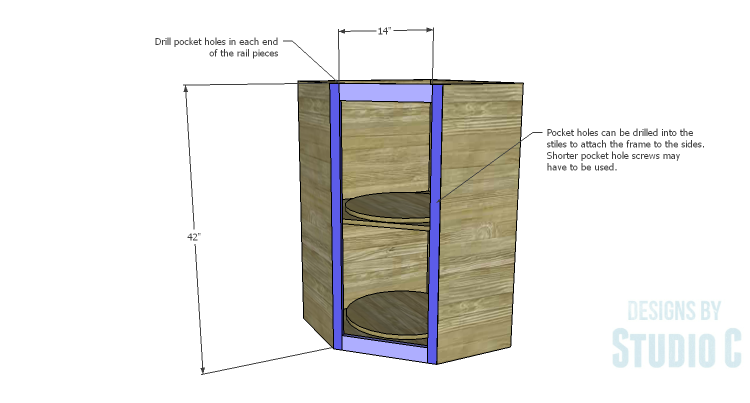
Cut the pieces for the face frame and drill pocket holes in each end of the shorter pieces as well as one long edge of each 1×2 piece (not shown in the drawing). Assemble the face frame using glue and 1-1/4″ pocket hole screws.
Secure the face frame to the beveled edges of the sides using glue and 1″ pocket hole screws. Do not use pocket hole screws that are longer as they may poke out the sides! Brad nails can also be used through the bevels into the sides of the frame but they may poke out the back side of the frame.
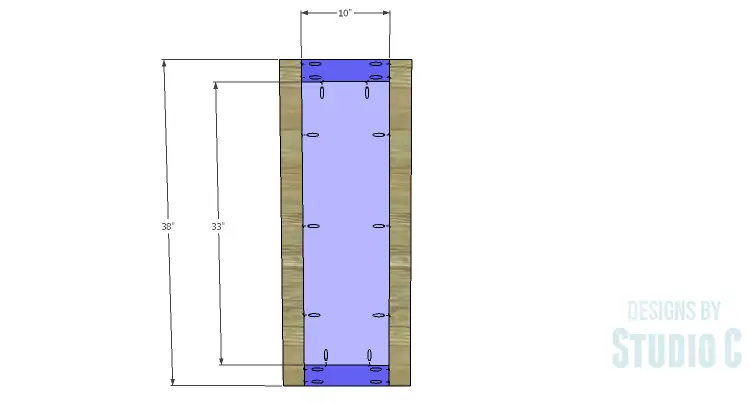
Step Eight
Cut the pieces for the door and drill pocket holes in each end of the rails. Assemble the door frame using glue and 1-1/4″ pocket hole screws.
Set the pocket hole jig for 1/2″ material and drill pocket holes in all four edges of the door panel. Secure the panel in the frame using glue and 1″ pocket hole screws. The back face of the panel will be flush with the back face of the door frame.
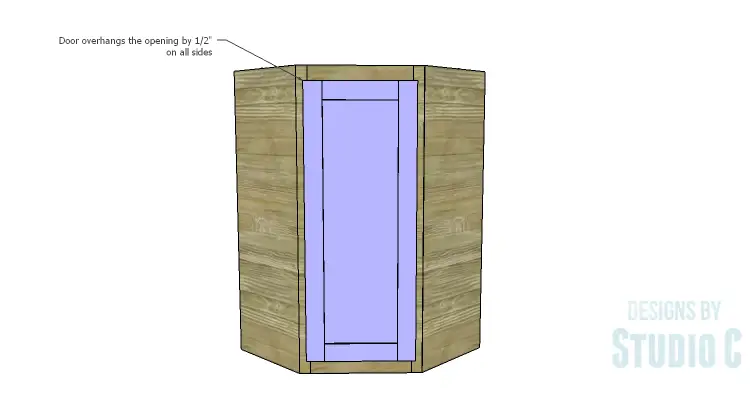
Install the hinges and the cabinet pull as desired.
Have any questions about the DIY plans to build a tall diagonal face upper corner cabinet? Leave a comment below!
Originally posted 2015-05-22 08:00:55.