
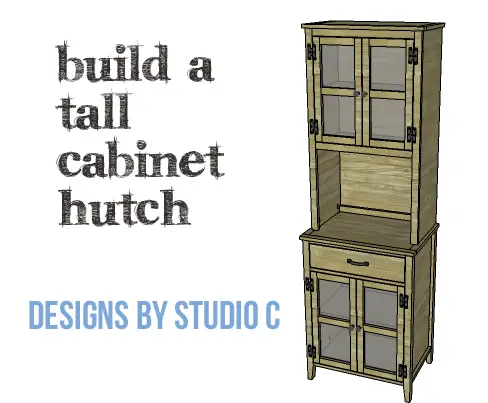
DIY Plans to Build a Tall Cabinet Hutch
A Tall Cabinet with a Hutch, Part Two
Previously, I posted plans to build a base for a tall cabinet with a hutch, and today I am posting the plans for the matching hutch. The DIY plans to build a Tall Cabinet Hutch fit on top of the Tall Cabinet Base and feature the same type of doors (with glass or Plexiglas panels) with a shelf inside. The hutch is easily secured to the top of the base with pocket hole screws. This hutch would also work well on any of the other narrow cabinet plans!
Materials:
- 1-1/4″ pocket hole screws (<– affiliate link!)
- 1-1/4″ brad nails
- 2 sets of hinges
- Cabinet pulls
- Wood glue
- Sandpaper (100, 150, 220 grits)
- Finishing supplies (primer & paint, or stain, sealer)
Lumber:
- 1 – 1/2″ x 2 craft boards at 2′
- 5 – 1×2 at 8′
- 1 – 2′ x 4′ sheet of 1/4″ plywood
- 1 – 4′ x 8′ sheet of 3/4″ plywood
Cut List:
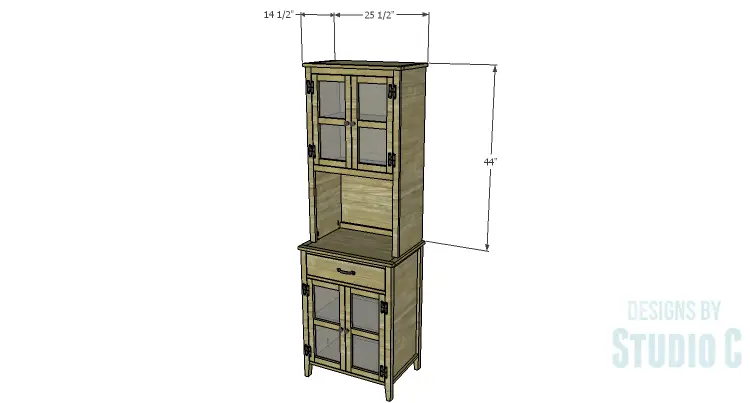
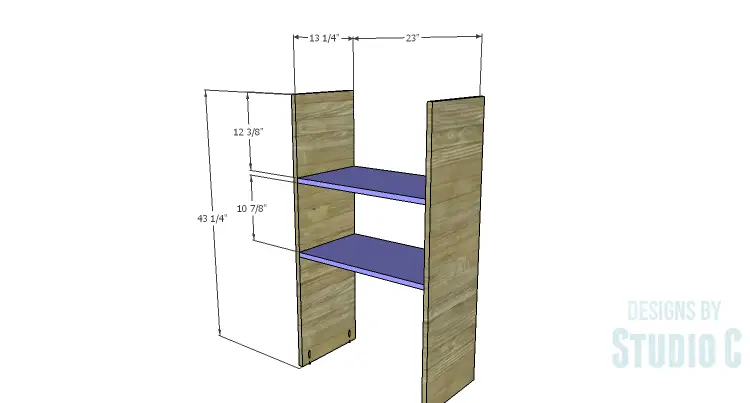
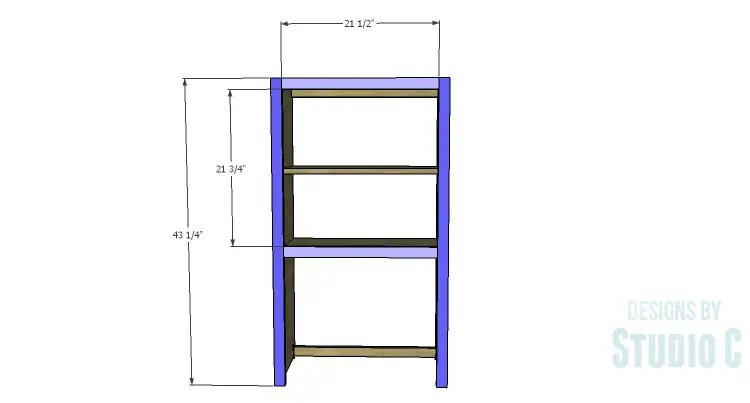
- 2 – 3/4″ plywood at 13-1/4″ x 43-1/4″ – Sides
- 2 – 3/4″ plywood at 13-1/4″ x 23″ – Shelves
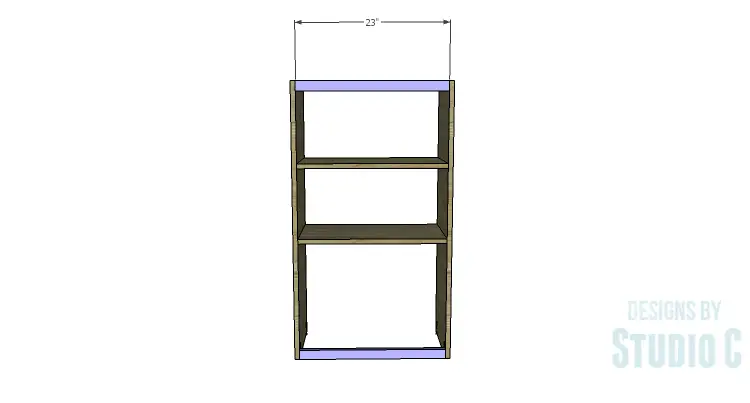
- 4 – 1×2 at 23″ – Back Stretchers & Face Frame
- 2 – 1×2 at 43-1/4″ – Face Frame
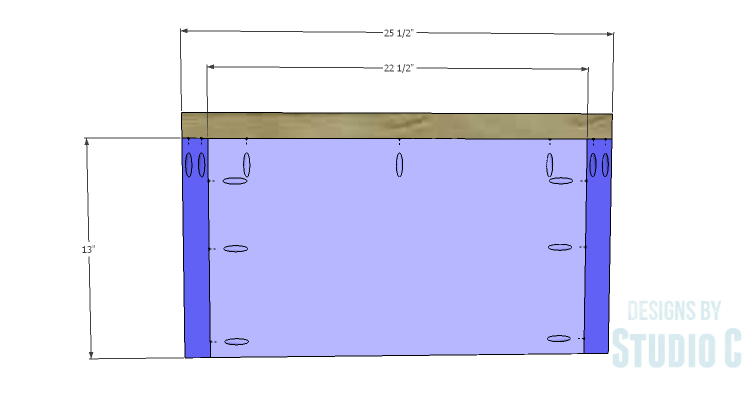
- 1 – 3/4″ plywood at 13″ x 22-1/2″ – Top Panel
- 2 – 1×2 at 13″ – Top Side Trim
- 1 – 1×2 at 25-1/2″ – Top Front Trim
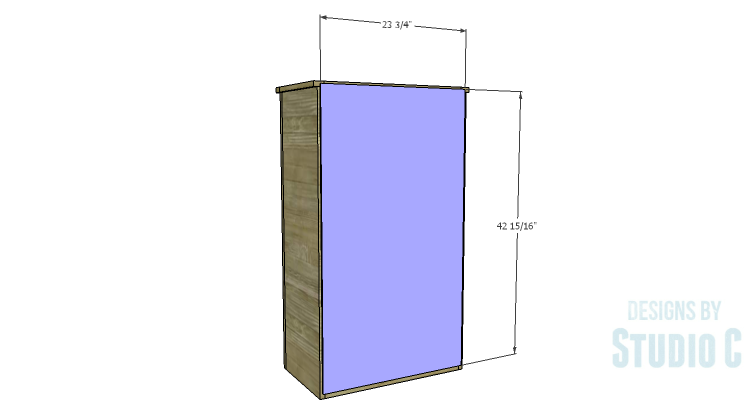
- 1 – 1/4″ plywood at 23-3/4″ x 42-15/16″ – Back
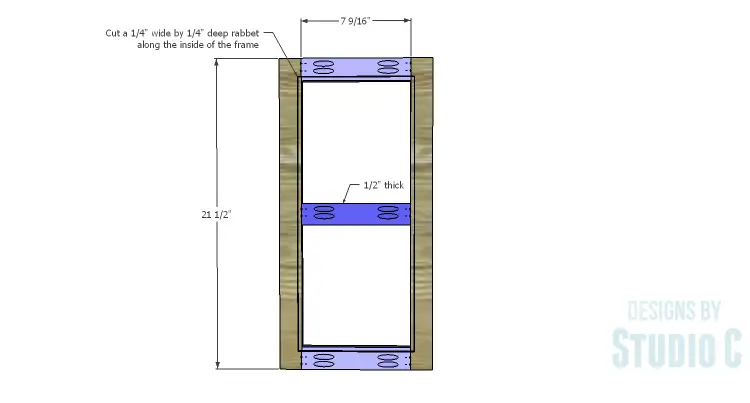
- 4 – 1×2 at 7-9/16″ Door Rails
- 4 – 1×2 at 21-1/2″ – Door Stiles
- 2 – 1/2″ x 2 craft boards at 7-9/16″ – Center Door Rails
Step One
Cut the pieces for the sides and the shelves. With the pocket hole jig set for 3/4″ material, drill pocket holes in the lower edge of the side pieces as well as each end of the shelves. Secure the shelves to the sides using glue and 1-1/4″ pocket hole screws.
Step Two
Cut the pieces for the back stretchers and drill pocket holes in each end. Secure the stretchers to the back of the sides as shown using glue and 1-1/4″ pocket hole screws.
Step Three
Cut the pieces for the face frame. The face frame will be assembled first, then secured to the front of the sides and front edge of the bottom shelf.
Drill pocket holes in each end of the shorter pieces. Secure the shorter face frame pieces to the longer face frame pieces using glue and 1-1/4″ pocket hole screws. Secure the face frame to the front edge of the sides and the bottom shelf using glue and 1-1/4″ brad nails. The outside edges of the frame will be flush with the outside face of the sides, and flush with the top face of the bottom shelf.
Step Four
Cut the pieces for the top panel and the top trim. Drill pocket holes in the side and front edges of the top panel, and the top edge only of the side trim pieces. Secure the side trim pieces to the panel first, using glue and 1-1/4″ pocket hole screws, then secure the front trim.
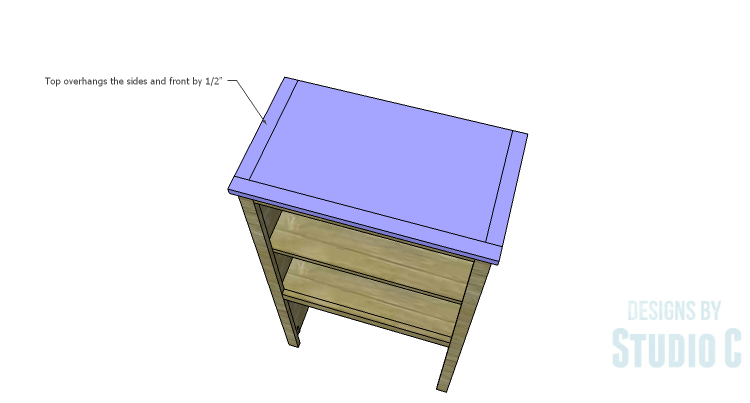
Position the top so that the back is flush with the back face of the legs which will make the front of the top overhang by 1/2″. The sides will also overhang by 1/2″. Secure the top in place using glue and 1-1/4″ brad nails.
Step Five
Cut the piece for the back. Secure the back using glue and 1-1/4″ brad nails through the panel into the sides, top, bottom stretcher, and bottom shelf.
Step Six
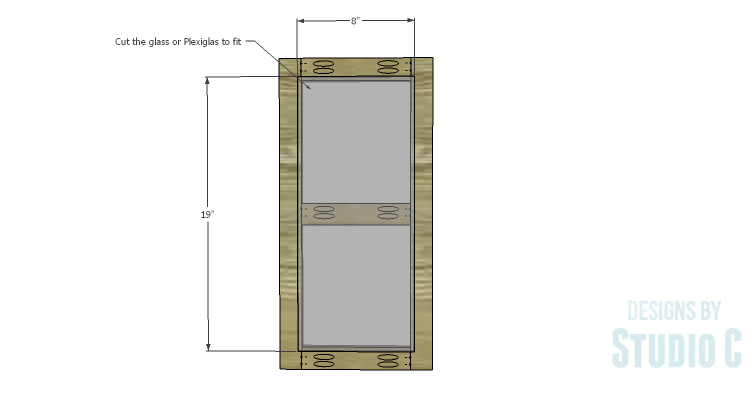
Cut the pieces for the doors. Drill pocket holes in each end of the rails (except for the center rail) locating them so that the rabbeting router bit (for the Plexiglas or glass panel) will not interfere. Assemble the frame using glue and 1-1/4″ pocket hole screws. Use a router and a 1/4″ rabbeting bit to cut a 1/4″ deep rabbet along the inside of the frame. Use a chisel and a hammer to square the corners of the rabbet.
Set the pocket hole jig for 1/2″ material, and drill pocket holes in each end of the center rail. Secure the center rail to the frame using glue and 1″ pocket hole screws. The front face of the center rail will be flush with the front face of the door frames.
Install the hinges on the doors, then install the doors in the cabinet. There will be a 1/8″ gap around all sides of the doors in the opening as well as in between them.
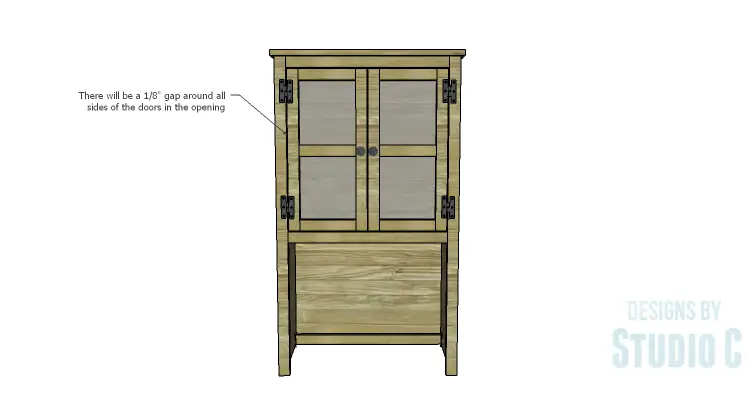
Finish as desired. Secure the hutch to the top of the base cabinet using 1-1/4″ pocket hole screws. The back faces will be flush with each other.
The hutch and base ensemble is a perfect addition to an entryway or a pair in a dining room. This would be the perfect addition to holiday entertaining! Have any questions about the DIY plans to build a Tall Cabinet Hutch? Leave a comment below!
Originally posted 2015-10-21 08:00:14.