
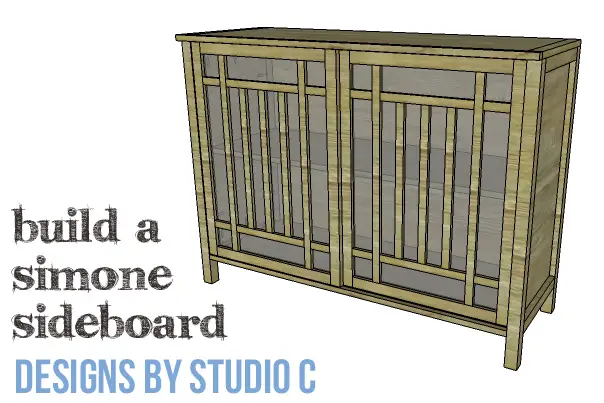
DIY Plans to Build a Simone Sideboard
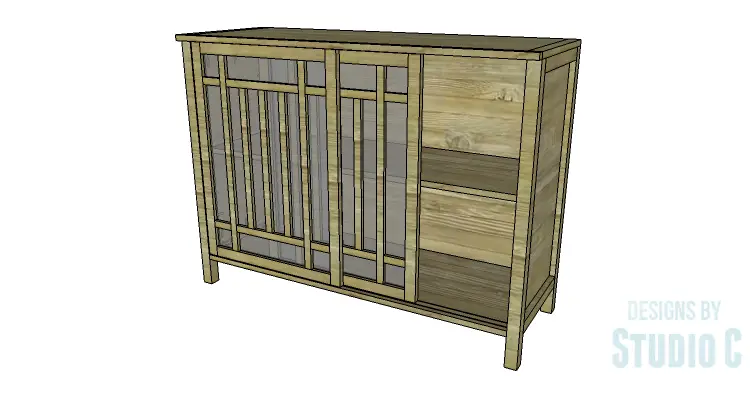
A Beautiful Cabinet with Pieced Sliding Doors
Don’t be deceived by the pieced doors, this cabinet is actually a breeze to build! The DIY plans for the Simone Sideboard include sliding doors with a lovely glass or Plexiglas panel, all held together by a charming lattice-style frame. Inside, you’ll find a spacious shelf for all your storage needs. The doors are made with 1/2″ thick craft boards and 1×2 framing, making it a super-easy project that you can finish in just one weekend!
Materials:
- 1″ pocket hole screws
- 1-1/4″ pocket hole screws (<– affiliate link!)
- 2-1/2″ pocket hole screws
- 1-1/4″ brad nails
- 1-3/4″ brad nails
- Edge banding
- Sliding door hardware like this
- Wood glue
- Sandpaper (100, 150, 220 grits)
- Finishing supplies (primer & paint, or stain, sealer)
Lumber:
- 4 – 1/2″ x 6″ craft boards, generally sold in 3′ or 4′ lengths
- 4 – 1×2 at 8′
- 3 – 2×2 at 6′
- 1 – 4′ x 4′ sheet of 1/4″ plywood
- 1 – 2′ x 4′ sheet of 3/4″ plywood
- 1 – 4′ x 8′ sheet of 3/4″ plywood
- 1/4″ Glass or Plexiglas
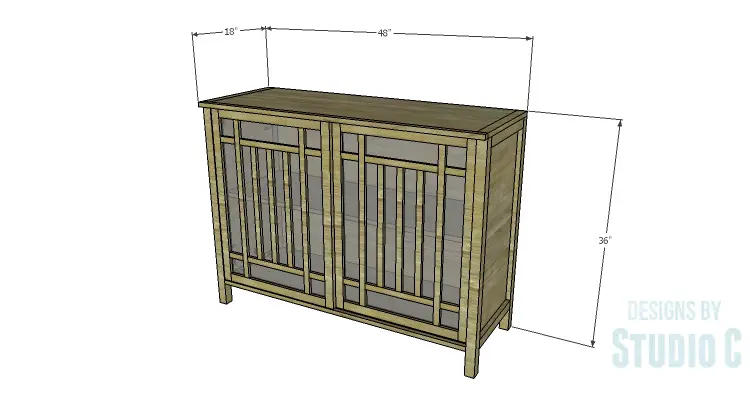
Cut List:
- 4 – 2×2 at 35-1/4″ – Legs
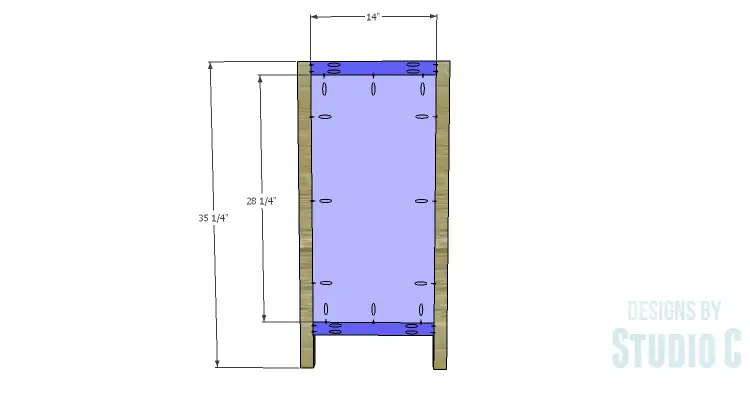
- 4 – 2×2 at 14″ – Side Framing
- 2 – 3/4″ plywood at 14″ x 28-1/4″ – Side Panels
- 2 – 3/4″ plywood at 17″ x 45″ – Top & Bottom
- 1 – 3/4″ plywood at 15″ x 45″ – Shelf
- 2 – 1×2 at 17″ – Top Side Trim
- 1 – 1×2 (ripped to 1″ wide) at 48″ – Top Front Trim
- 1 – 1/4″ plywood at 31-1/4″ x 46-1/2″ – Back
- 4 – 1×2 at 30-1/4″ – Door Stiles
- 4 – 1×2 at 19-1/2″ – Door Rails
- 4 – 1/2″ x 6″ craft boards (ripped to 1″ wide) at 27-1/4″ – Door (shown in Dark Blue)
- 8 – 1/2″ x 6″ craft boards (ripped to 1″ wide) at 3″ – Door (shown in Green)
- 4 – 1/2″ x 6″ craft boards (ripped to 1″ wide) at 11-1/2″ – Door (shown in Pink)
- 6 – 1/2″ x 6″ craft boards (ripped to 1″ wide) at 19-1/4″ – Door (shown in Purple)
- Glass or Plexiglas cut to fit
Step One
Cut the pieces for the legs and side framing. With the pocket hole jig set for 1-1/2″ material, drill pocket holes in each end of the framing pieces. Secure the framing to the legs using glue and 2-1/2″ pocket hole screws.
Cut the pieces for the side panels. Set the pocket hole jig for 3/4″ material and drill pocket holes in all four edges of the panels. Secure the panels inside the side framing using glue and 1-1/4″ pocket hole screws. The inside faces of the panels will be flush with the inside faces of the legs and framing.
Step Two
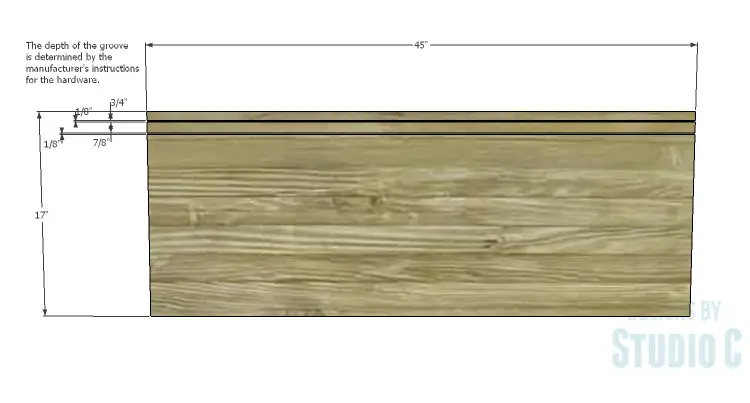
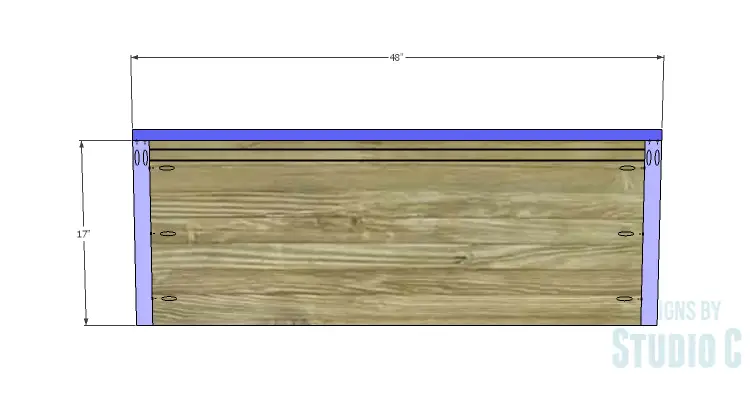
Cut the pieces for the top and bottom. Cut the grooves toward the front edges as shown. Refer to the manufacturer’s installation instruction for the exact width and depth of the grooves. The first groove will be located 3/4″ back from the front edge of the piece, and the second groove will be located 7/8″ behind the back edge of the first groove (to allow the doors to slide past each other easily!).
Drill pocket holes on the side opposite the grooves for the bottom. Secure the bottom to the legs using glue and 1-1/4″ pocket hole screws. Set the piece for the top aside.
Step Three
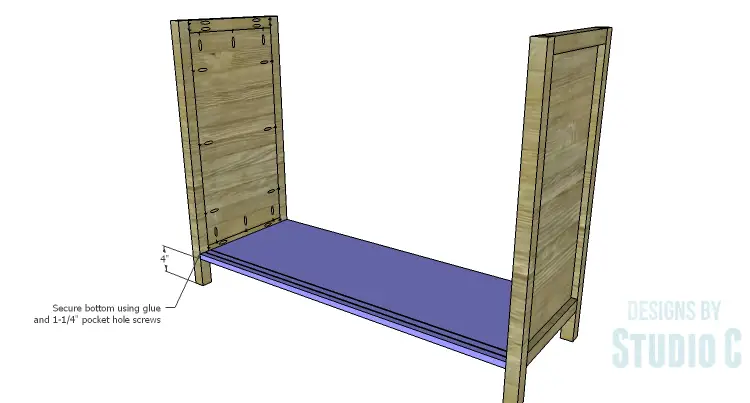
Cut the piece for the shelf and drill pocket holes in each end. Secure the shelf to the side panels using glue and 1-1/4″ pocket hole screws. The back edge of the shelf will be flush with the back legs.
Finish the cabinet as desired.

Step Four
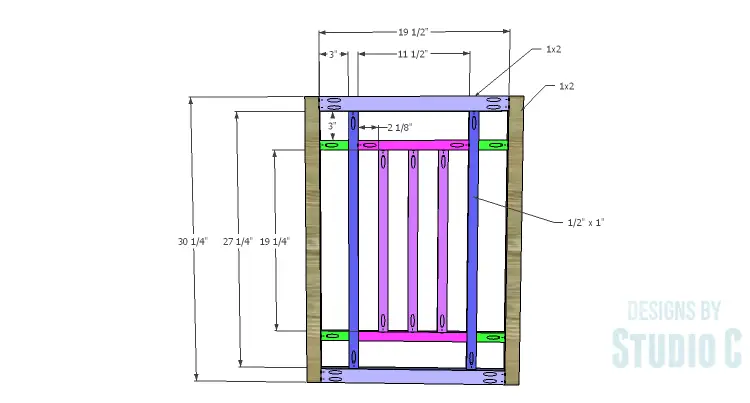
Cut the pieces for the doors. Drill pocket holes in each end of the 1×2 rails. Assemble the outer frame using glue and 1-1/4″ pocket hole screws.
Cut the pieces for the inner lattice frames. Set the pocket hole jig for 1/2″ material and drill pocket holes in the pieces as indicated. Assemble the frame using glue and 1″ pocket hole screws, then attach to the outer frame. The outside face of the lattice frame will be flush with the outside face of the outer frame.
Where the shorter green pieces attach to the dark blue pieces, the green pieces are too short to accommodate a pocket hole in each end (plus the pocket hole screw will conflict with the pocket hole screw in the pink pieces). The green pieces can be secured to the dark blue pieces using glue and 1-3/4″ brad nails.
Finish the doors as desired.
Step Five
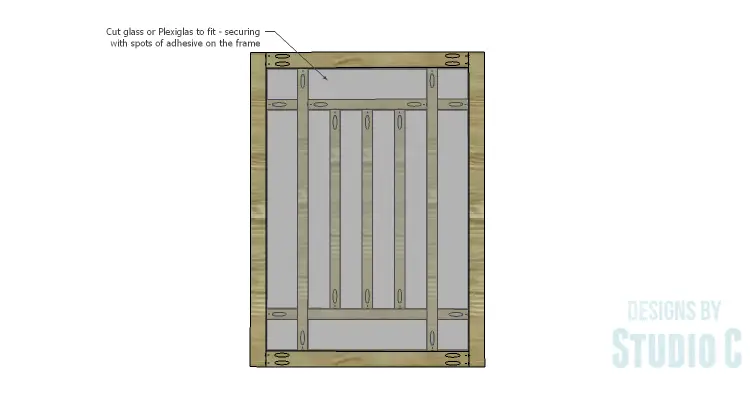
Cut a piece of glass or Plexiglas to fit over the lattice frame inside the outer frame. Secure the glass or Plexiglas in place with spots of adhesive.
Install the sliding door hardware on the doors according to the manufacturer’s installation instructions.
Step Six
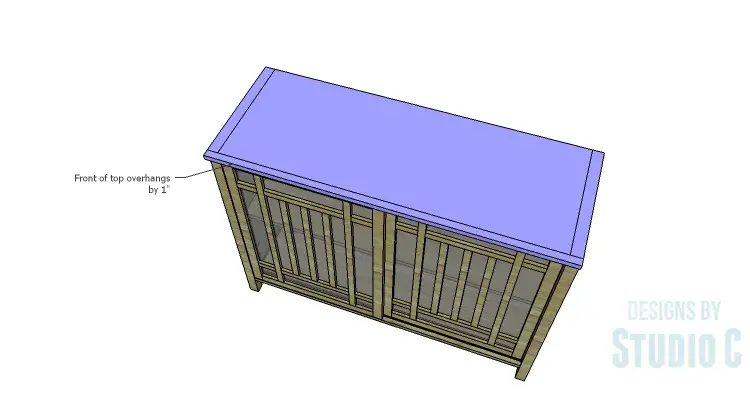
Cut the pieces for the top trim. Set the pocket hole jig for 3/4″ material and drill pocket holes in the side edges of the top panel (previously cut and “grooved” – the pocket holes will be on the same face as the grooves) as well as the front edge of the side trim pieces. Secure the trim pieces to the panel using glue and 1-1/4″ pocket hole screws. Secure the front trim piece using glue and 1-1/4″ pocket hole screws. The center of the front trim piece can be secured to the panel using 1-3/4″ brad nails.
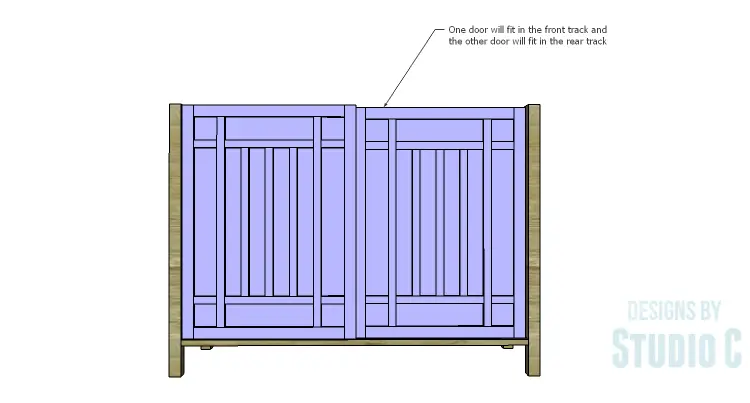
Finish the top as desired. Insert the doors in the opening with the hardware in the groove, then test fit the top. Secure the top in place using glue and 1-3/4″ brad nails through the top into the side panels.
Step Seven
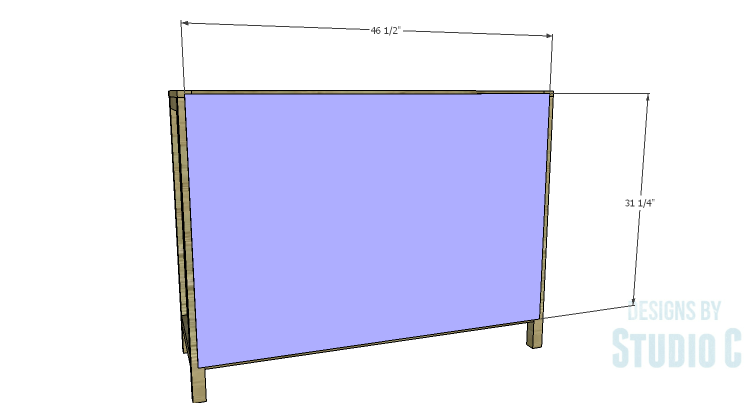
Pre-finish the back. Secure the back using glue and 1-1/4″ brad nails.
If you cannot get the sliding door hardware (a link is provided above), fender washers with screws can also be used. The depth of the groove will be cut at 3/8″, and the washers will be attached to the back side of the door with 1/2″ sticking out of the top and bottom of the door. This will allow the washer to glide in the track with a 1/8″ gap between the door and the top or bottom.
Have any questions about the DIY plans to build a Simone Sideboard? Leave a comment below!