
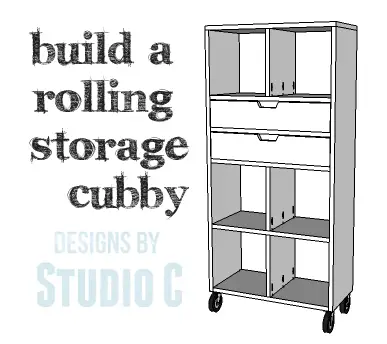
DIY Plans to Build a Rolling Storage Cubby with Drawers
An Easy to Build Piece Specifically for Storage!
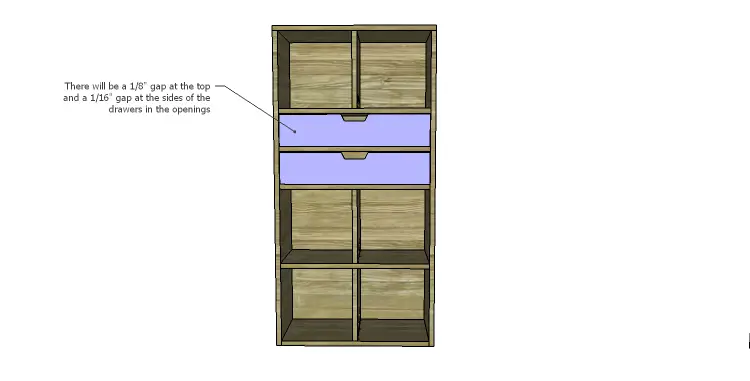
This Rolling Storage Cubby is the perfect piece for those who have a lot of books… or maybe DVDs! The DIY plans to build a Rolling Storage Cubby feature six large open cubbies and two drawers, plus locking casters on the bottom. This is an easy build that mainly uses straight off-the-shelf lumber and does not require drawer slides for the drawers making this the perfect plan for those new to woodworking!
Materials:
- 1-1/4″ pocket hole screws (<– affiliate link!)
- 1-1/4″ brad nails
- 4 – 4″ casters – two should be locking casters
- Wood glue
- Sandpaper (100, 150, 220 grits)
- Finishing supplies (primer & paint, or stain, sealer)
- Paste wax
Lumber:
- 2 – 1×6 at 6′
- 3 – 1×12 at 8′
- 1 – 2′ x 4′ sheet of 1/4″ plywood
- 1 – 2′ x 2′ sheet of 3/4″ plywood
Cut List:
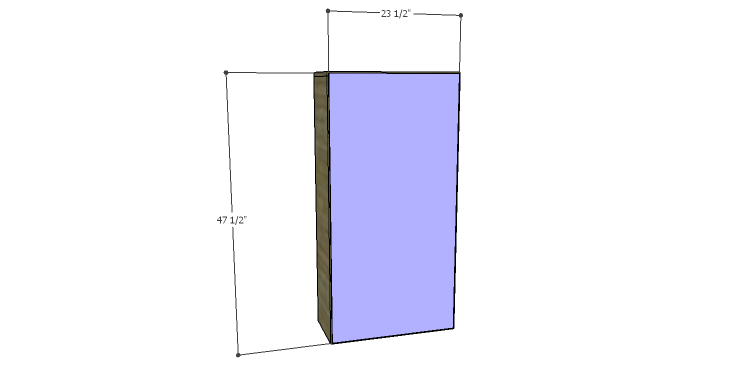
- 2 – 1×12 at 47-1/4″ – Sides
- 5 – 1×12 at 22-1/2″ – Bottom & Shelves
- 3 – 1×12 at 11-1/4″ – Dividers
- 1 – 1×12 at 24″ – Top
- 1 – 1/4″ plywood at 23-1/2″ x 47-1/2″ – Back
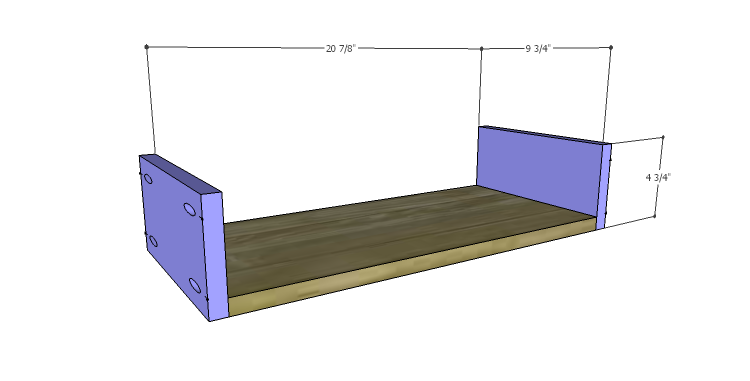
- 2 – 3/4″ plywood at 9-3/4″ x 20-7/8″ – Drawer Bottoms
- 4 – 1×6 (ripped to 4-3/4″” wide) at 9-3/4″ – Drawer Box Sides
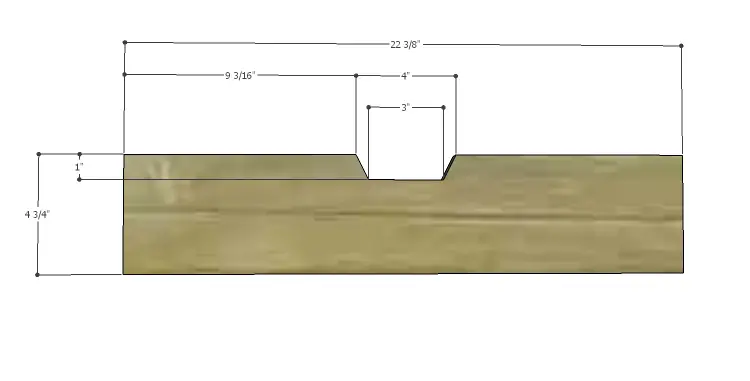
- 4 – 1×6 (ripped to 4-3/4″” wide) at 22-3/8″ – Drawer Box Front & Back
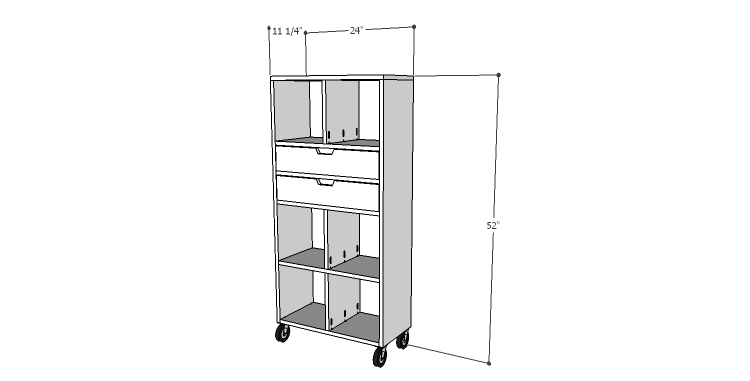
Click on the drawings for a larger view!
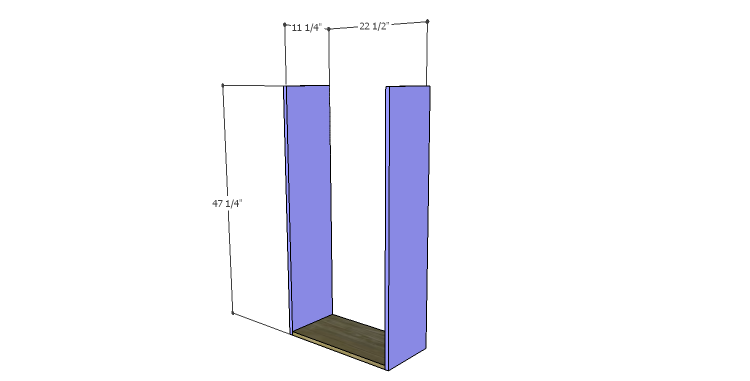
Step One
Cut the pieces for the sides and the bottom. With the pocket hole jig set for 3/4″ material, drill pocket holes in each end of the bottom piece. Secure to the bottom edge of the sides using glue and 1-1/4″ pocket hole screws.
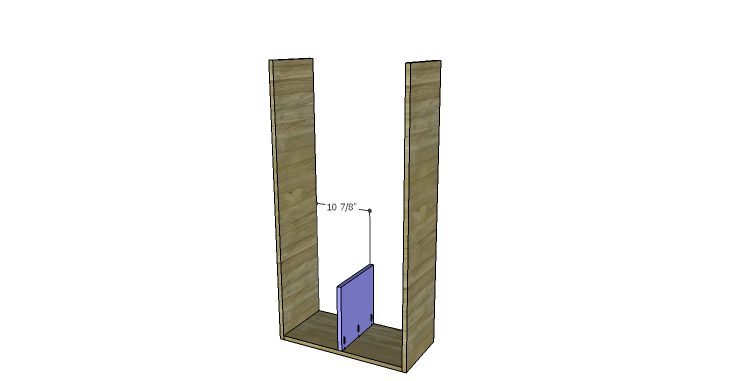
Step Two
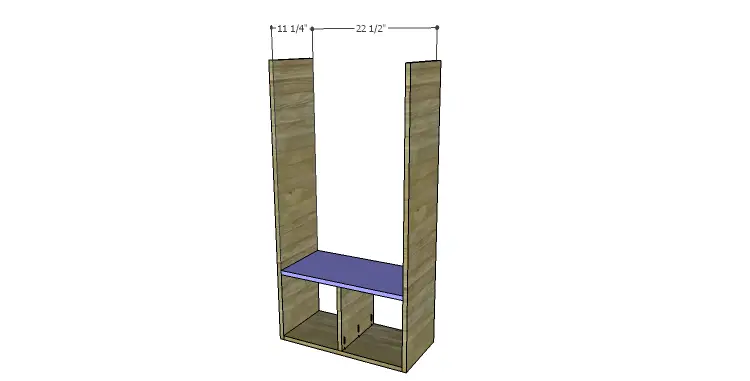
Cut the pieces for the dividers and the shelves. Drill pocket holes in each end of the shelves and the bottom edge only of each divider. Position the first divider on the bottom as indicated in the drawing then secure in place using glue and 1-1/4″ pocket hole screws.
Position the lower shelf on top of the divider then secure the shelf to the sides using glue and 1-1/4″ pocket hole screws. Drive a few 1-1/4″ brad nails through the shelf into the top of the divider.
Step Three
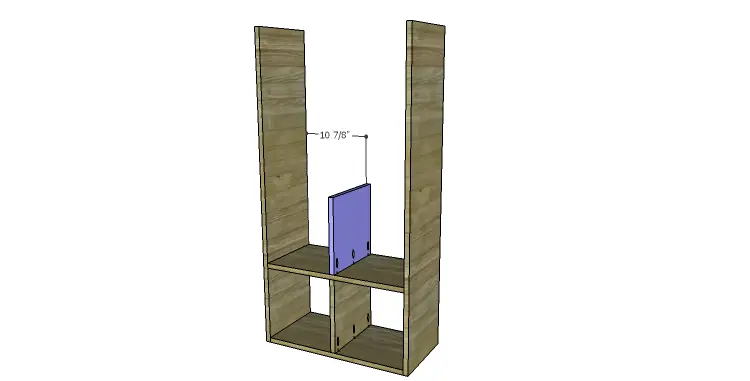
Position the middle divider on the shelf as indicated in the drawing, securing in place using glue and 1-1/4″ pocket hole screws.
Position the next shelf on top of the middle divider, securing the shelf to the sides and the middle divider in the same manner as the first shelf.
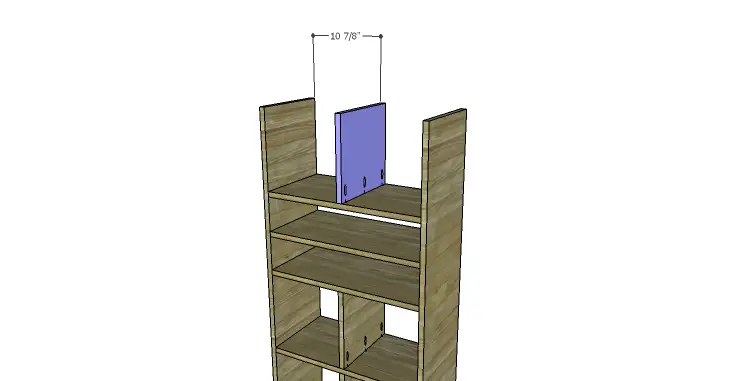
Install the next two shelves (no dividers) portioning them as indicated in the drawings. Secure to the sides using glue and 1-1/4″ pocket hole screws.

Step Four
Position the upper divider on the shelf as indicated in the drawing, securing in place using glue and 1-1/4″ pocket hole screws.
Step Five
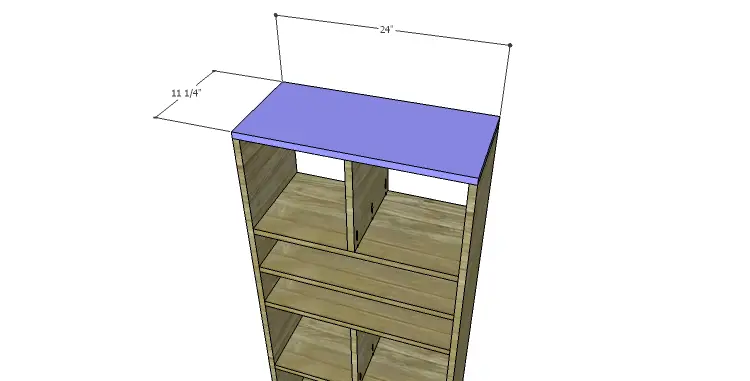
Cut the piece for the top. Secure to the sides and upper divider using glue and 1-1/4″ brad nails.
Step Six
Cut the piece for the back. Secure the back to the sides, top, bottom, shelves, and dividers using glue and 1-1/4″ brad nails.
Step Seven
Cut the pieces for the drawer boxes. Cut the notch in each drawer front using a jigsaw.
Drill pocket holes in all four edges of the drawer box bottom pieces, as well as each end of the sides. Secure the sides to the bottom using glue and 1-1/4″ pocket hole screws.
Secure the drawer box front and back to the sides and bottom using glue and 1-1/4″ pocket hole screws.

Step Eight
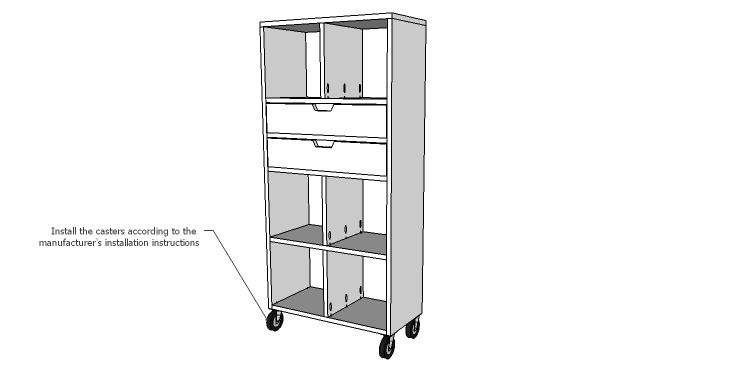
Install the casters on the bottom of the cabinet according to the manufacturer’s installation instructions.
Finish as desired, then apply a coat of paste wax to the bottom of each drawer to help them slide smoothly in the openings.
This would be a great piece in a kid’s bedroom, in a family room, or even in a mudroom or entryway to corral backpacks or shoes! The DIY plans to build a Rolling Storage cubby are pretty straightforward but if you have any questions, please leave a comment below or contact me at cher {at} designsbystudioc {dot} com!
Originally posted 2014-10-06 08:00:13.
I would love to have a few of these in the craft room!
I know what you mean, Alecia – I could use several myself! Thank you for stopping by!