
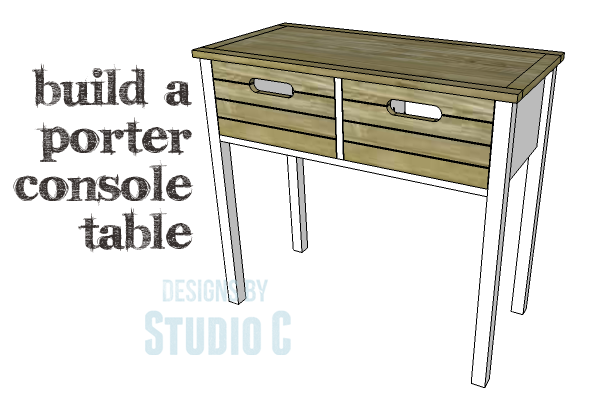
DIY Plans to Build a Porter Console Table
A Console Table with Solid Crate Drawers
This console table is a really quick and easy build. The DIY plans to build a Porter Console Table feature two drawers with hand-holds and grooves cut in the fronts to resemble crates. With the exception of the top and bottom panels, the console table and drawers use straight off-the-shelf lumber and should be fairly inexpensive!
Materials:
- 1-1/4″ pocket hole screws (<– affiliate link!)
- 1-1/4″ brad nails
- Wood glue
- Sandpaper (100, 150, 220 grits)
- Finishing supplies (primer & paint, or stain, sealer)
- Paste Wax
Lumber:
- 2 – 1×2 at 6′
- 2 – 1×10 at 8′
- 2 – 2×2 at 6′
- 1 – 4′ x 4′ sheet of 3/4″ plywood
Cut List:
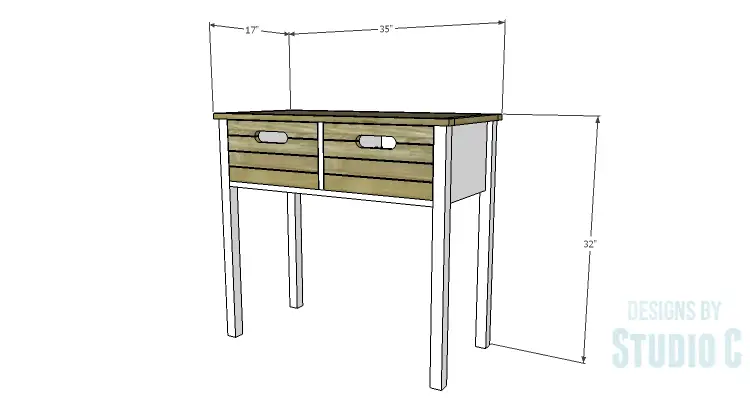
- 4 – 2×2 at 31-1/4″ – Legs
- 2 – 1×10 at 13″ – Side Panels
- 1 – 1×10 at 31″ – Back
- 1 – 1×2 at 31″ – Front Stretcher
- 1 – 3/4″ plywood at 13″ x 31″ – Bottom
- 1 – 1×10 (ripped to 8-1/2″ wide) at 14-1/2″
- 1 – 3/4″ plywood at 14″ x 32″ – Top Panel
- 2 – 1×2 at 14″ – Top Trim Sides
- 2 – 1×2 at 35″ – Top Trim Front & Back
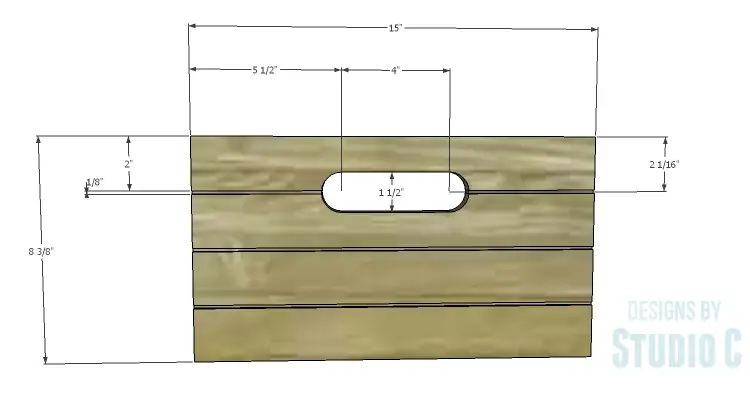
- 2 – 1×10 (ripped to 8-3/8″ wide) at 15″ – Drawer Front
- 2 – 3/4″ plywood at 13″ x 13-1/2″ – Drawer Box Bottoms
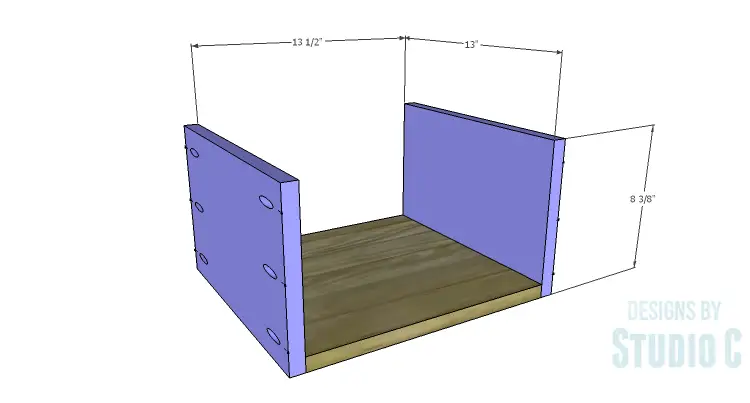
- 4 – 1×10 (ripped to 8-3/8″ wide) at 13″ – Drawer Box Sides
- 2 – 1×10 (ripped to 8-3/8″ wide) at 15″ – Drawer Box Back
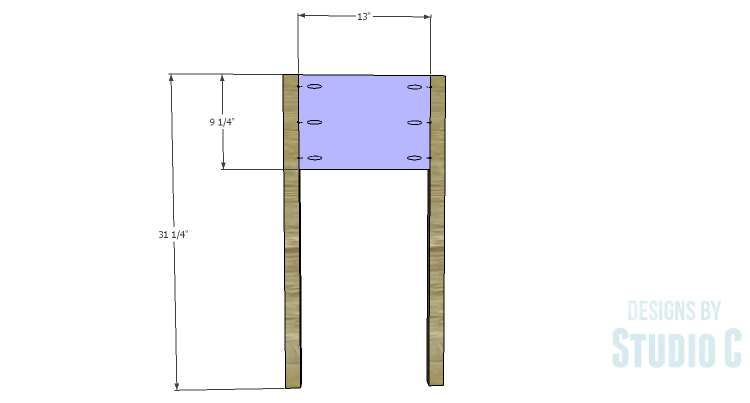
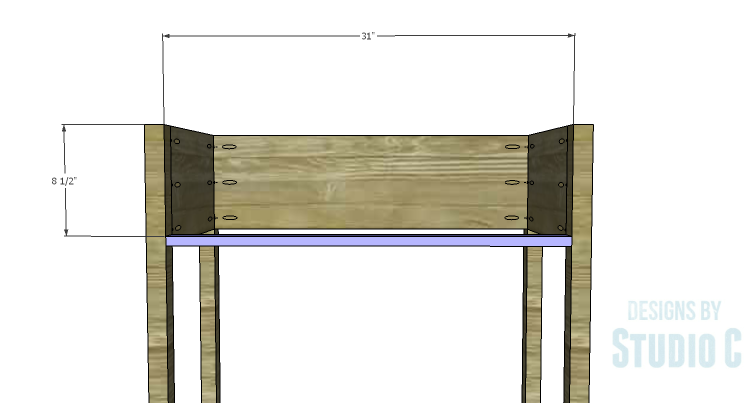
Step One
Cut the pieces for the legs and the side panels. With the pocket hole jig set for 3/4″ material, drill pocket holes in each end of the side pieces. Secure the sides to the legs using glue and 1-1/4″ pocket hole screws. The back face of the side pieces will be flush with the inside faces of the legs.
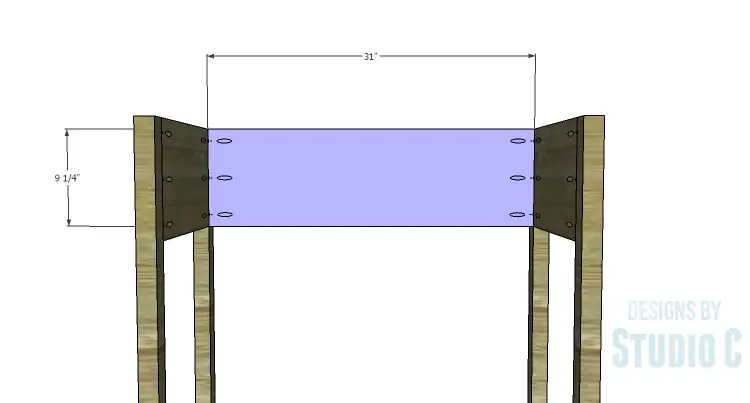
Step Two
Cut the piece for the back and drill pocket holes in each end. Secure the back piece to the legs using glue and 1-1/4″ pocket hole screws. The back face of the back piece will be flush with the inside faces of the legs.
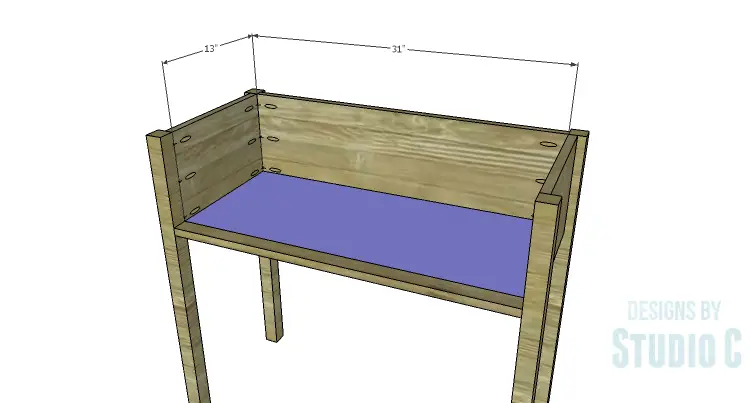
Step Three
Cut the piece for the front stretcher and drill pocket holes in each end. Secure the front stretcher to the front legs using glue and 1-1/4″ pocket hole screws. Orient the piece so the pocket holes face down and will not have to be filled.
Step Four
Cut the piece for the bottom and drill pocket holes in all four edges. Secure the bottom to the lower edge of the sides and back, and to the front stretcher using glue and 1-1/4″ pocket hole screws. The top face of the bottom panel will be flush with the top face of the front stretcher.
Step Five
Cut the piece for the divider. Drill pocket holes in the back edge and the lower edge. Secure the divider to the back and bottom panels using glue and 1-1/4″ pocket hole screws.

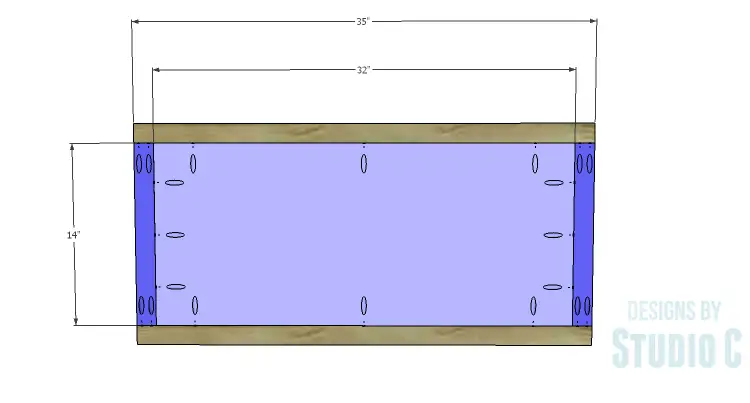
Step Six
Cut the pieces for the top panel and the top trim. Drill pocket holes in all four edges of the panel, and each end of the shorter pieces. Secure the side trim pieces first, using glue and 1-1/4″ pocket hole screws, then secure the front and back trim pieces.
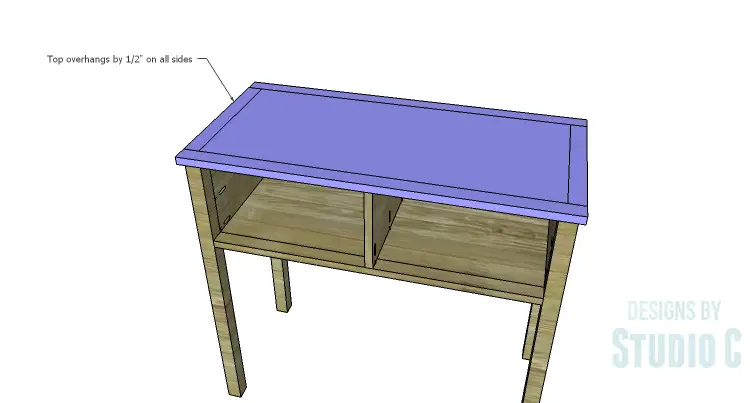
Position the top so that it overhangs the cabinet by 1/2″ on all sides securing in place using glue and 1-1/4″ pocket hole screws.
Step Seven
Cut the pieces for the drawer fronts. It will be easier to cut the hand-holds first, then cut the grooves in the board. Mark the position for the hand holds and cut the holes using a 1-1/2″ paddle bit or hole saw. Connect the two holes with straight lines cut using a jigsaw. For a detailed tutorial, click here.
The grooves in the drawer fronts can be cut by using a straight bit on a router with a guide, or by running the pieces through the table saw with the blade set to a 1/8″ depth. The grooves are completely optional!
Step Eight
Cut the pieces for the drawer box bottoms, sides, and back. Drill pocket holes in all four edges of the bottom as well as in each end of the side pieces. Secure the side pieces to the bottom using glue and 1-1/4″ pocket hole screws, then secure the front and back pieces.
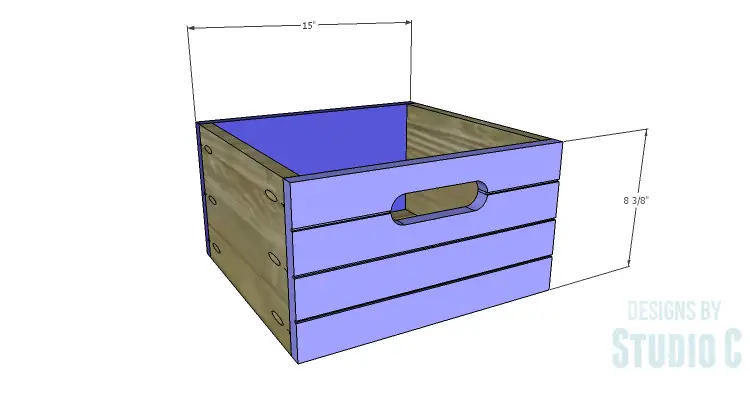
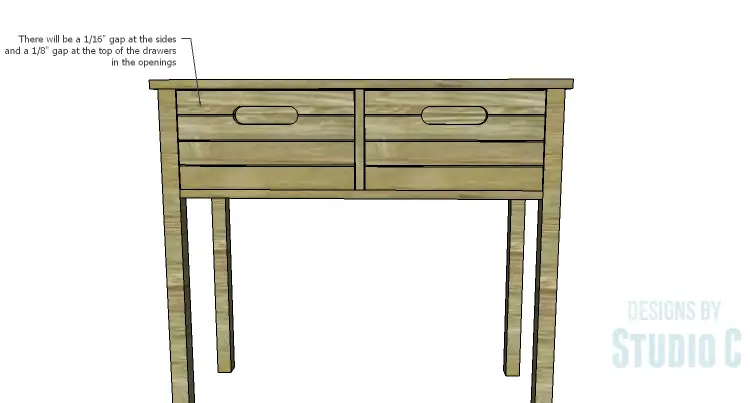
Finish as desired, then apply a coat of paste wax to the sides and bottom of the drawers so they slide smoothly in the openings.
There are so many nifty ways to finish the table and drawers – the top and drawers can be left plain while the rest of the cabinet is painted, a rustic weathered finish can be used, or just a clear coat. If you build from this plan or any others, I would love to see the finished result – contact me at cher {at} designsbystudioc {dot} com! Have any questions about the DIY plans to build a Porter Console Table? Leave a comment below!