
DIY Plans to Build a Nell End Table
A Simple and Easy End Table with a Drawer
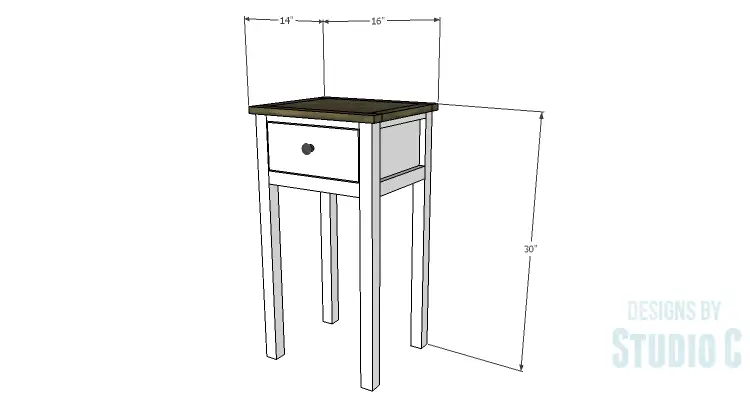
This is the perfect plan for those new to woodworking… The DIY plans to build a Nell End Table feature long legs (which are easily shortened), a drawer, and wood drawer slides. This is a great table for a simple decor style, and can easily be completed in a few hours!
Materials:
- 1-1/4″ pocket hole screws (<– affiliate link!)
- 2-1/2″ pocket hole screws
- 1-1/4″ brad nails
- Cabinet pull
- Wood glue
- Sandpaper (100, 150, 220 grits)
- Finishing supplies (primer & paint, or stain, sealer)
Lumber:
- 2 – 1×2 at 6′
- 1 – 1×6 at 8′
- 2 – 2×2 at 8′
- 1 – 2′ x 4′ sheet of 3/4″ plywood
Cut List:
- 4 – 2×2 at 29-1/4″ – Legs
- 2 – 1×2 at 10″ – Side Framing
- 2 – 2×2 at 10″ – Side Framing
- 2 – 1×6 at 10″ – Side Panels
- 2 – 1×2 at 12″ – Back Framing & Front Stretchers
- 2 – 2×2 at 12″ – Back Framing & Front Stretchers
- 1 – 1×6 at 12″ – Back Panel
- 2 – 1/2″ x 3/4″ at 10-3/4″ – Drawer Slides (these pieces can be ripped off of a 1×6 cut to length)
- 2 – 1×2 at 11″ – Top Side Trim
- 2 – 1×2 at 16″ – Top Side Trim
- 1 – 3/4″ plywood at 11″ x 13″ – Top Panel
- 1 – 3/4″ plywood at 9″ x 10-1/8″ – Drawer Box Bottom
- 2 – 1×6 (ripped to 5″ wide) at 10-1/8″ – Drawer Box Front & Back
- 2 – 1×6 (ripped to 5″ wide) at 10-1/2″ – Drawer Sides
- 1 – 1×6 (ripped to 5-1/4″ wide) at 11-3/4″ – Drawer Front
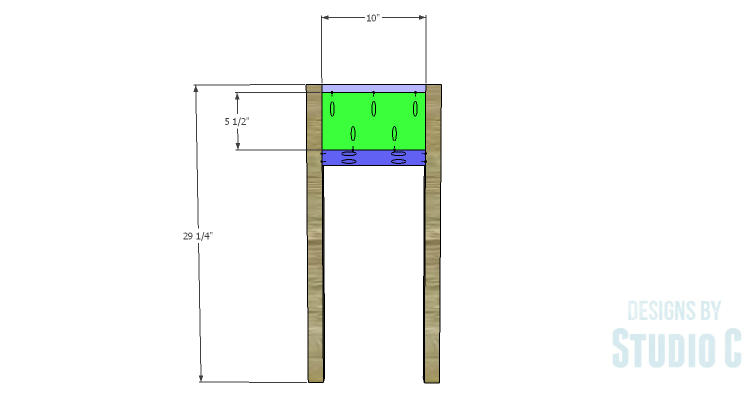
Step One
Cut the pieces for the legs, the side framing, and the side panels. With the pocket hole jig set for 1-1/2″ material, drill pocket holes in each end of the 2×2 framing. Secure the 2×2 framing to the legs using glue and 2-1/2″ pocket hole screws.
Set the pocket hole jig for 3/4″ material and drill pocket holes in each end of the 1×2 framing as well as the two long edges of the 1×6 panels. Secure the 1×2 framing to the legs using glue and 1-1/4″ pocket hole screws. Orient the pocket holes so they face up and will be hidden by the top.
Insert the panel into the frame and secure the panels using glue and 1-1/4″ pocket hole screws. The back face of the panels will be flush with the inside of the frames.
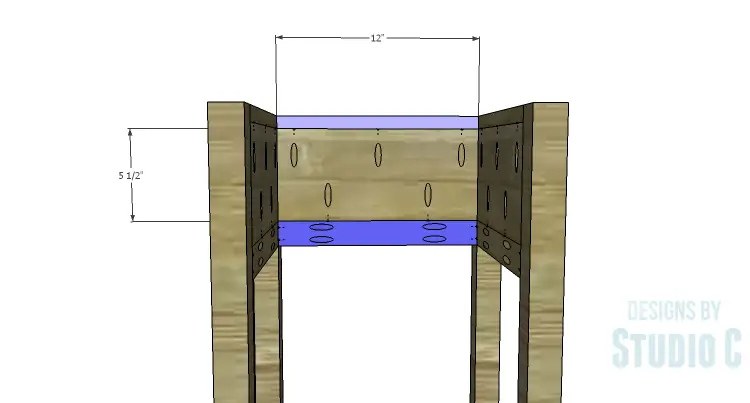
Step Two
Cut the pieces for the back framing, back panel, and front stretchers. Set the pocket hole jig set for 1-1/2″ material and drill pocket holes in each end of the 2×2 framing and stretcher. Secure the 2×2 framing and stretcher to the legs using glue and 2-1/2″ pocket hole screws.
Set the pocket hole jig for 3/4″ material and drill pocket holes in each end of the 1×2 framing and stretcher, as well as the two long edges of the 1×6 panel. Secure the 1×2 framing and stretcher to the legs using glue and 1-1/4″ pocket hole screws. Orient the pocket holes so they face up and will be hidden by the top.

Step Three
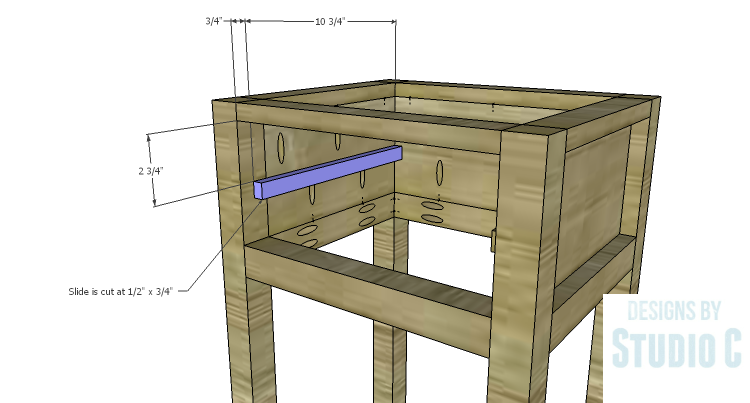
Cut the pieces for the drawer slides. Position the drawer slides as shown – the 3/4″ length will be the height and the 1/2″ length will be the width. The slides will be located 3/4″ back from the front edge of the legs and flush with the back. Secure the slides using glue and 1-1/4″ brad nails.
Step Four
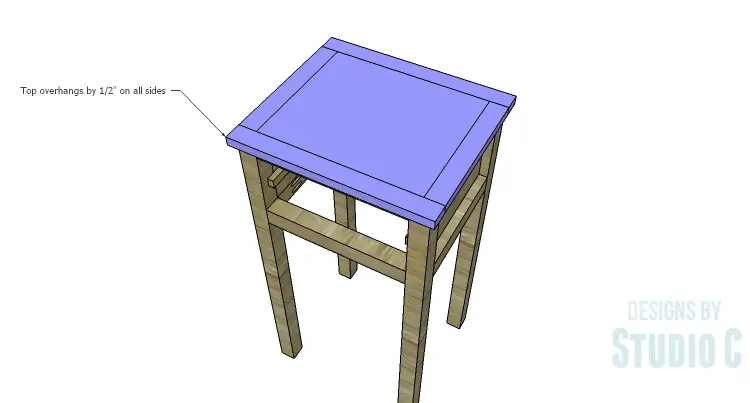
Cut the pieces for the top and the top trim. Drill pocket holes in each end of the shorter trim pieces as well as all four edges of the panel. Assemble the top as shown using glue and 1-1/4″ pocket hole screws.
The top will overhang by 1/2″ on all sides. Secure the top in place using glue and 1-1/4″ brad nails.

Step Five
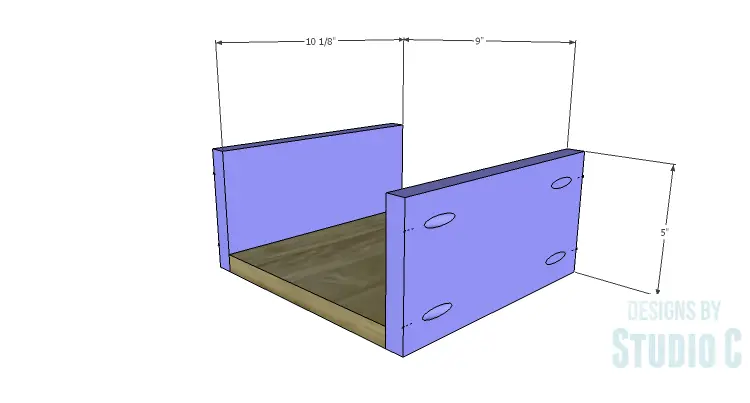
Cut the pieces for the drawer box. Drill pocket holes in each end of the front and back as well as all four edges of the bottom. Secure the front and back to the bottom using glue and 1-1/4″ pocket hole screws.
The sides will have 7/8″ wide by 3/8″ deep dadoes cut into them to allow for the drawer slides. The dadoes can be cut by using a router with a dado bit or by making multiple passes through a table saw. This tutorial on making your own drawer slides will be helpful.
Secure the sides to the drawer boxes using glue and 1-1/4″ pocket hole screws.

Step Six
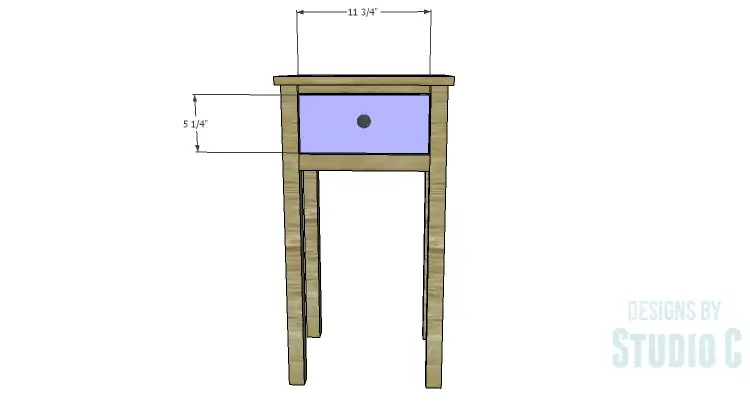
Cut the piece for the drawer front. Cut the pieces for the drawer fronts. Mark the position for the drawer pulls and drill the holes. Shim the drawer front in the opening – there will be a 1/8” gap around all sides – then drive screws through the holes for the drawer pulls into the drawer box. Open the drawer, and secure the drawer front using countersunk 1-1/4” screws from the inside. Remove the screws from the holes for the drawer pull then finish drilling the holes. Install the drawer pull. Take a look at this easy tutorial on installing drawer fronts.
Finish as desired.
The table would be an excellent addition to an entry way and built as a pair, would make great nightstands! Have any questions about the DIY plans to build a Nell End Table? Leave a comment below!