
DIY Plans to Build a Mayweather Tall Dresser
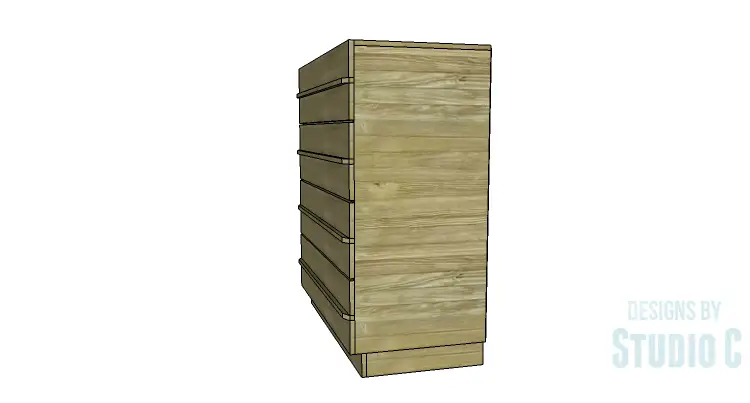
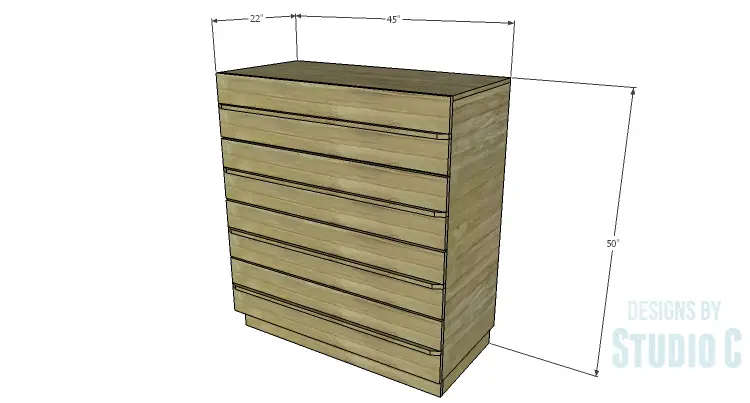
A Tall Dresser with Built-In Handles on the Drawer Fronts
Previously, I posted plans for the Mayweather Dresser which features built-in handles on the drawer fronts. The DIY plans to build a Mayweather Tall Dresser feature the same built-in handles but is taller and narrower in stature. This is another super-easy build and is an excellent choice for those new to woodworking!

Materials:
- 1-1/4″ pocket hole screws
- 1-1/4″ brad nails
- 4 sets of 20″ drawer slides (<– affiliate link!)
- Edge banding
- Wood glue
- Sandpaper (100, 150, 220 grits)
- Finishing supplies (primer & paint, or stain, sealer)
Lumber:
- 5 – 1×2 at 8′
- 1 – 1×6 at 4′
- 5 – 1×6 at 8′
- 6 – 1×10 at 8′
- 1 – 4′ x 8′ sheet of 1/4″ plywood
- 1 – 4′ x 8′ sheet of 3/4″ plywood
Cut List:
- 2 – 3/4″ plywood at 21-1/4″ x 45-1/4″ – Sides
- 1 – 3/4″ plywood at- 21-1/4″ x 43-1/2″ – Bottom
- 1 – 3/4″ plywood at 21-1/4″ x 45″ – Top
- 3 – 1×6 (ripped to 4″ wide) at 19-1/4″ – Base Supports
- 1 – 1×6 (ripped at 4″ wide) at 43-1/2″ – Kick Plate
- 6 – 1×2 at 43-1/2″ – Front & Back Stretchers
- 3 – 1×2 at 19-3/4″ – Stretcher Supports
- 1 – 1/4″ plywood at 44-1/4″ x 45-1/4″ – Back
- 8 – 1×10 (ripped to 9″ wide) at 20″ – Drawer Box Sides
- 8 – 1×10 (ripped to 9″ wide) at 41″ – Drawer Box Front & Back
- 4 – 1/4″ plywood at 19″ x 41″ – Drawer Box Bottom
- 8 – 1×6 (ripped to 5-1/4″ wide) at 45″ – Drawer Fronts
- 4 – 1×2 at 45″ – Drawer Fronts
Edge banding will be applied to the exposed edges of the plywood prior to assembly.
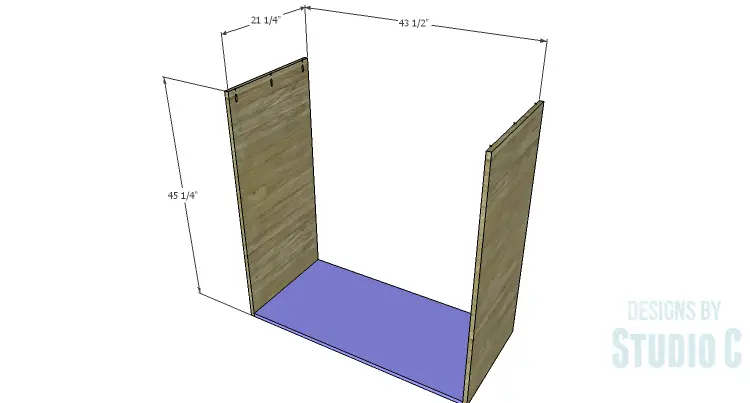
Step One
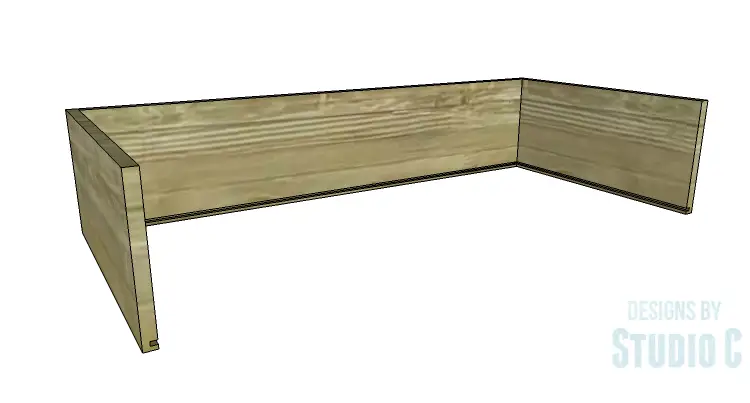
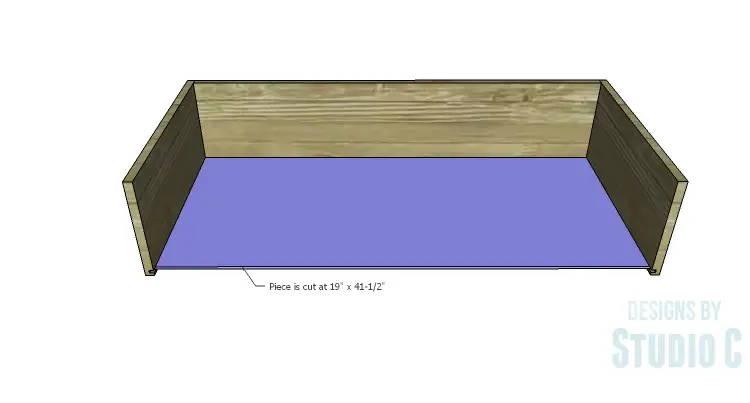
Cut the pieces for the sides and bottom. With the pocket hole jig set for 3/4″ material, drill pocket holes in each end of the bottom and the top edge of the sides. Secure the bottom to the sides using glue and 1-1/4″ pocket hole screws.
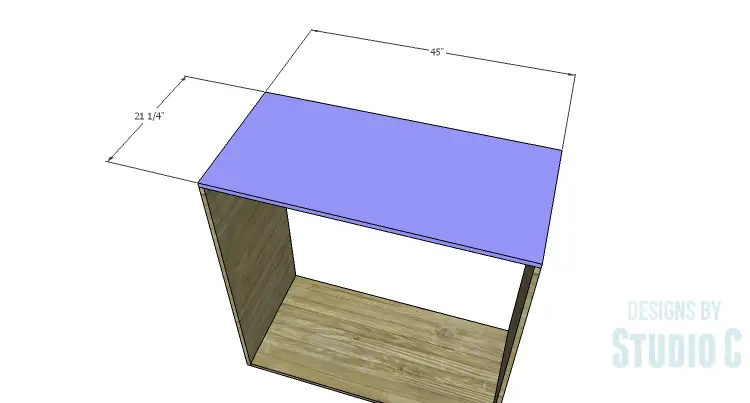
Step Two
Cut the piece for the top. Secure the top using glue and 1-1/4″ pocket hole screws through the top of the sides.
Step Three
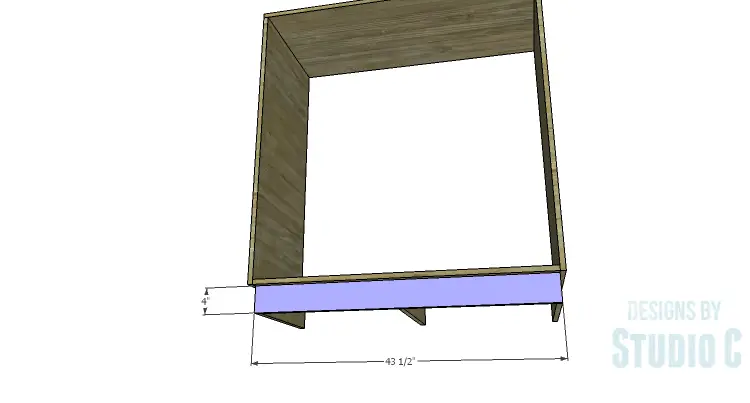
Cut the pieces for the bottom supports and drill pocket holes in one long edge of each piece. Secure the supports to the bottom as indicated in the drawing using glue and 1-1/4″ pocket hole screws.
Cut the piece for the kick plate. Secure the kick plate to the front of the supports using glue and 1-1/4″ brad nails.
Step Four
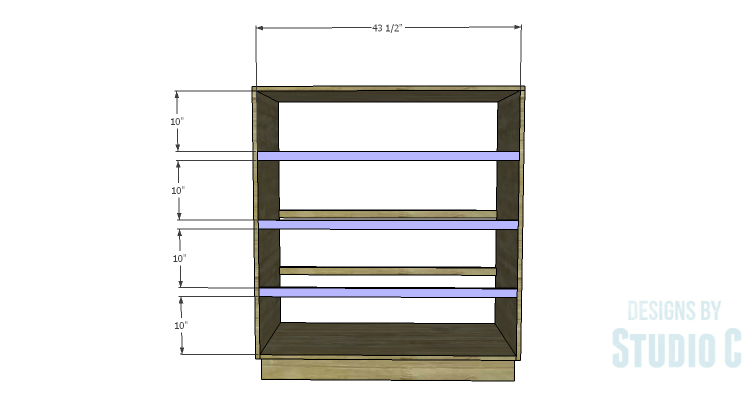
Cut the pieces for the front and back stretchers, and drill pocket holes in each end. Secure the stretchers to the sides as shown using glue and 1-1/4″ pocket hole screws.
Cut the pieces for the stretcher supports and drill pocket holes in each end. Secure the supports to the front and back stretchers using glue and 1-1/4″ pocket hole screws.

Step Five
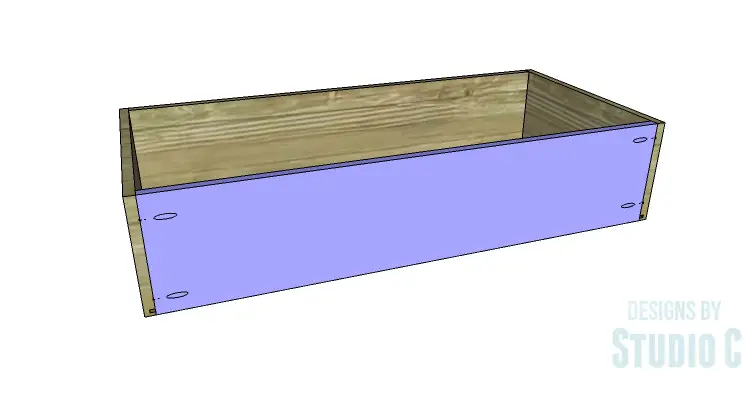
Cut the piece for the back. Secure the back using glue an 1-1/4″ brad nails.

Step Six
Cut the pieces for the drawer box sides, front, and back. Cut the groove in the bottom edge of each piece at 1/4″ wide by 1/4″ deep using a table saw or a router and a straight bit. Set the pocket hole jig for 3/4″ material and drill pocket holes in each end of the drawer box sides on the opposite side as the groove. Make sure that the pocket holes will not interfere with the groove. Secure the sides to the back using glue and 1-1/4″ pocket hole screws.
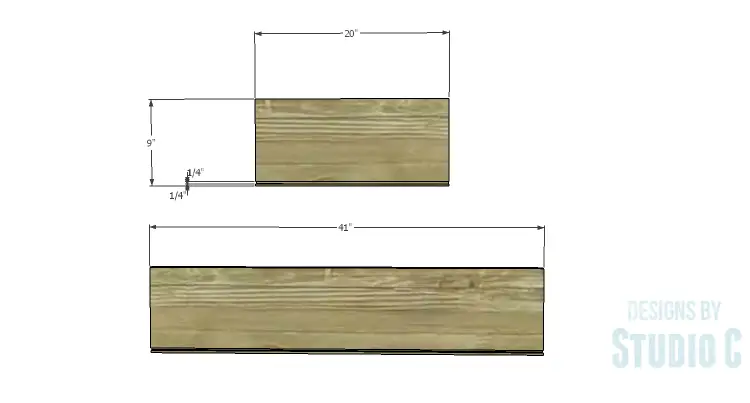
Step Seven
Cut the piece for the drawer bottom. Slide the bottom into the grooves in the sides and back. The piece should fit snugly but not too tight.
Step Eight
Insert the front edge of the drawer box bottom into the groove on the drawer box front. Secure the drawer box sides to the drawer box front using glue and 1-1/4″ pocket hole screws.
Step Nine
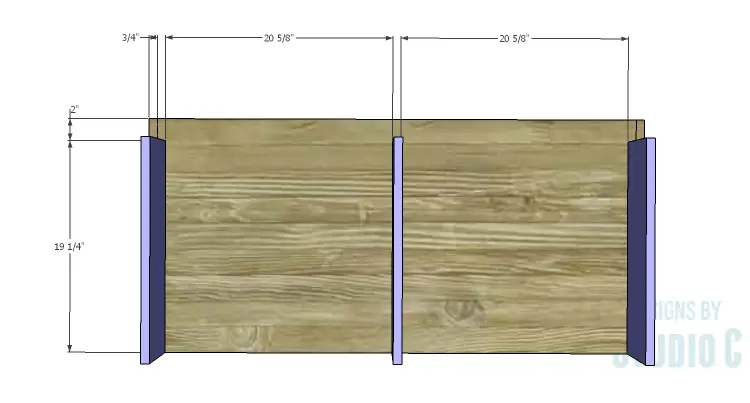
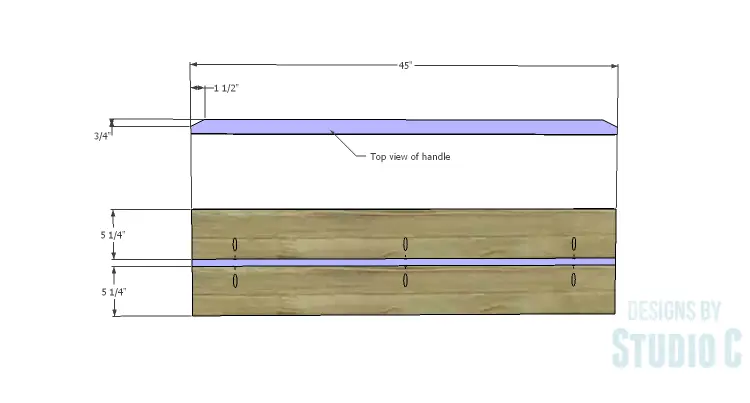
Cut the pieces for the drawer fronts. Cut the 1×2 handles to length, then cut the bevels in the edges as shown in the drawing.
Drill pocket holes along one long edge of each drawer front piece, staggering the pocket holes so they won’t interfere with each other. Sandwich the 1×2 between the wider pieces using glue and 1-1/4″ pocket hole screws.
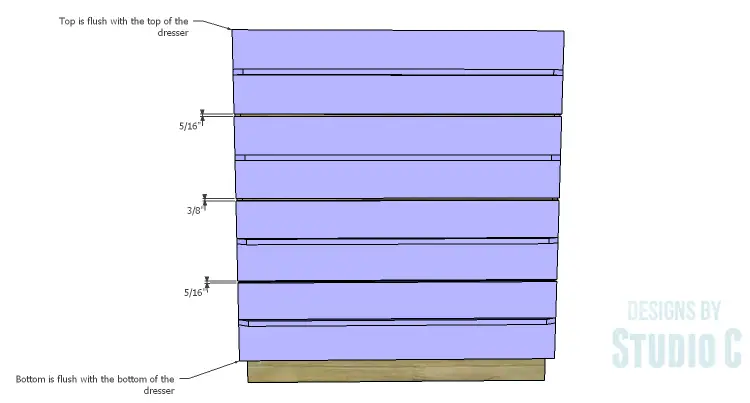
Step Ten
The sides of the longer drawer fronts will be flush with the outside of the cabinet. The top edge of the uppermost drawer front will be flush with the top, and the bottom edge of the lower drawer front will be flush with the bottom. Secure each drawer front to the corresponding drawer box using glue and 1-1/4″ brad nails. Open the drawers, then secure the fronts from the inside using 1-1/4″ screws.
The remaining drawer fronts will be spaced as indicated in the drawing.
Finish as desired.
This is a great dresser that will look at home in any room, in any style. Paired with the original Mayweather Dresser, it would make a fabulous pair of storage pieces! Have any questions about the DIY plans to build a Mayweather Tall Dresser? Leave a comment below!