
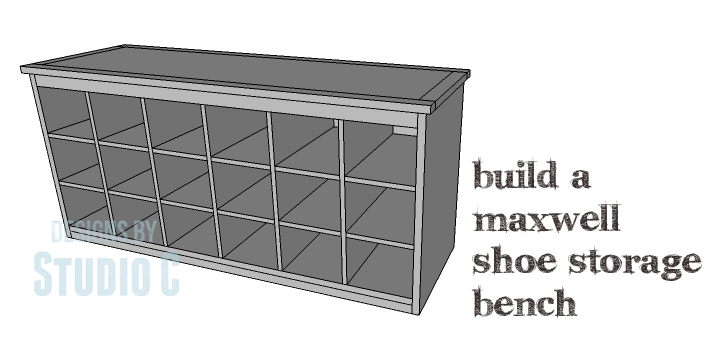
DIY Plans to Build a Maxwell Shoe Storage Bench
An Excellent Bench with Built-In Storage
Tired of the mudroom or entryway being a huge mess with piles of shoes and umbrellas? The DIY plans to build a Maxwell Shoe Storage Bench can help solve that problem! Featuring eighteen cubbies, the bench is the ultimate in shoe and umbrella storage, and would be an excellent place to stash pet leashes or a few hat and scarf sets!
Materials:
- 1-1/4″ pocket hole screws (<– affiliate link!)
- 1-3/4″ brad nails
- Edge banding, optional
- Wood glue
- Sandpaper (100, 150, 220 grits)
- Finishing supplies (primer & paint, or stain, sealer)
Lumber:
- 3 – 1×2 at 4′
- 2 – 1×2 at 6′
- 1 – 4′ x 8′ sheet of 1/2″ plywood
- 1 – 4′ x 8′ sheet of 3/4″ plywood
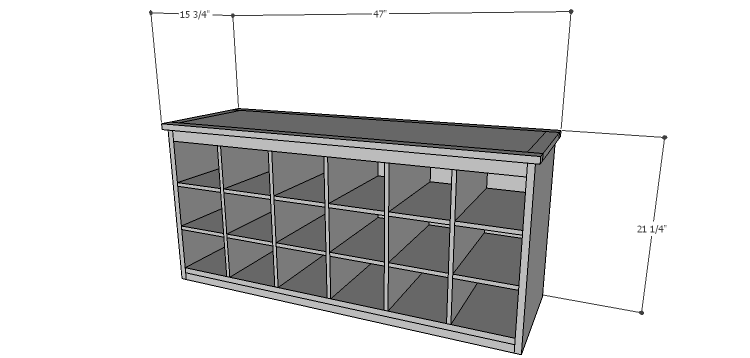
Cut List:
- 2 – 3/4″ plywood at 14-3/4″ x 20-1/2″ – Sides
- 1 – 3/4″ plywood at 14-3/4″ x 44-1/2″ – Bottom
- 3 – 1×2 at 44-1/2″ – Bottom Stretcher & Upper Stretcher
- 1 – 3/4″ plywood at 19″ x 44-1/2″ – Back
- 5 – 1/2″ plywood at 14″ x 19″ – Cubby Dividers
- 2 – 1/2″ plywood at 14″ x 44-1/2″ – Cubby Dividers
- 1 – 3/4″ plywood at 12-3/4″ x 44″ – Top Panel
- 2 – 1×2 at 12-3/4″ – Top Side Trim
- 2 – 1×2 at 47″ – Top Front & Back Trim
Click on the drawings for a larger view!
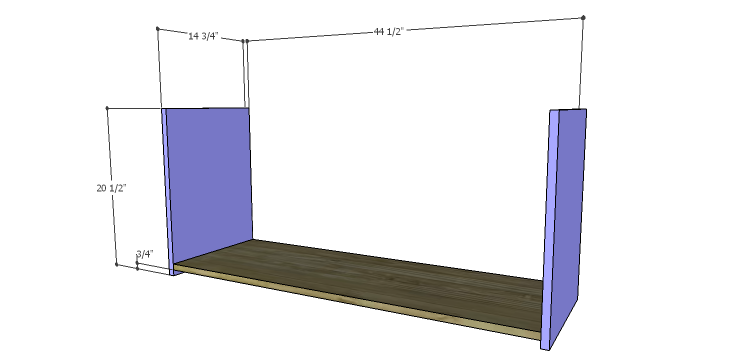
Step One
Edge banding will be applied to the exposed edges of the plywood prior to assembly!
Cut the pieces for the sides and the bottom. With the pocket hole jig set for 3/4″ material, drill pocket holes in each end of the bottom piece. Position the bottom 3/4″ up from the lower edge of the sides then secure in place using glue and 1-1/4″ pocket hole screws.
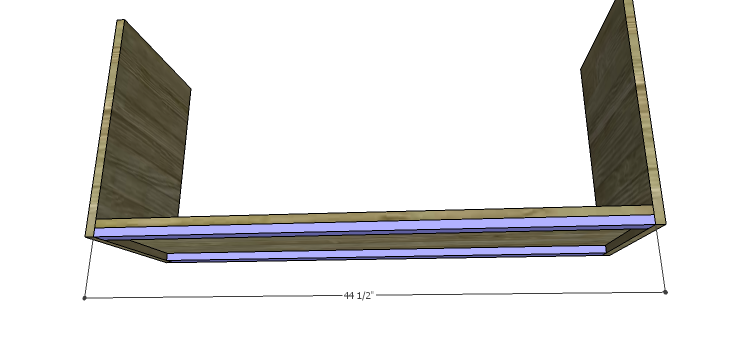
Step Two
Cut the pieces for the bottom stretchers. Secure to the underside of the bottom piece (between the sides) using glue and 1-1/4″ brad nails through the bottom and lower edge of the sides.
Step Three
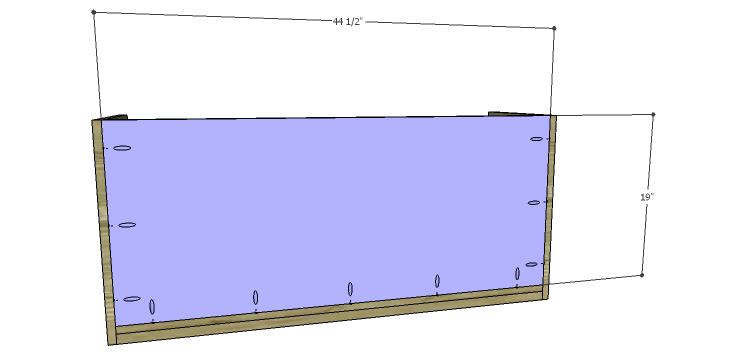
Cut the piece for the back. Drill pocket holes in the bottom and side edges of the back piece. Secure to the sides and bottom of the cabinet using glue and 1-1/4″ pocket hole screws.
Step Four
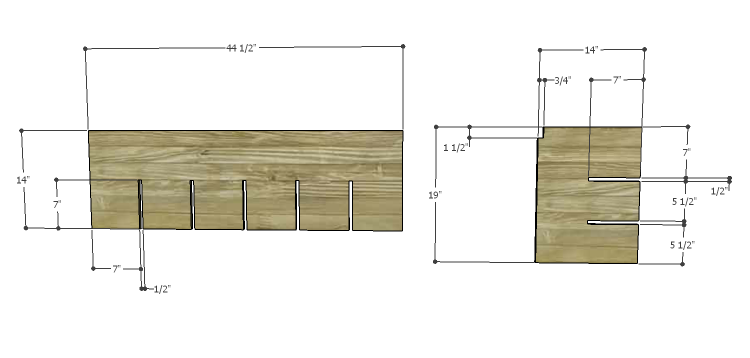
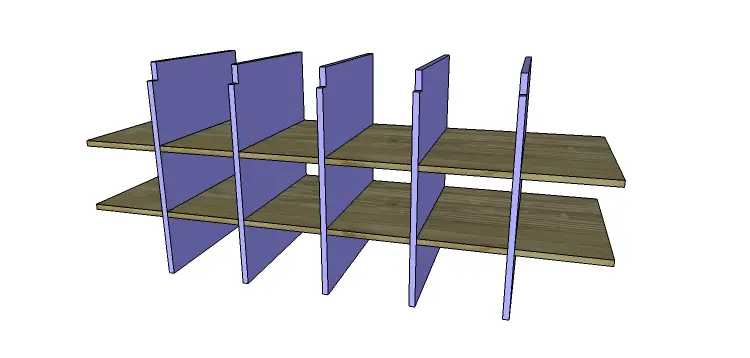
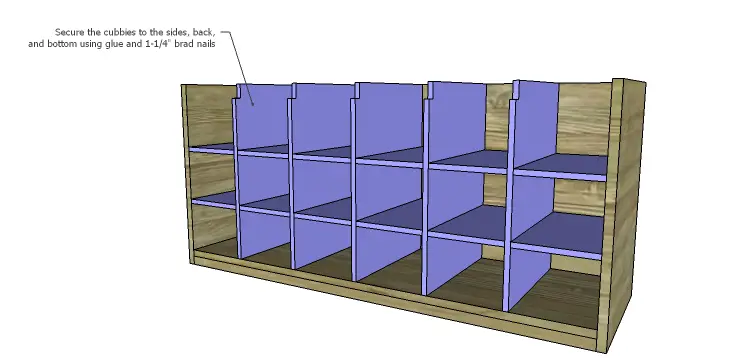
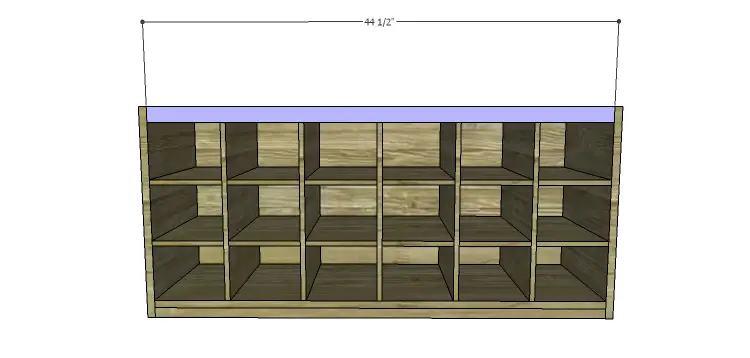
Cut the pieces for the cubbies. Cut the pieces to size first then cut the notches using a jigsaw. Assemble the cubbies by sliding the pieces together, then position the assembly in the cabinet. Secure the cubby assembly to the sides, back, and bottom of the cabinet using glue and 1-1/4″ brad nails.
Step Five
Cut the piece for the upper stretcher. Position the stretcher between the sides at the top and it will rest in the notches of the vertical cubbies. Secure the stretcher in place using glue and 1-1/4″ brad nails.
Step Six
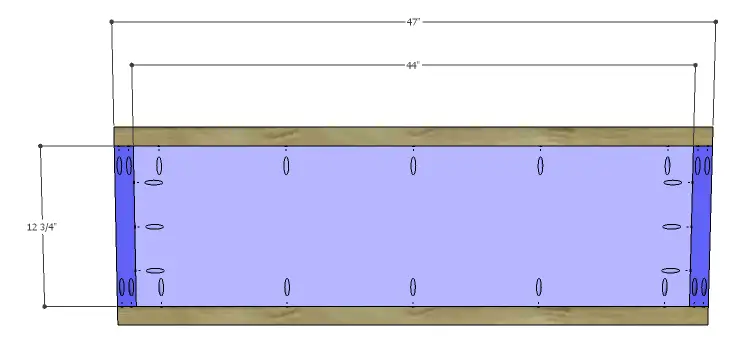
Cut the pieces for the top panel and the top trim. Drill pocket holes in all four edges of the top panel as well as each end of the shorter trim pieces. Secure the top trim side pieces to the panel first using glue and 1-1/4″ pocket hole screws, then secure the front and back. A decorative edge can be routed on the trim, if desired.
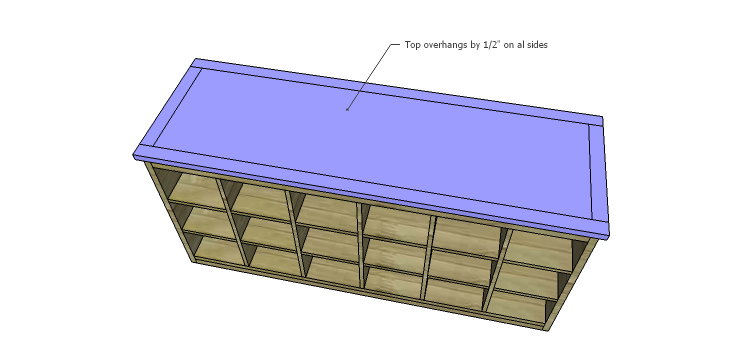
The top will overhang the cabinet by 1/2″ on all sides. Secure the top in place using glue and 1-3/4″ brad nails through the top into the sides, back and front stretcher.
Finish as desired.
This bench can be useful as storage in other areas of the home as well. Rolled towels can be placed in the cubbies for storage and seating in a bathroom. The bench can be used at the foot of a kid’s bed to store shoes, small toys, and sweaters. The possibilities are endless! have any questions about the DIY plans to build a Maxwell Shoe Storage Bench? Leave a comment below or contact me at cher {at} designsbystudioc {dot} com!
Originally posted 2014-10-29 08:00:10.
I love this idea. I’d like to be able to store some larger boots (10+ inches high). Has anyone altered this design to fit larger shoes/boots?
Hi, Kelly! For boots, you could eliminate the lower shelf and not cut the notches in the dividers. That would leave an area about 10″ tall. Otherwise, one or two of the dividers could be eliminated, and the shelves shortened to make an open area approximately 17″ tall with cubbies still intact on the side. Hope this helps!
[…] Build this shoe storage bench featuring eighteen cubbies with these free step-by-step woodworking plans. […]
[…] Here are plans for another nifty storage bench: Maxwell Shoe Storage Bench… […]
can the depth of the bench be altered? There is a side door of the house that opens into a wall that runs parallel to where the bench will be placed. I don’t want the door to be obstructed by the bench so I was hoping to modify the depth to 13 1/2” – 13 3/4”. Can that work if I modify the plans from the 14 3/4” depth?
Thank you
Absolutely, Charlie! I don’t see any problems with that at all. Hope this helps! Good luck with your project and please share photos when you build it!