
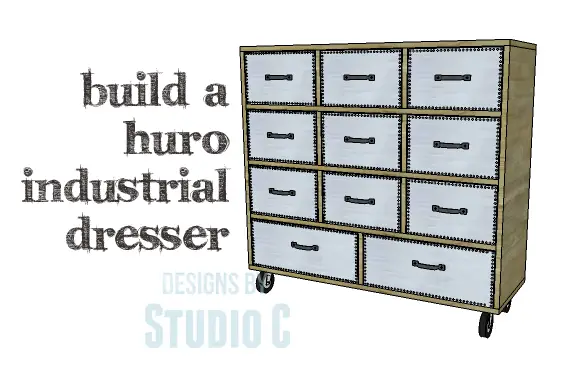
DIY Plans to Build a Huro Industrial Dresser
An Industrial Dresser with Metal Drawer Fronts
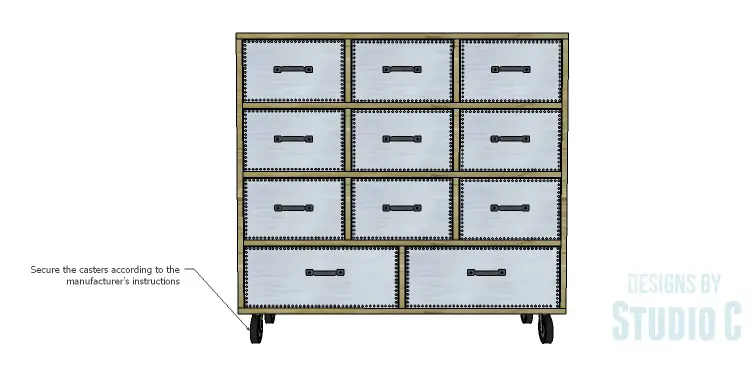
This dresser is really one of the simplest builds yet packs a stylish punch! The DIY plans to build a Huro Industrial Dresser feature a total of eleven drawers with metal and nailhead trim on each drawer. The dresser also features 4″ casters for mobility! This is truly an inexpensive build and can be completed in a weekend!
Materials:
- 1-1/4″ pocket hole screws (<– affiliate link!)
- 1-1/4″ brad nails
- Edge banding, optional
- Aluminum flashing
- Upholstery nails or nailhead trim
- Cabinet pulls – utility handles are perfect for this project!
- 4″ casters
- Wood glue
- Sandpaper (100, 150, 220 grits)
- Finishing supplies (primer & paint, or stain, sealer)
- Paste Wax
Lumber:
- 1 – 4′ x 4′ sheet of 3/4″ plywood
- 2 – 4′ x 8′ sheets of 3/4″ plywood
Cut List:
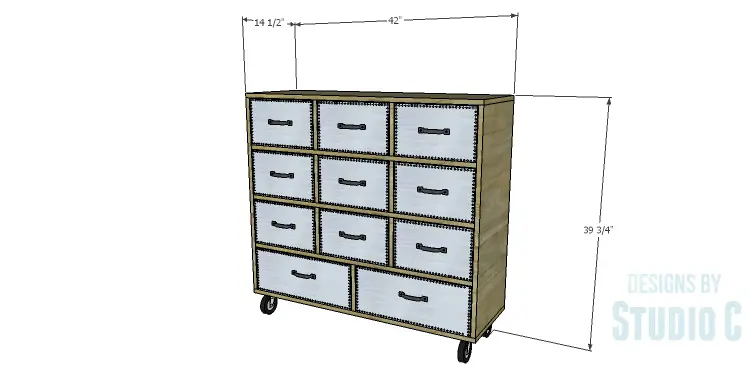
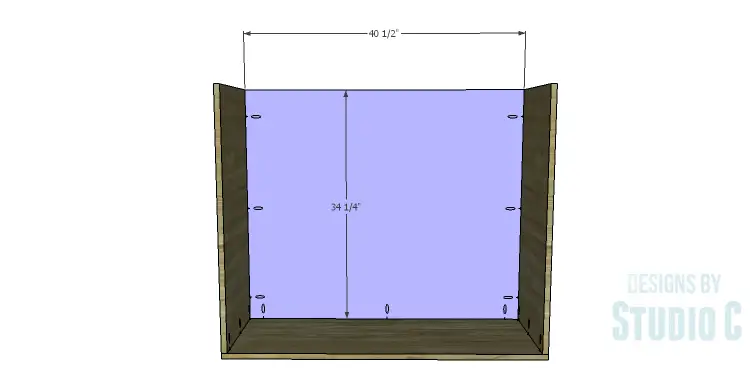
- 2 – 3/4″ plywood at 14-1/2″ x 34-1/4″ – Sides
- 1 – 3/4″ plywood at 14-1/2″ x 42″ – Bottom
- 1 – 3/4″ plywood at 34-1/4″ x 40-1/2″ – Back
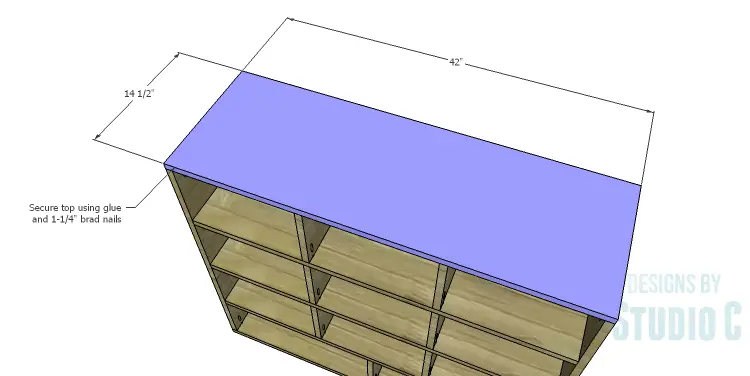
- 1 – 3/4″ plywood at 14-1/2″ x 42″ – Top
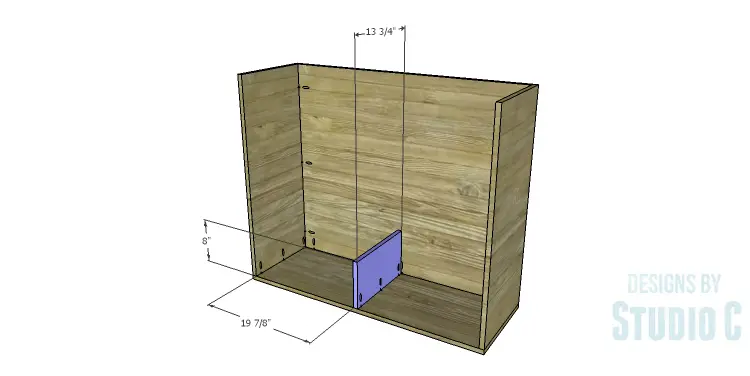
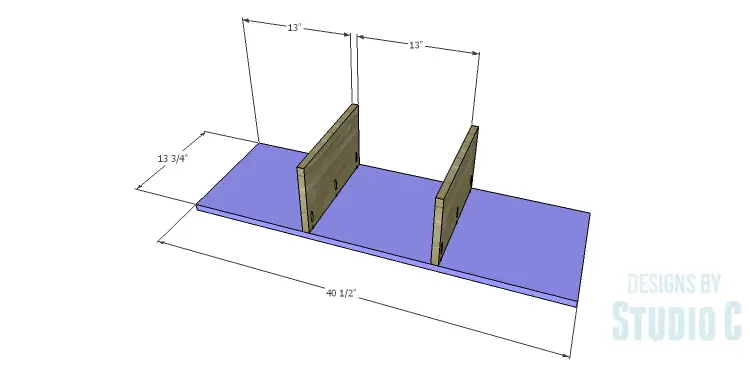
- 7 – 3/4″ plywood at 8″ x 13-3/4″ – Dividers
- 3 – 3/4″ plywood at 13-3/4″ x 40-1/2″ – Shelves
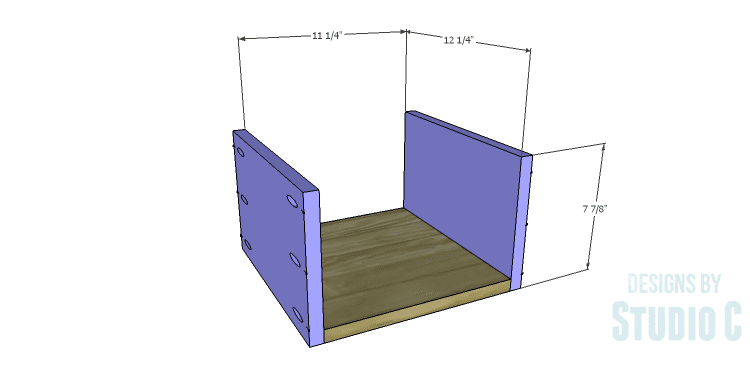
- 9 – 3/4″ plywood at 11-1/4″ x 12-1/4″ – Small Drawer Box Bottom
- 18 – 3/4″ plywood at 7-7/8″ x 12-1/4″ – Small Drawer Box Sides
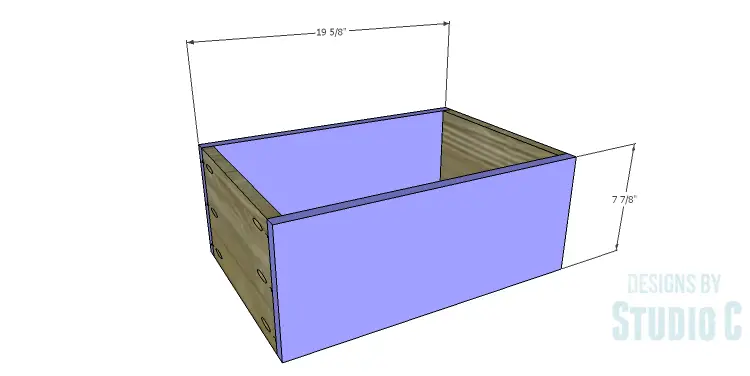
- 18 – 3/4″ plywood at 7-7/8″ x 12-3/4″ – Small Drawer Box Front & Back
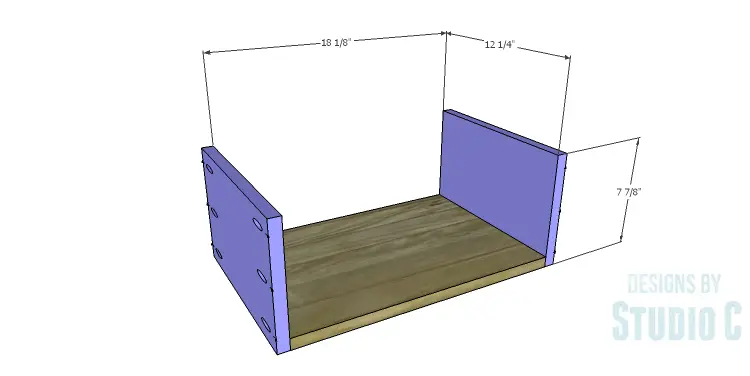
- 2 – 3/4″ plywood at 12-1/4″ x 18-1/8″ – Large Drawer Box Bottom
- 4 – 3/4″ plywood at 7-7/8″ x 12-1/4″ – Large Drawer Box Sides
- 4 – 3/4″ plywood at 7-7/8″ x 19-5/8″ – Large Drawer Box Front & Back
Step One
Edge banding will be applied to the exposed edges of the plywood prior to assembly.
Cut the pieces for the sides and the bottom. With the pocket hole jig set for 3/4″ material, drill pocket holes in the lower edge of the side pieces. Secure the sides to the bottom using glue and 1-1/4″ pocket hole screws.

Step Two
Cut the piece for the back and drill pocket holes in the side edges as well as the bottom edge. Secure the back to the bottom and sides using glue and 1-1/4″ pocket hole screws.
Step Three
Cut the pieces for the dividers and drill pocket holes in the lower edge of each piece. Secure one divider to the bottom as shown using glue and 1-1/4″ pocket hole screws.
Step Four
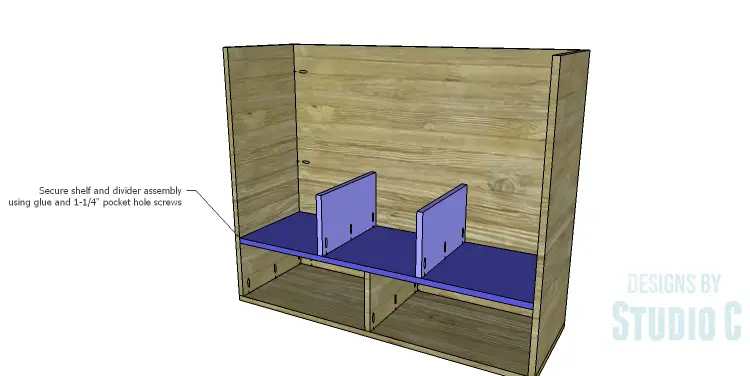
Cut the pieces for the shelves and drill pocket holes in each end. Secure a pair of dividers to the lowest shelf as shown using glue and 1-1/4″ pocket hole screws.
Position the shelf on the lower divider then secure in place using glue and 1-1/4″ pocket hole screws through the ends of the shelf into the sides. Add a few 1-1/4″ brad nails through the shelf into the lower divider.
Step Five
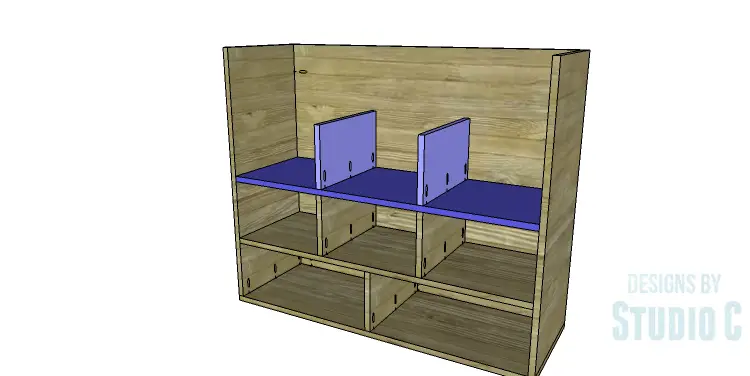
Position the next shelf on top of the dividers, securing in place using glue and 1-1/4″ pocket hole screws. Add a few brad nails through the shelf into the dividers below.
Position the next set of dividers directly over the dividers on the previous shelf securing in place using glue and 1-1/4″ pocket hole screws.
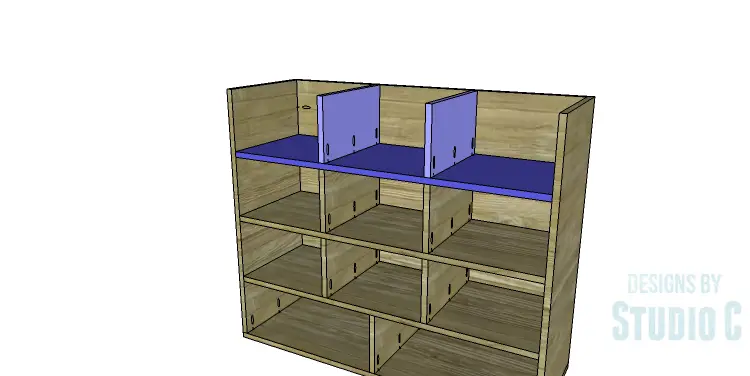
Repeat the process with the remaining dividers and shelf.
Step Six
Cut the piece for the top. Secure to the sides and back as well as the last set of dividers using glue and 1-1/4″ brad nails.
Step Seven
Cut the pieces for the drawer boxes. Drill pocket holes in all four edges of the bottom as well as each end of the sides. Assemble the drawer boxes as shown using glue and 1-1/4” pocket hole screws.
Finish the drawers and the cabinet as desired. Apply a coat of paste wax to the bottom of each drawer to help the drawers slide easily on the shelves.

Step Eight
Cut pieces of flashing to fit each drawer front. The flashing can be secured to the drawer fronts using an adhesive, then further secured along the edges with the upholstery nails or upholstery nailhead trim.
Mark the position for the handles and secure the handles in place. Add the casters to the bottom of the cabinet.
This is a great furniture piece to use as toy storage in a family room or in a kid’s room. This is also a fabulous piece to use as media storage, or storage in a dining room! The DIY plans to build a Huro Industrial Dresser are quick and easy! If there are any questions, please leave a comment below!
Originally posted 2014-12-18 08:00:03.