
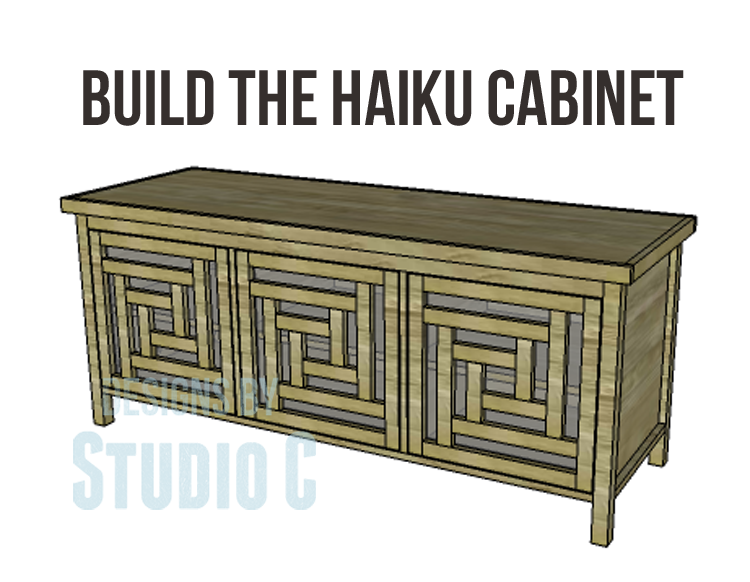
DIY Plans to Build the Haiku Cabinet
A Cabinet with Fantastic Door Detail!
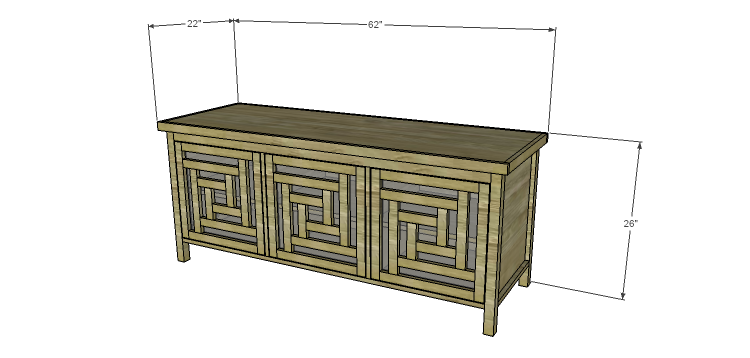
This roomy little cabinet has a very interesting twist… Not only does it feature three doors with a shelf inside each cubby, but it has very interestingly pieced doors with glass behind the frame! The DIY plans to build a Haiku cabinet only look complicated but are very easy and should be quite the inexpensive build!
Materials:
- 1-1/4″ pocket hole screws (<– affiliate link!)
- 1-1/4″ brad nails
- Edge banding, optional
- Cabinet pulls
- Wood glue
- Sandpaper (100, 150, 220 grits)
- Finishing supplies (primer & paint, or stain, sealer)
Lumber:
- 9 – 1×2 at 8′
- 1 – 1×3 at 6′
- 2 – 2×2 at 6′
- 2 – 4′ x 8′ sheets of 3/4″ plywood
Cut List:
- 4 – 2×2 at 25-1/4″ – Legs
- 4 – 1×2 at 17″ – Side Frames
- 2 – 3/4″ plywood at 17″ x 19-3/4″ – Side Panels
- 3 – 1×2 at 57″ – Back Frame & Lower Front Stretcher
- 1 – 3/4″ plywood at 19-3/4″ x 57″ – Back Panel
- 1 – 3/4″ plywood at 17″ x 57″ – Bottom
- 2 – 3/4″ plywood at 18-1/2″ x 20-1/2″ – Dividers
- 3 – 3/4″ plywood at 17-1/2″ x 18-1/2″ – Shelves
- 1 – 1×3 at 57″ – Upper Front Stretcher
- 1 – 3/4″ plywood at 20-1/2″ x 60-1/2″ – Top
- 2 – 1×2 at 20-1/2″ – Top Trim Sides
- 2 – 1×2 at 62″ – Top Trim Front & Back
- 6 – 1×2 at 15-1/4″ – Door Frame
- 6 – 1×2 at 17-3/4″ – Door Frame
- 6 – 1×2 at 12-1/4″ – Door Panel
- 6 – 1×2 at 11-3/4″ – Door Panel
- 6 – 1×2 at 6-1/4″ – Door Panel
- 6 – 1×2 at 5-3/4″ – Door Panel
- 2 – 1/4″ glass or Plexiglas at 15-3/4″ x 16-1/4″ – Door Glass
 Step One
Edge banding will be applied to the exposed edges of the plywood prior to assembly!
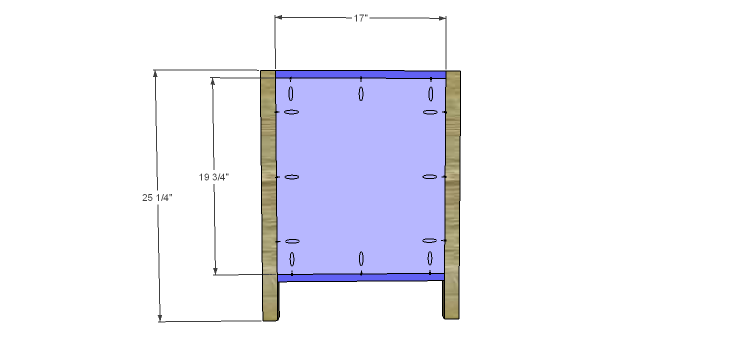
Cut the pieces for the legs, side frames, and side panels. With the pocket hole jig set for 3/4″ material, drill pocket holes in each end of the frame pieces and all four edges of the panels. Secure the frame pieces to the legs using glue and 1-1/4″ pocket hole screws. Orient the pocket holes so they face away from the center panel – this way they won’t have to be filled!
Insert the panel in the frame opening and secure using glue and 1-1/4″ pocket hole screws. The back face of the panel will be flush with the inside face of the legs and frame pieces.
Step Two
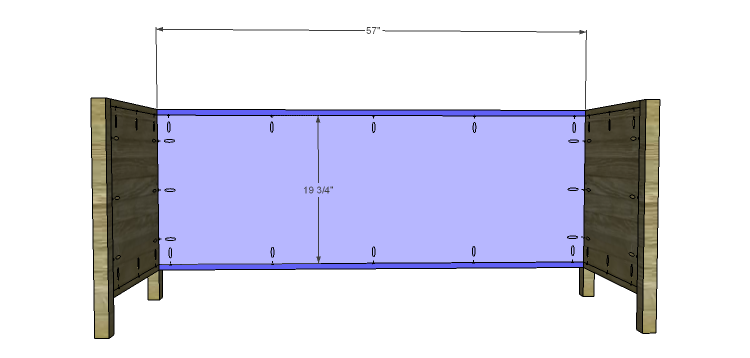
Cut the pieces for the back frame and panel. Drill pocket holes in each end of the frame pieces and all four edges of the panel. Secure the frame pieces to the legs using glue and 1-1/4″ pocket hole screws, again orienting the pocket holes to face away from the panel.
Step Three
Cut the piece for the lower front stretcher and drill pocket holes in each end. Secure to the legs using glue and 1-1/4″ pocket hole screws, orienting the piece so the pocket holes face down.
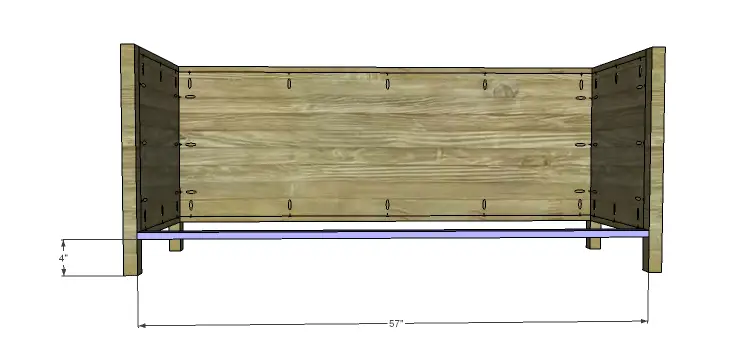
Step Four
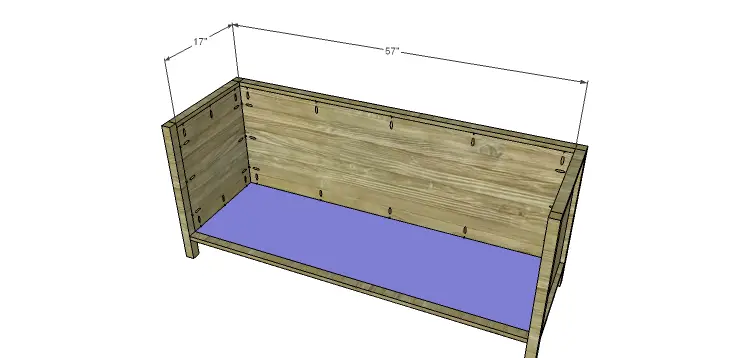
Cut the piece for the bottom and drill pocket holes in all four edges. Secure to the lower stretcher and frame pieces using glue and 1-1/4″ pocket hole screws. The top face of the bottom will be flush with the top face of the front stretcher.
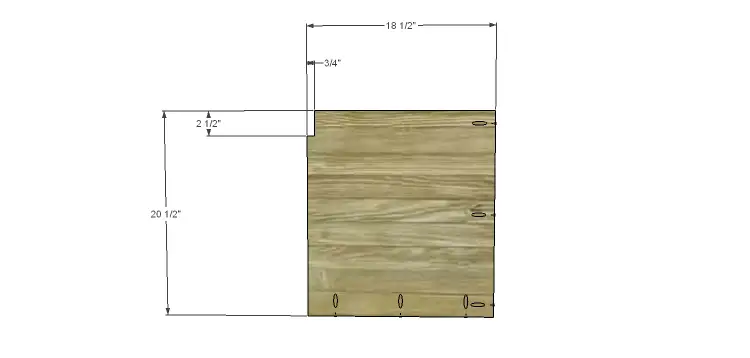
 Step Five
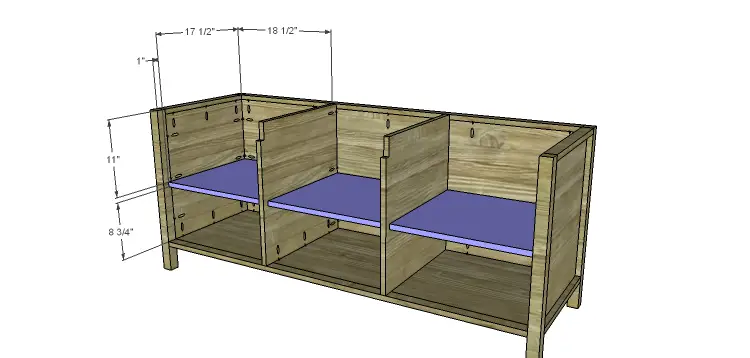
Cut the pieces for the dividers, cutting the notch in the top with a jigsaw. Drill pocket holes in the back and bottom edges, then secure to the back and bottom of the cabinet using glue and 1-1/4″ pocket hole screws.
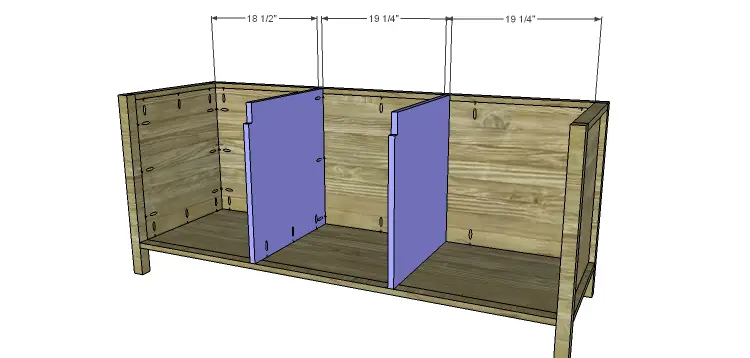
Step Six
Cut the pieces for the shelves and drill pocket holes in the side edges as well as the back edge. Secure to the sides and dividers as shown using glue and 1-1/4″ pocket hole screws.
Step Seven
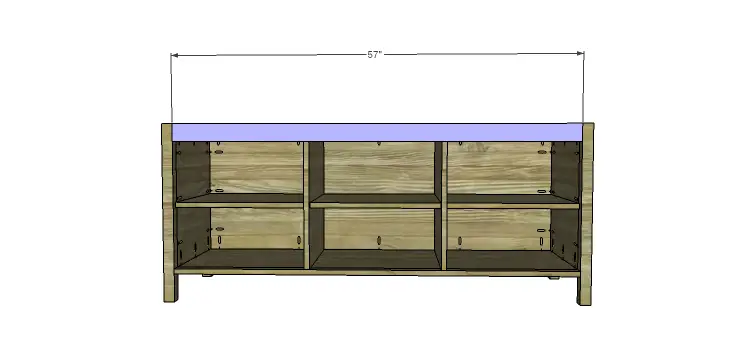
Cut the piece for the upper front stretcher and drill pocket holes in each end. Secure to the legs using glue and 1-1/4″ pocket hole screws. Add a few 1-1/4″ brad nails through the stretcher into the dividers.
Step Eight
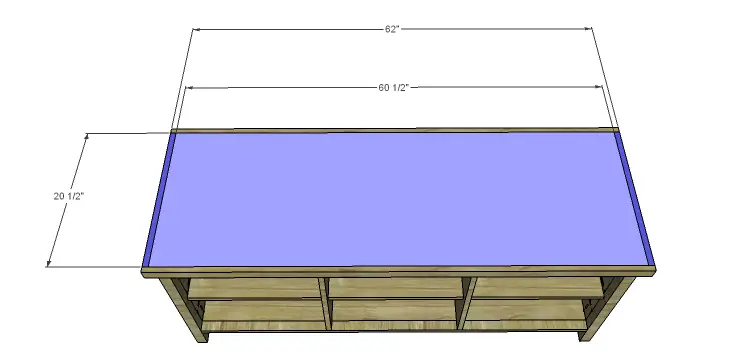
Cut the piece for the top. The top will overhang all sides of the cabinet by 1/4″. Secure in place using glue and 1-1/4″ brad nails.
Cut the pieces for the top trim. Install the side trim pieces first, securing them with glue and 1-1/4″ brad nails, then secure the front and back. The top edge of the trim pieces will be flush with the top face of the top.
Step Nine
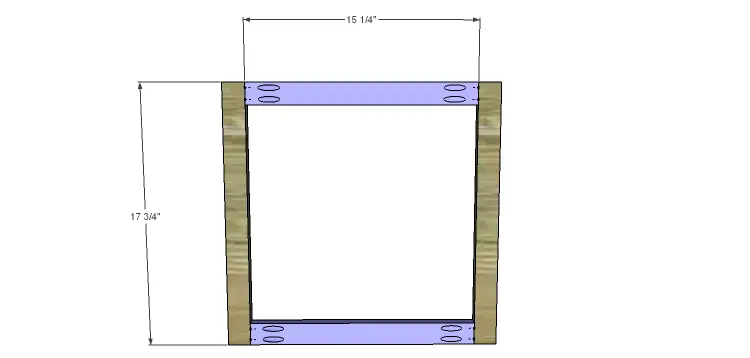
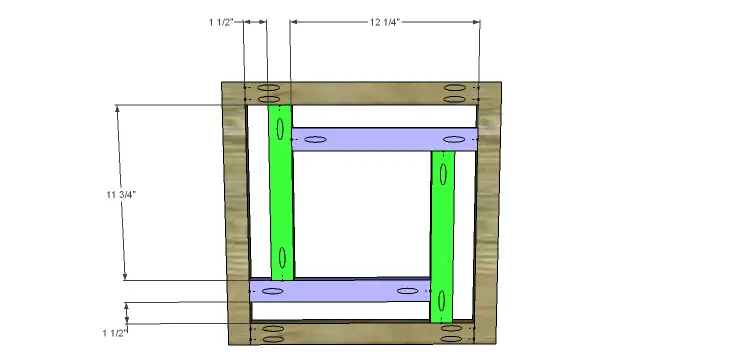
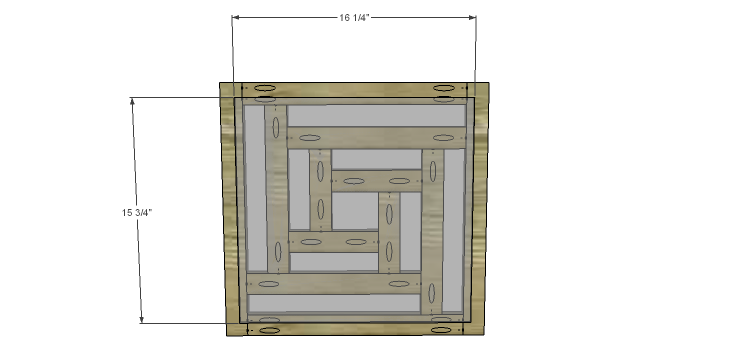
Cut the pieces for the door frames. Drill pocket holes in each end of the shorter pieces then assemble the frame using glue and 1-1/4″ pocket hole screws.
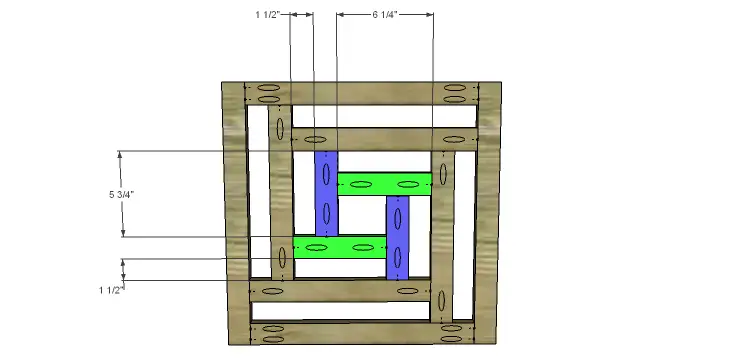
Cut the pieces for the center panels and drill one pocket hole in each end of each piece. The pieces will connect to each other as well as the outer frame with 1-1/2″ spacing. Secure one piece to the frame (it doesn’t matter which one you start with) using glue and a 1-1/4″ pocket hole screw, the build on that by securing the others as shown.
Step Ten
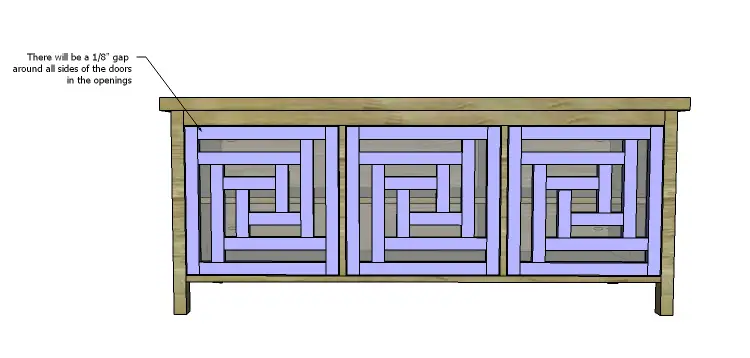
Cut the pieces of glass or Plexiglas. Secure to the back of each door frame (with at least 1/2″ overlap) using mirror clips or turn buttons.
Install the hinges on the doors, then install the doors in the cabinet. Install the cabinet pulls.
 Finish as desired!
This cabinet would make a great media stand or even a bar cabinet! The glass in the doors could be replaced with 1/4″ plywood panels or decorative punched aluminum. have any questions about the DIY plans to build the Haiku cabinet? Leave a comment below!
Originally posted 2014-05-28 08:00:09.
Downright gorgeous! I’ve got some aged Scotch looking for a place to live…
The Scotch would look beautiful in this cabinet, Linda! Lol!