
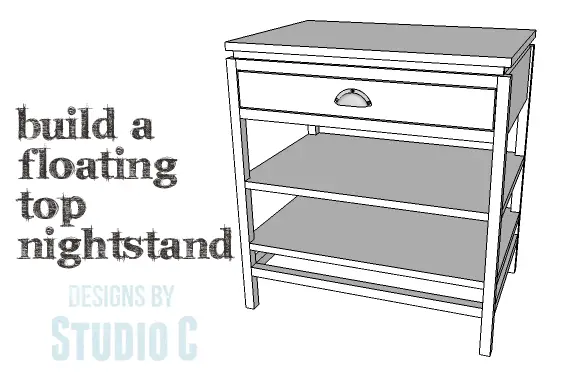
DIY Plans to Build a Floating Top Nightstand
A Unique Nightstand That Is Easy to Build
Hey there! This nightstand is not only super stylish, but it’s also incredibly functional. You’ll love the DIY plans to build it, as they include two shelves and a handy drawer. What’s really cool is that the top of the nightstand appears to be floating, thanks to a recessed frame underneath. And guess what? You can easily find all the materials you need, like square dowels, at your local home improvement store. Best part? This project is a breeze and can be finished in just one weekend!
Materials:
- 1-1/2″ pocket hole screws
- 1-1/4″ brad nails
- 1-1/4″ screws
- Edge banding (<– affiliate link!)
- 1 set of 16″ Drawer slides
- Cabinet pull
- Wood glue
- Sandpaper (100, 150, 220 grits)
- Finishing supplies (primer & paint, or stain, sealer)
Lumber:
- 3 – 1/2″ square dowels at 4′ long *
- 8 – 1″ square dowels at 4′ long *
- 1 – 1×3 at 8′
- 1 – 1×4 at 2′
- 1 – 1×8 at 6′
- 1 – 2′ x 2′ sheet of 1/4″ plywood
- 1 – 4′ x 8′ sheet of 3/4″ plywood
* Dowels are generally sold in 4′ lengths
Cut List:
- 4 – 1″ square dowels at 26-1/2″ – Legs
- 2 – 1×8 (ripped to 5-3/4″ wide) at 16″ – Side Panels
- 1 – 1×8 (ripped to 5-3/4″ wide) at 24″ – Back Panel
- 2 – 1″ square dowels at at 16″ – Lower Stretchers
- 2 – 1″ square dowels at at 24″ – Lower Stretchers
- 2 – 3/4″ plywood at 18″ x 26″ – Shelves
- 2 – 1″ square dowels at at 24″ – Drawer Stretchers
- 1 – 1″ square dowel at 16″ – Top Center Support
- 3 – 1/2″ square dowels at 16″ – Top Support Frame
- 2 – 1/2″ square dowels at 24-7/8″ – Top Support Frame
- 1 – 3/4″ plywood at 18″ x 26″ – Top
- 2 – 1×3 at 14-1/2″ – Drawer Box Sides
- 2 – 1×3 at 23″ – Drawer Box Front & Back
- 1 – 1/4″ plywood at 15″ x 22″ – Drawer Box Bottom
- 1 – 1×4 at 23-3/4″ – Drawer Front

Edge banding will be applied to the exposed edges of the plywood prior to assembly.
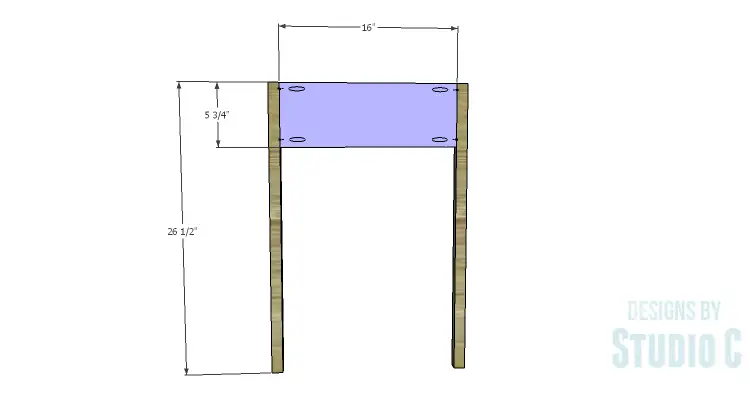
Step One
Cut the pieces for the legs and the side panels. With the pocket hole jig set for 3/4″ material, drill pocket holes in each end of the side panels. Secure the panels to the legs using glue and 1-1/2″ pocket hole screws. The back face of the panels will be flush with the inside faces of the legs.
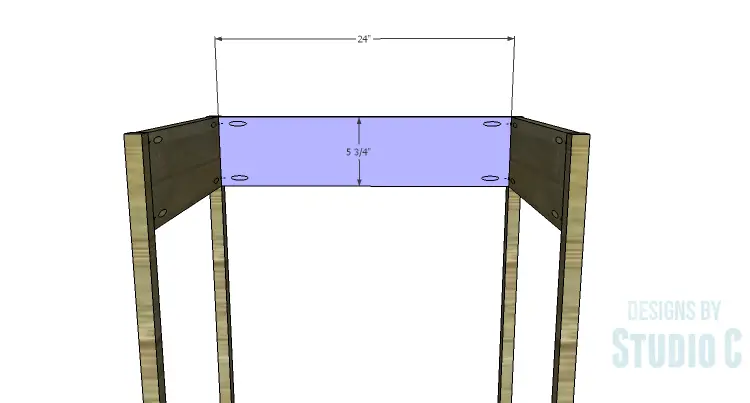
Step Two
Cut the piece for the back and drill pocket holes in each end. Secure the back to the legs using glue and 1-1/2″ pocket hole screws. The back face of the panel will be flush with the inside faces of the legs.
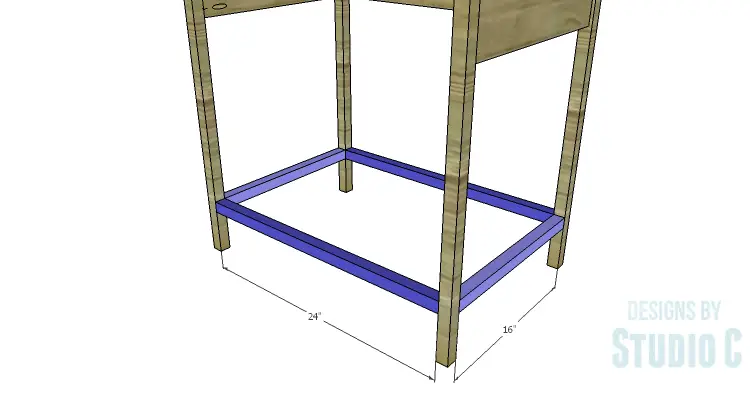
Step Three
Cut the pieces for the lower stretchers. Set the pocket hole jig for 1″ material and drill a pocket hole in each end of each piece. Secure the stretchers to the legs using glue and 1-1/2″ pocket hole screws. Orient the pocket holes so they face down and will not have to be filled.
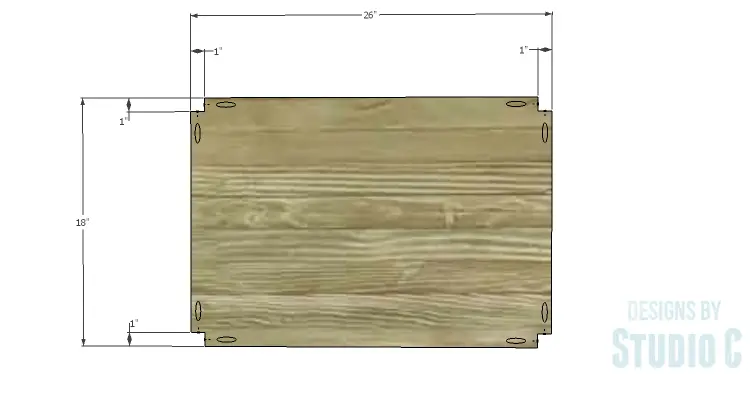
Step Four
Cut the pieces for the shelves. Cut the notches using a jigsaw or a bandsaw. Using a portable pocket hole jig set for 3/4″ material, drill one pocket hole in each notch. Secure the shelves to the legs as shown using glue and 1-1/2″ pocket hole screws.
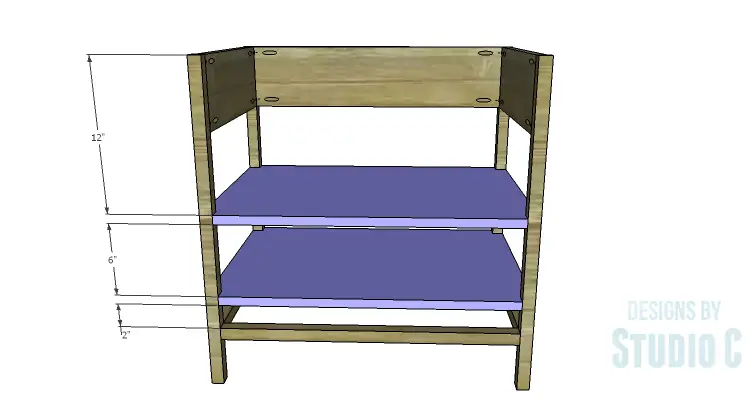
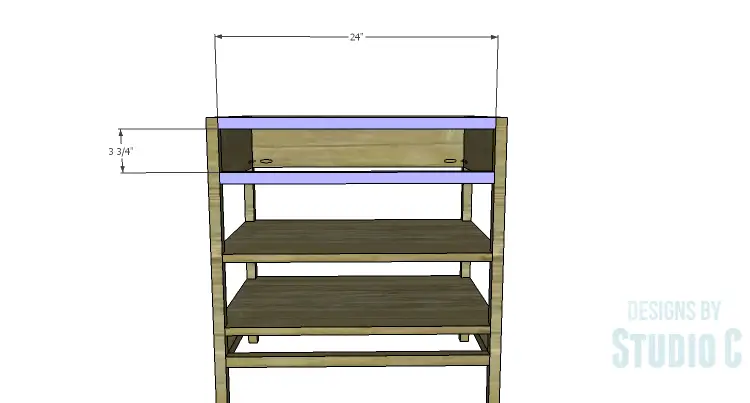
Step Five
Cut the pieces for the drawer stretchers and drill pocket holes in each end. (The pocket hole jig should be set for 1″ material.) Secure the stretchers to the legs using glue and 1-1/2″ pocket hole screws. Orient the pocket holes so that the lower drawer stretcher faces down, and the upper drawer stretcher faces up.
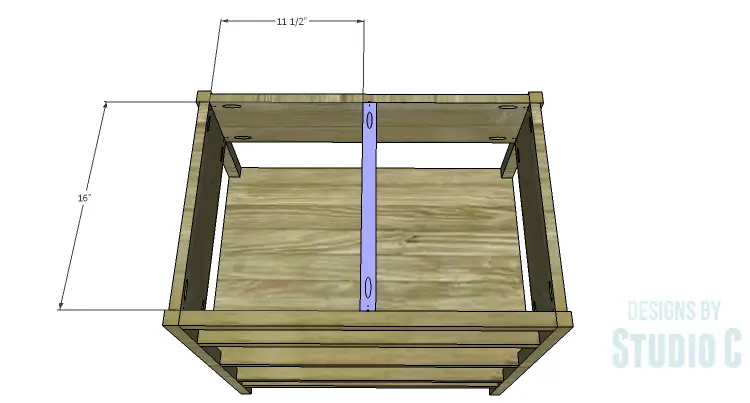
Step Six
Cut the piece for the center top support and drill a pocket hole in each end. Secure the support to the upper drawer stretcher and the back using glue and 1-1/2″ pocket hole screws.
Step Seven
Cut the pieces for the top support frame. The pieces will be secured to the upper drawer stretcher, sides, and back using glue and 1-1/4″ brad nails. Note that the frame pieces are located 1/2″ away from the outside edges of the drawer stretchers, side panels, and back panel.
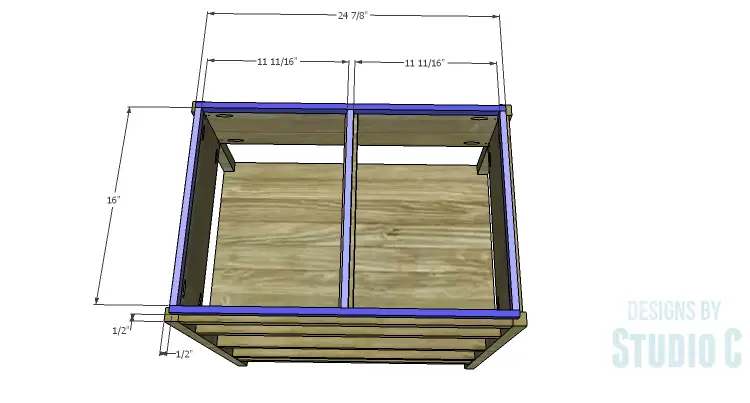
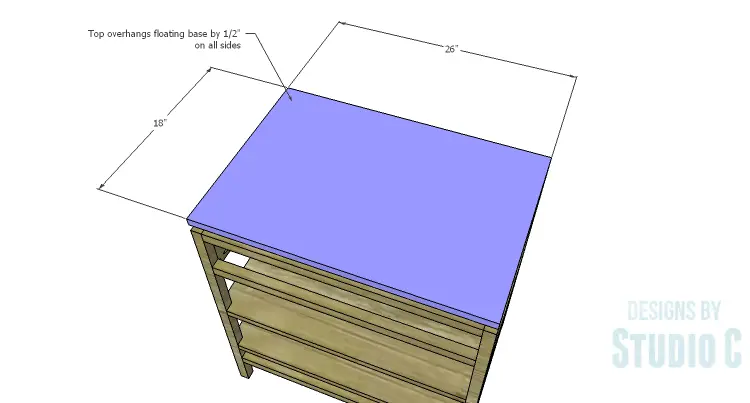
Step Eight
Cut the piece for the top. Secure the top to the support frame using glue and 1-1/4″ brad nails. The top will be flush with the cabinet on all sides.
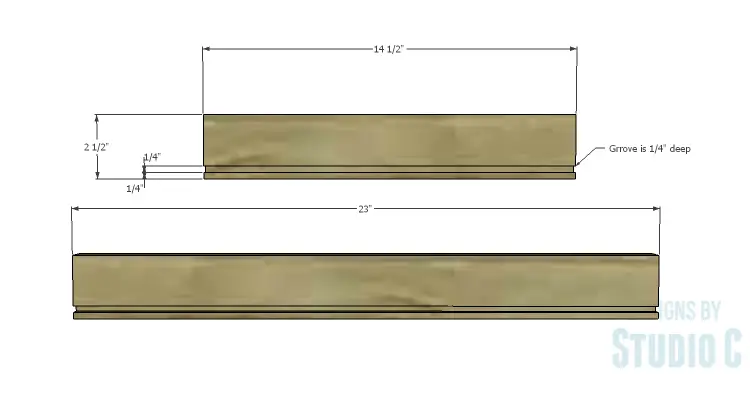
Step Nine
Cut the pieces for the drawer box sides, front, and back. Cut the groove in the bottom edge of each piece at 1/4″ wide by 1/4″ deep using a table saw or a router and a straight bit. Set the pocket hole jig for 3/4″ material and drill pocket holes in each end of the drawer box sides on the opposite side as the groove. Make sure that the pocket holes will not interfere with the groove. Secure the sides to the back using glue and 1-1/2″ pocket hole screws.
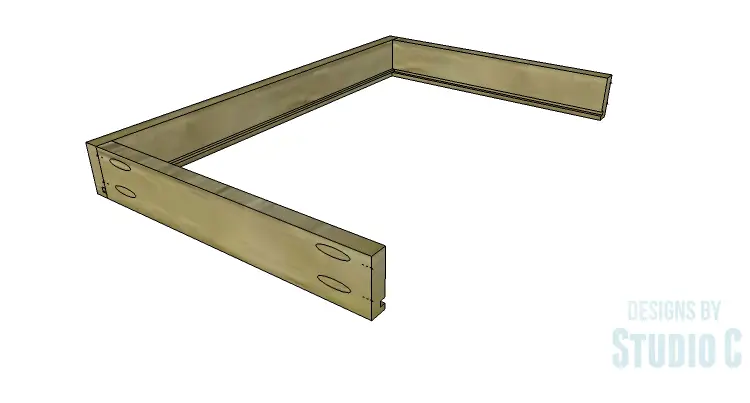
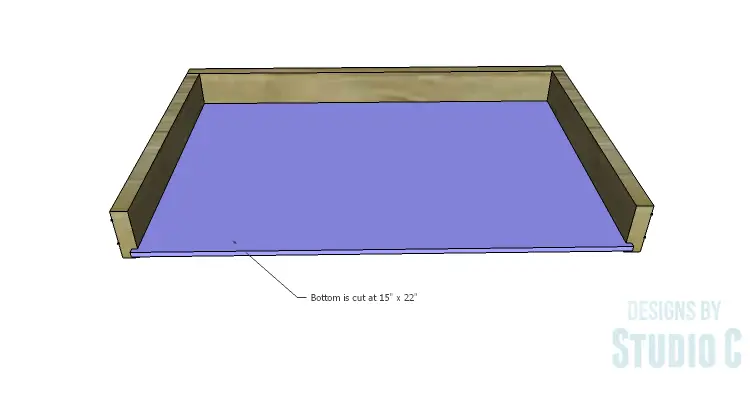
Step Ten
Cut the piece for the drawer bottom. Slide the bottom into the grooves in the sides and back. The piece should fit snugly but not too tight.
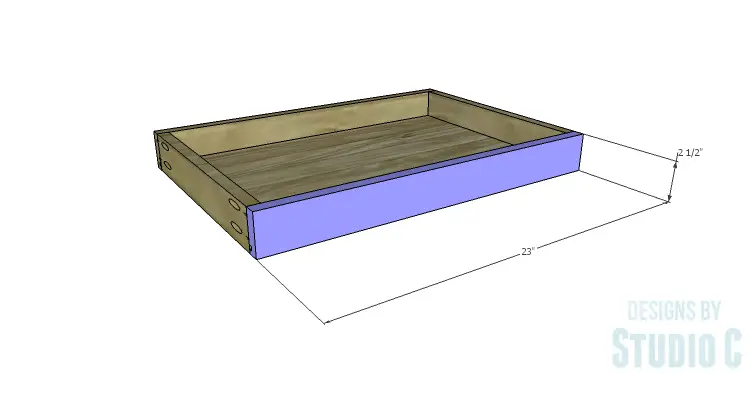
Step Eleven
Insert the front edge of the drawer box bottom into the groove on the drawer box front. Secure the drawer box sides to the drawer box front using glue and 1-1/2″ pocket hole screws.
Install the drawer slides according to the manufacturer’s installation instructions, locating them ¾” back from the front edge of the sides. This easy tutorial on how to install drawer slides will be helpful! Make any necessary adjustments.
Step Twelve
Cut the piece for the drawer front. Mark the position for the drawer pull and drill the holes. Shim the drawer front in the opening – there will be a 1/8” gap around all sides – then drive screws through the holes for the drawer pulls into the drawer box. Open the drawer, and secure the drawer front using countersunk 1-1/4” screws from the inside. Remove the screws from the holes for the drawer pull then finish drilling the holes. Install the drawer pull. Take a look at this easy tutorial on installing drawer fronts.

Finish as desired.
This nightstand has a lot of storage space and can also be used as a side table. Have any questions about the DIY plans to build a Floating Top Nightstand? Leave a comment below!
[…] Floating Top Nightstand […]