
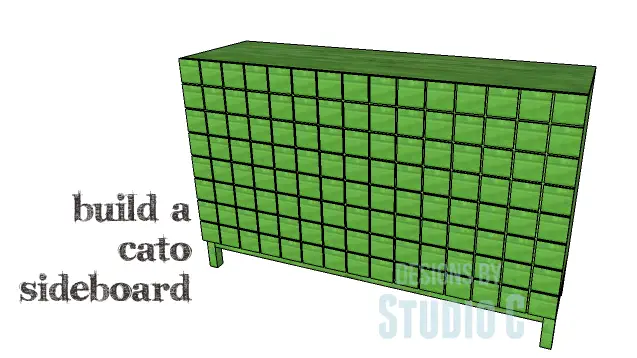
DIY Plans to Build a Cato Sideboard
An Interesting Twist to a Simple Sideboard
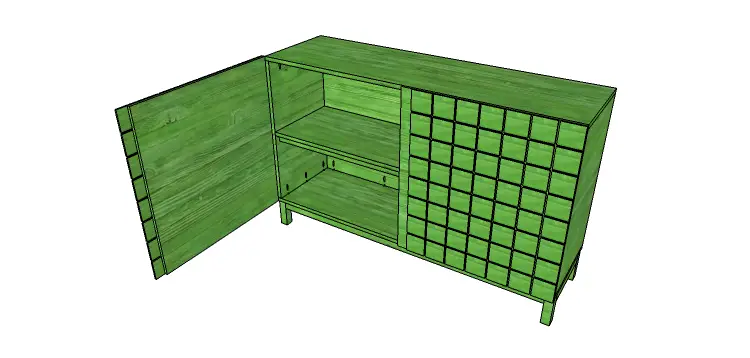
Hey there! Check out this super cool sideboard that I came across. It may seem simple at first, but what makes it truly unique are the squares on the front doors. The DIY plans for building this awesome Cato Sideboard include two spacious doors and a handy shelf inside. The squares cleverly overlap the space between the doors, giving it a really sleek and cohesive appearance. And guess what? Despite having to cut 120 squares, you can still finish building this beauty in just one weekend!
Materials:
- 1-1/4″ pocket hole screws (<– affiliate link!)
- 2-1/2″ pocket hole screws
- 1-1/2″ screws
- 5/8″ brad nails
- Edge banding, optional
- 2 sets of hinges
- Wood glue
- Sandpaper (100, 150, 220 grits)
- Finishing supplies (primer & paint, or stain, sealer)
Lumber:
- 2 – 1×2 at 6′
- 2 – 2×2 at 8′
- 1 – 4′ x 4′ sheet of 1/4″ plywood
- 1 – 4′ x 8′ sheet of 1/2″ plywood
- 2 – 4′ x 8′ sheets of 3/4″ plywood
Cut List:
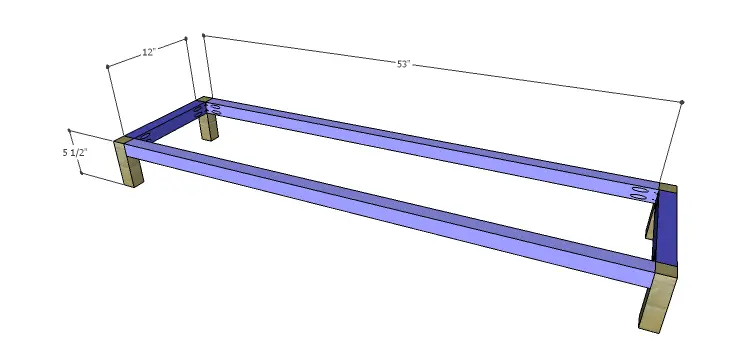
- 4 – 2×2 at 5-1/2″ – Legs
- 2 – 2×2 at 12″ – Base Frame
- 2 – 2×2 at 53″ – Base Frame
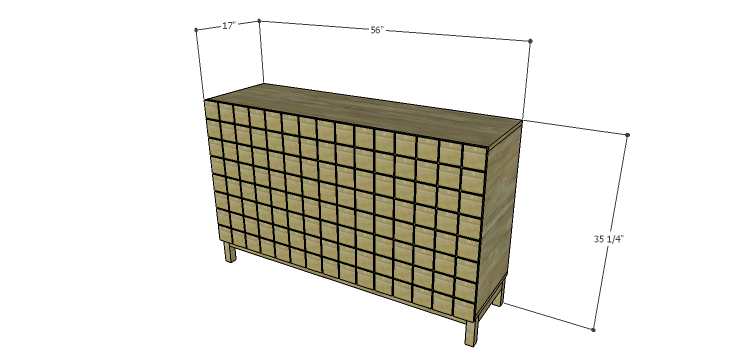
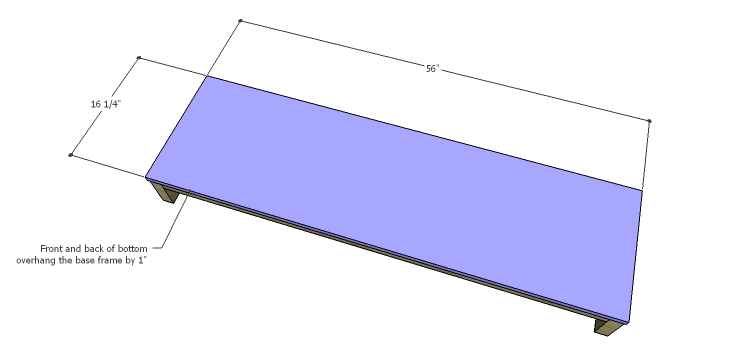
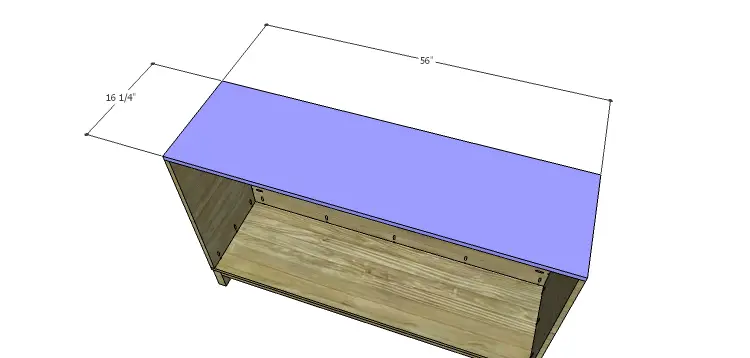
- 2 – 3/4″ plywood at 16-1/4″ x 56″ – Bottom & Top
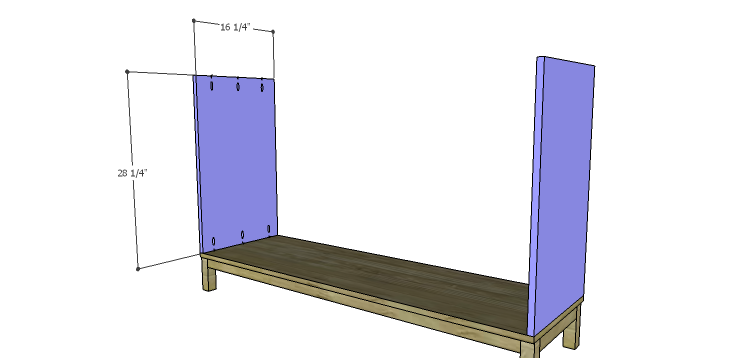
- 2 – 3/4″ plywood at 16-1/4″ x 28-1/4″ – Sides
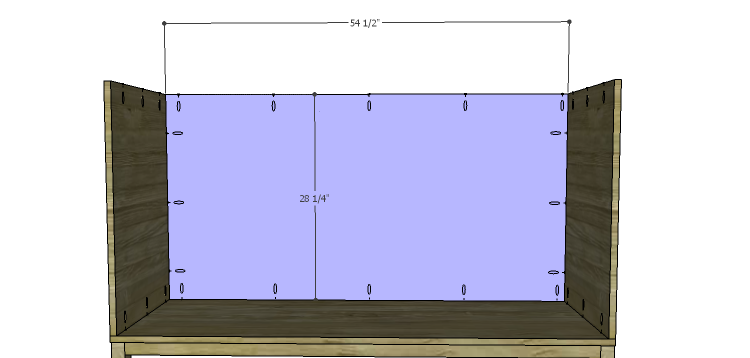
- 1 – 3/4″ plywood at 28-1/4″ x 54-1/2″ – Back
- 2 – 1×2 at 13″ – Shelf Frame
- 2 – 1×2 at 54-1/2″ – Shelf Frame
- 1 – 3/4″ plywood at 15-1/2″ x 54-1/2″ – Shelf
- 2 – 1/2″ plywood at 27-15/16″ x 29-3/4″ – Door Base
- 120 – 1/4″ plywood at 3-1/2″ x 3-1/2″ – Decorative Squares
Step One
Edge banding will be applied to the exposed edges of the plywood before assembly!
Cut the pieces for the base frame. With the pocket hole jig set for 1-1/2″ material, drill pocket holes in each end of the framing pieces. Secure the framing pieces to the legs using glue and 2-1/2″ pocket hole screws.
Step Two
Cut the piece for the bottom. The longer edges of the bottom piece will overhang the base frame by 1″ on each side. Secure the bottom to the base frame using glue and 1-1/2″ countersunk screws.
Step Three
Cut the pieces for the sides. Set the pocket hole jig for 3/4″ material and drill pocket holes in each of the shorter edges. Secure the sides to the bottom using glue and 1-1/4″ pocket hole screws.
Step Four
Cut the piece for the back and drill pocket holes in all four edges. Secure the back to the sides and bottom using glue and 1-1/4″ pocket hole screws.
Step Five
Cut the piece for the top. Secure to the sides and back using glue and 1-1/4″ pocket hole screws. The edges of the top will be flush with the sides and the back.
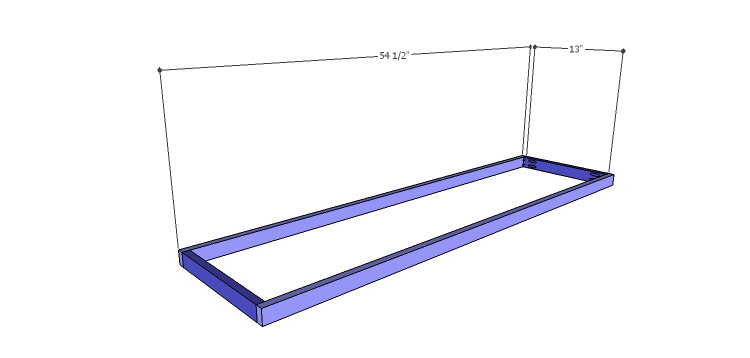
Step Six
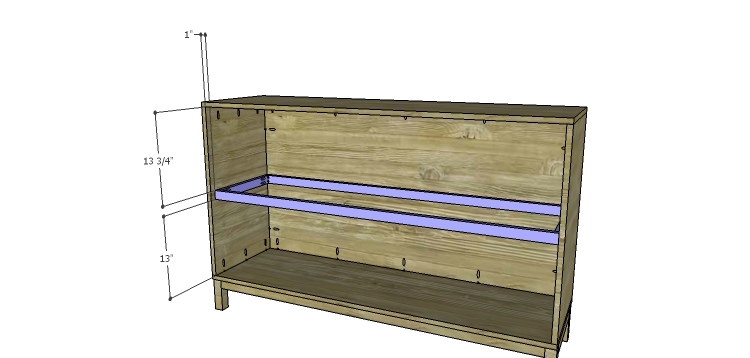
Cut the pieces for the shelf frame. Drill pocket holes in each end of the shorter pieces. Assemble the frame as shown using glue and 1-1/4″ pocket hole screws.
Position the frame inside the cabinet as shown. The back of the frame will be flush with the back of the cabinet making the frame location 1″ from the front edge of the sides. Secure the frame in place using glue and countersunk 1-1/2″ screws.
Step Seven
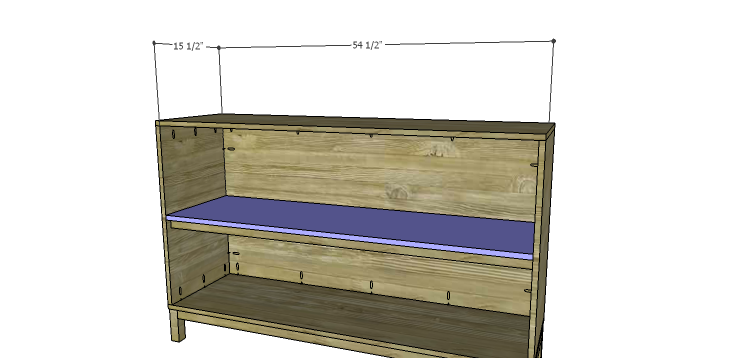
Cut the piece for the shelf. Position the shelf on top of the frame and secure in place with glue and countersunk 1-1/2″ screws.
Step Eight
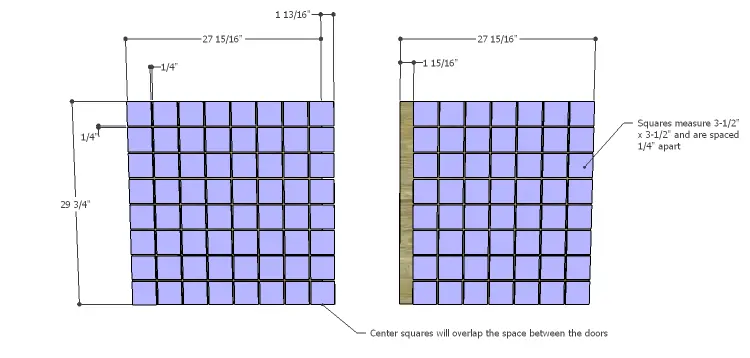
Cut the door base pieces and the squares for the front of the doors. The squares on the left hand door will overlap the space between the doors and will rest on the right hand door. The squares on the right hand door will start 1-15/16″ away from the left hand edge – see drawings. The squares will be flush with the outer sides, top, and bottom of the doors base. The spacing between the squares is 1/4″. (Scrap pieces of the 1/4″ plywood can be used as spacers when securing the squares to the doors.) Secure the squares in place using glue and 5/8″ brad nails.
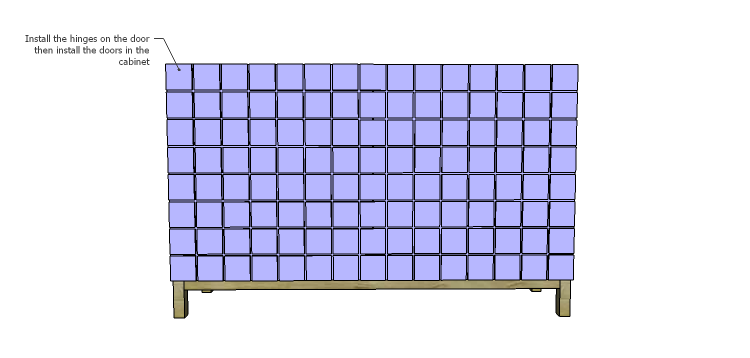
Install the hinges on the doors then install the doors on the cabinet.
Finish as desired.
Any type of finish would look fabulous on this sideboard – painted one color, a dark stain, the glue resist technique on a few of the squares on the doors, or even stenciling! The DIY plans to build a Cato Sideboard are suitable for beginners and if there are any questions about the plans, leave a comment below or contact me at cher {at} designsbystudioc {dot} com!