
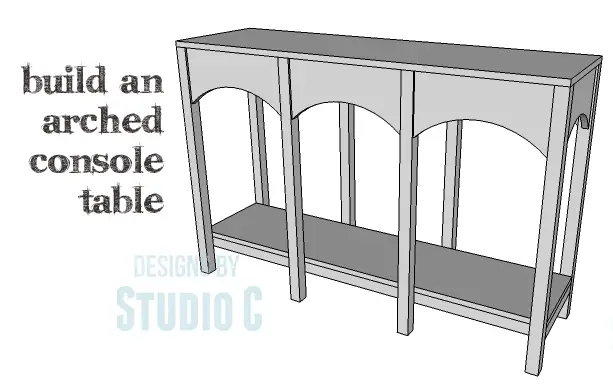
DIY Plans to Build an Arched Console Table
A Beautifully Simple Console Table
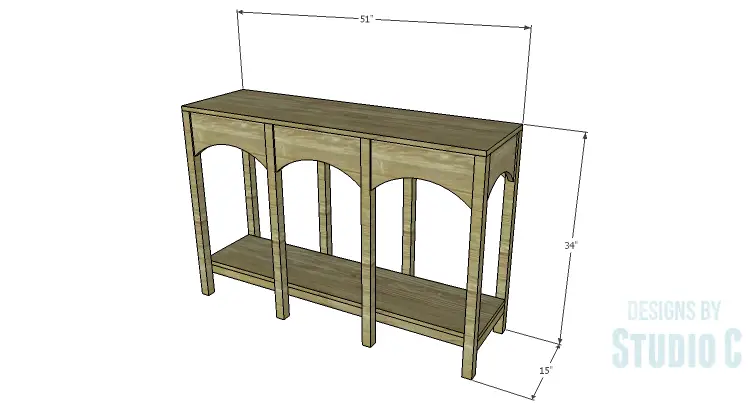
This console table is a super-simple build. The DIY plans to build an Arched Console Table feature a lower shelf and three arched aprons on the front and back with an arched apron on each side. The arches in the front and back aprons can be cut at one time by stacking the pieces and using a jigsaw. A template can also be made using 1/4″ material. The aprons can be rough-cut using a jigsaw, then a router and the template can be used to clean up the arches. Either way, this is a quick project that can be completed in a weekend!
Materials:
- 1-1/4″ pocket hole screws (<– affiliate link!)
- 2″ screws
- 1-1/4″ brad nails
- Wood glue
- Sandpaper (100, 150, 220 grits)
- Finishing supplies (primer & paint, or stain, sealer)
Lumber:
- 2 – 1×2 at 8′
- 2 – 1×8 at 6′
- 2 – 2×2 at 6′
- 1 – 4′ x 8′ sheet of 3/4″ plywood
Cut List:
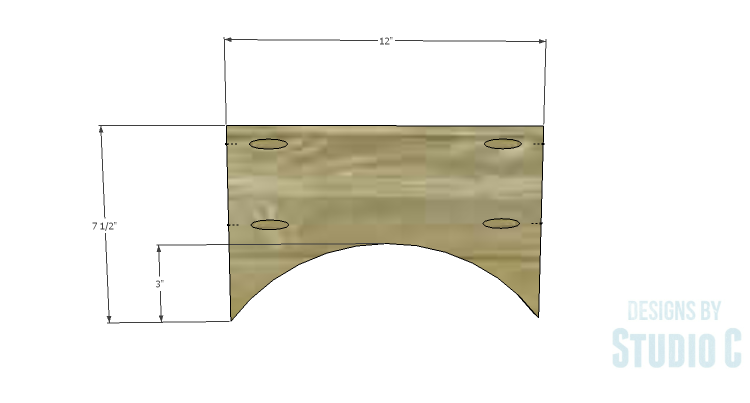
- 2 – 1×8 at 12″ – End Aprons
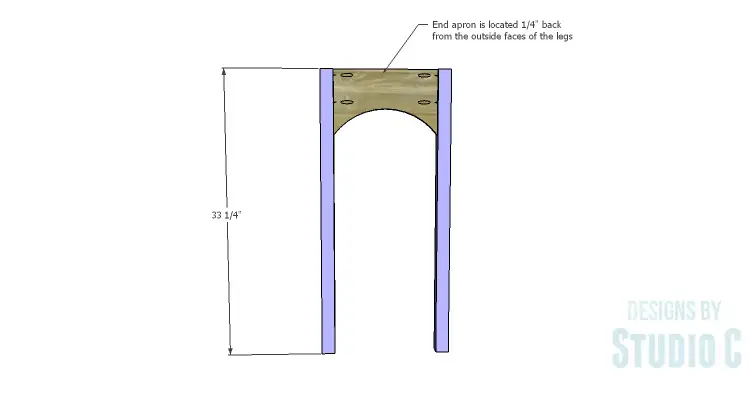
- 8 – 2×2 at 33-1/4″ – Legs
- 6 – 1×8 at 15″ – Front & Back Aprons
- 2 – 1×2 at 49-1/2″ – Front & Back Shelf Framing
- 2 – 1×2 at 12″ – End Shelf Framing
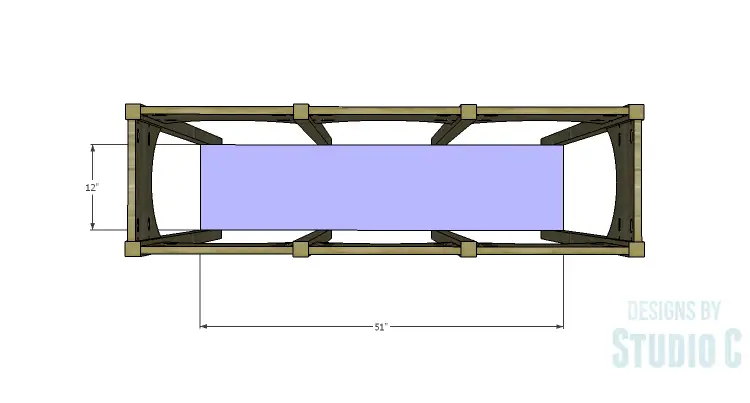
- 1 – 3/4″ plywood at 12″ x 51″ – Shelf
- 2 – 1×2 at 12″ – Top Supports
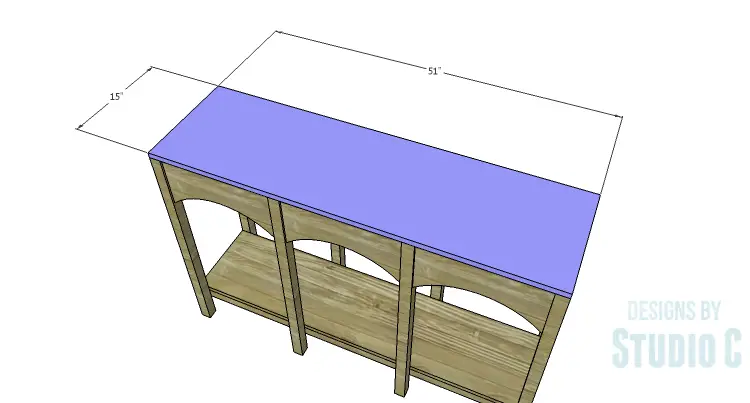
- 1 – 3/4″ plywood at 15″ x 51″ – Top
Step One
Edge banding will be applied to the exposed edges of the plywood prior to assembly.
Cut the pieces for the end aprons. Draw the arcs on the lower edge of the pieces. The easiest way to do this is to use a flexible metal yardstick or a thin piece of scrap wood held at each end of the piece, then flexed to create the arc. Cut the arcs using a jigsaw, a bandsaw, or a router with a template.
With the pocket hole jig set for 3/4″ material, drill pocket holes in each end.
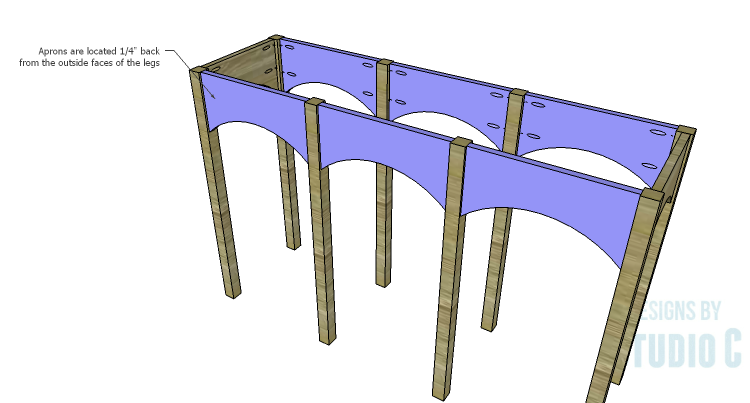
Cut the pieces for the legs. Secure the end aprons to two sets of the legs using glue and 1-1/4″ pocket hole screws. The aprons will be positioned 1/4″ back from the outside faces of the legs.
Step Two
Cut the pieces for the front and back aprons. Draw the arcs on the lower edge of each piece in the same manner as the end aprons. Cut the arcs using a jigsaw, a bandsaw, or a router with a template. Drill pocket holes in each end.
Secure the front and back aprons to the legs using glue and 1-1/4″ pocket hole screws as shown in the drawing. The aprons will be positioned 1/4″ back from the outside faces of the legs.
Step Three
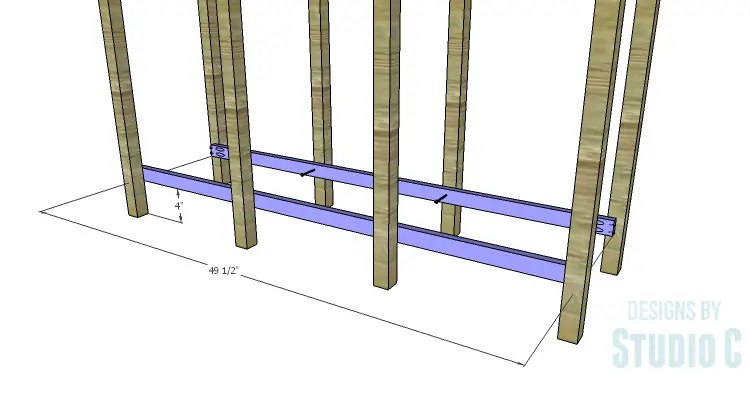
Cut the pieces for the front and back shelf framing, and drill pocket holes in each end. Secure the framing to the inside of the middle two legs using glue and countersunk 1-1/2″ screws. The pieces will be positioned 3/4″ away from the outside end of each outer leg.
Step Four
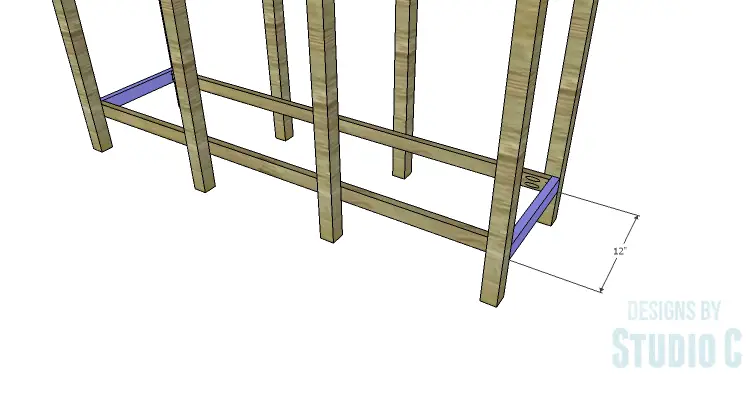
Cut the pieces for the end shelf framing. Secure to the front and back framing pieces using glue and 1-1/4″ pocket hole screws.
Step Five
Cut the piece for the shelf. Secure the shelf to the framing using glue and 1-1/4″ brad nails.
Step Six
Cut the pieces for the top supports and drill pocket holes in each end. Secure the supports to the middle legs using glue and 1-1/4″ pocket hole screws.

Step Seven
Cut the piece for the top. Secure in place using glue and 1-1/4″ brad nails.
Finish as desired.
This is a fabulous table for an entry way or dining room. The table would also be great in a craft room to store supplies! Have any questions about the DIY plans to build an Arched Console Table? Leave a comment below!