
DIY Plans to Build the Anna Chair
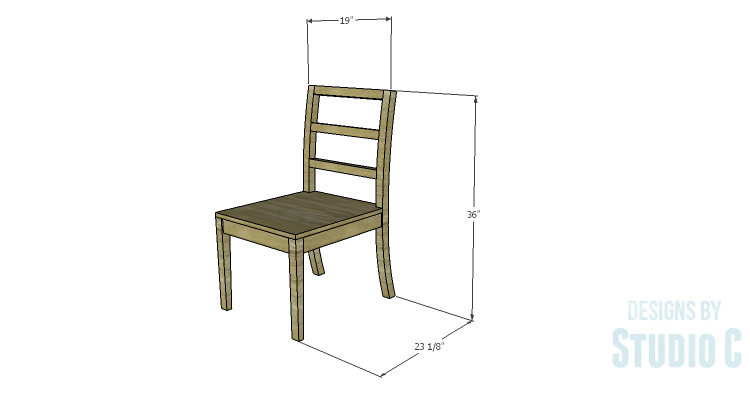
A Beautiful Chair with Curved Back Legs
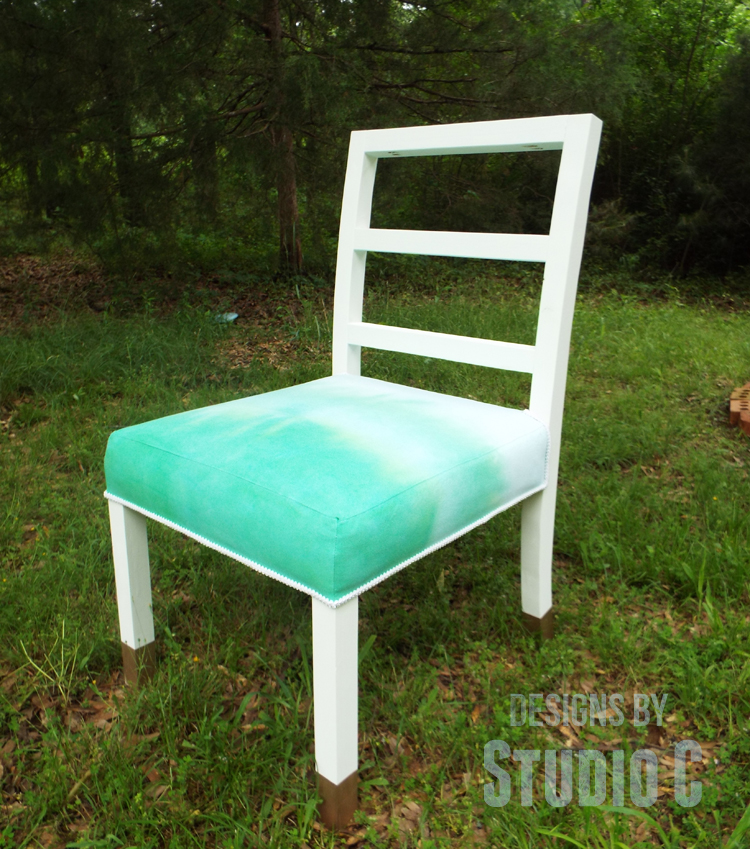
Oh my goodness, have you seen the curve on the back legs of this chair? It’s absolutely stunning! The Anna Chair DIY plans are amazing – they come with templates that make it super easy to create those gorgeous curves. Plus, the front legs are tapered for an extra touch of elegance. And get this – I’m already planning to add an upholstered seat option with an Elasbelt webbed foundation. It’s perfect for using with a nice, thick cushion. Best of all, this chair is a breeze to build and can be done in just one weekend. Can’t wait to see how it turns out!
Materials:
- 1-1/4″ pocket hole screws (<– affiliate link!)
- 2-1/2″ pocket hole screws
- 1-1/4″ brad nails
- Metal corner braces (<– affiliate link!)
- Wood glue
- Sandpaper (100, 150, 220 grits)
- Finishing supplies (primer & paint, or stain, sealer)
Lumber:
- 1 – 1×3 at 8′
- 1 – 2×2 at 4′
- 1 – 2×2 at 6′
- 1 – 2×6 at 6′
- 1 – 2′ x 2′ sheet of 3/4″ plywood
Cut List:
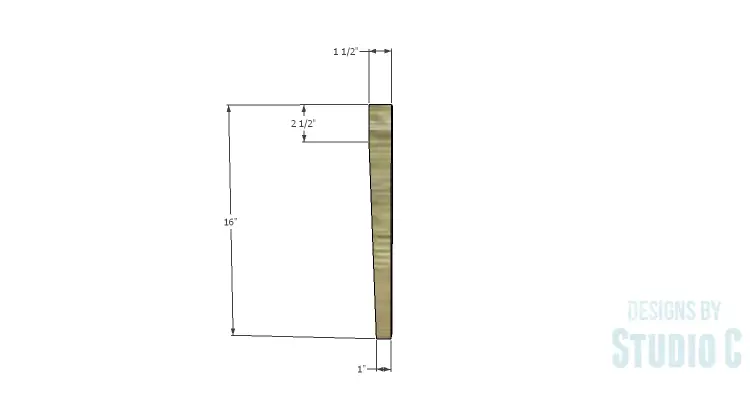
- 2 – 2×2 at 16″ – Front Legs
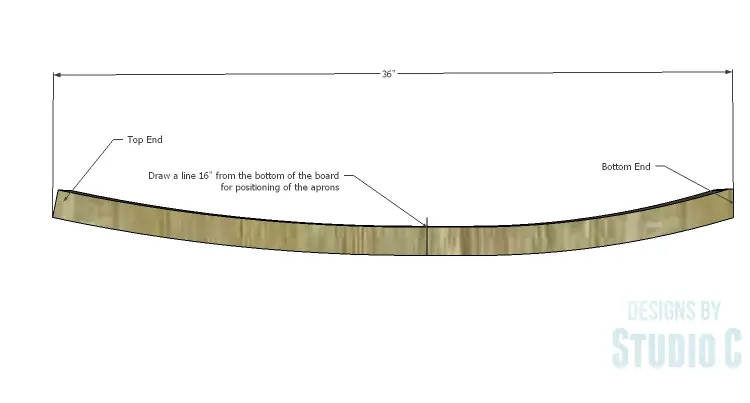
- 2 – 2×6 at 36″ – Back Legs
- 2 – 1×3 at 16″ – Front & Back Aprons
- 2 – 1×3 at 18-1/8″ – Side Aprons
- 3 – 2×2 at 16″ – Back
- 4 – 1×2 at 5″ – Corner Braces
- 1 – 3/4″ plywood at 19″ x 21-1/8″ – Seat
Step One
Cut the pieces for the front legs. Cut the taper using a tapering jig on the table saw or a jigsaw.
Cut the piece for the front apron. With the pocket hole jig set for 3/4″ material, drill pocket holes in each end of the apron piece. Secure the apron to the legs using glue and 1-1/4″ pocket hole screws. The tapers on the legs will face toward the back legs. The apron will be positioned 1/4″ back from the front face of the legs.

Step Two
Print the templates. Align the registration marks and tape the sheets together, then cut out the template. Secure the two 2×6 pieces together using screws or hot glue (not wood glue!) then trace the template. Draw a line across the pieces at 16″ from the bottom of the leg. Cut out the legs using a jigsaw or a bandsaw. Thoroughly sand the legs before separating the pieces trying to keep the pencil mark drawn beforehand in place. Transfer the pencil mark to the other leg. This mark is where the top of the back apron will be positioned.
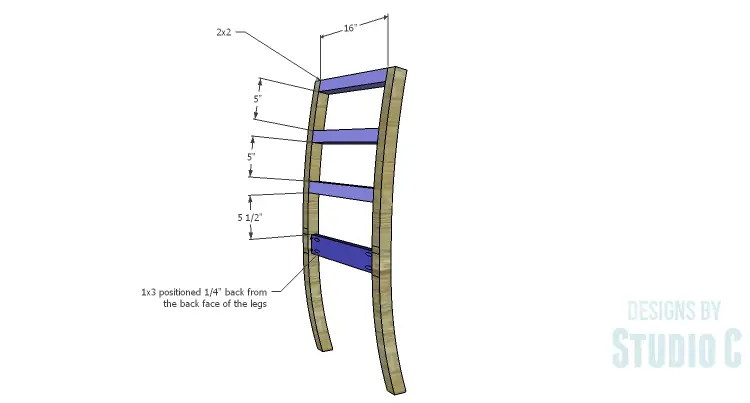
Step Three
Cut the pieces for the back apron and back framing. Drill pocket holes in each end of the apron. Secure the apron to the back legs at the pencil mark (16″ up from the bottom of the leg). The apron will be positioned 1/4″ back from the back face of the legs.
Set the pocket hole jig for 1-1/2″ material and drill pocket holes in each end of the back pieces. Secure the pieces as shown to the back legs using glue and 2-1/2″ pocket hole screws. The front face of the back pieces will be flush with the front faces of the legs.
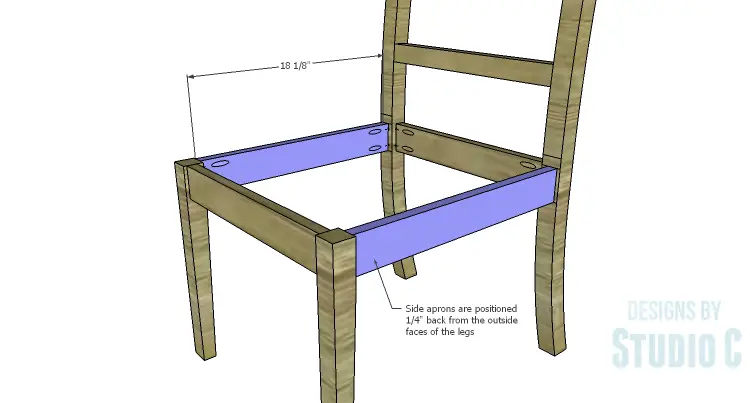
Step Four
Cut the pieces for the side aprons. Set the pocket hole jig for 3/4″ material and drill pocket holes in each end. Secure the aprons to the front and the back legs using glue and 1-1/4″ pocket hole screws. The aprons will be positioned 1/4″ back from the side faces of the legs.
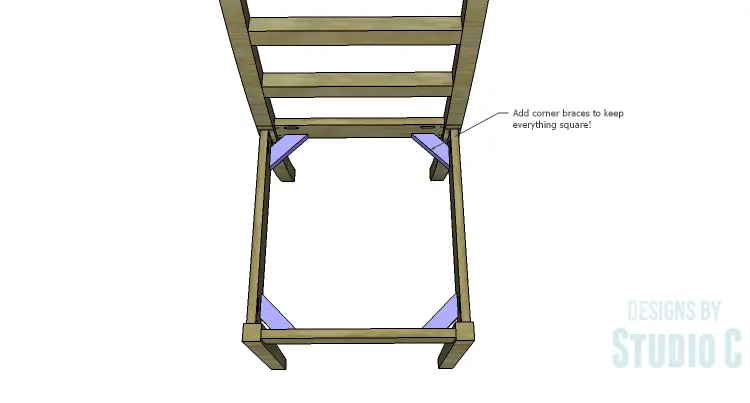
Step Five
Secure the corner braces to the inside of the legs at the lower edges of the aprons. Corner braces can also be cut from scrap pieces of 1×2 material with a 45° miter in each end then secured using glue and 1-1/4″ brad nails.
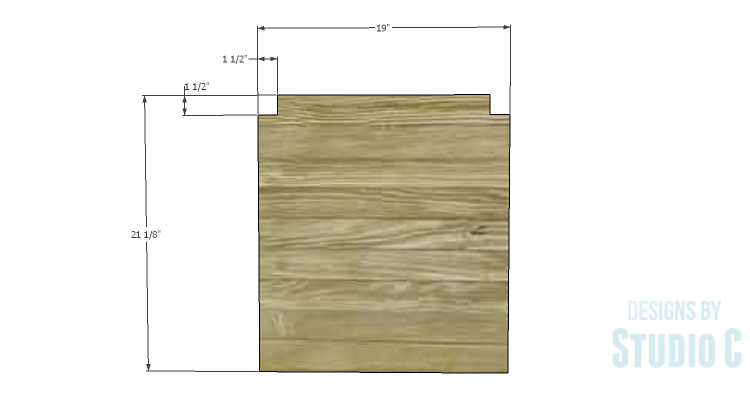
Step Six
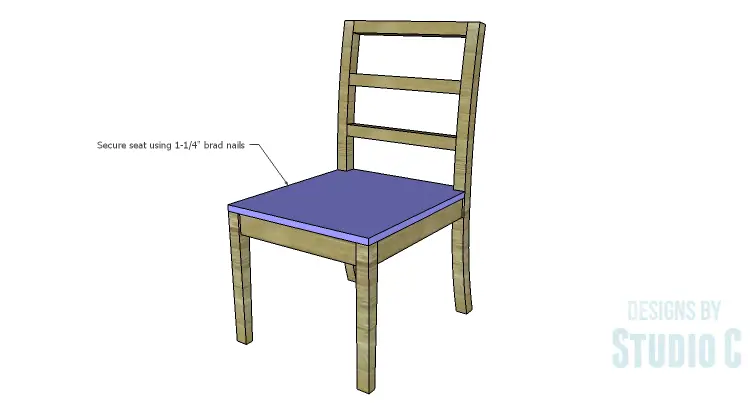
Cut the piece for the seat and cut the notches with a jigsaw. Secure the seat to the aprons using glue and 1-1/4″ brad nails.
Finish as desired.
The curved legs are what make this chair so fabulous – at least in my opinion! The templates are easy to use, and the legs are easy to cut. Have any questions on the DIY plans to build an Anna Chair? Leave a comment below!
Originally posted 2015-05-20 08:00:06.
[…] this example, I’m using the Anna Chair plan and have tie-dyed the fabric for the seat. If the chair plan calls for the aprons to be located […]
[…] chair features a curved back leg, tapered front legs and an upholstered seat. Here are the free woodworking plans to build […]
[…] I posted plans for the Anna Chair – a chair with beautifully curved back legs and a wide seat. The DIY furniture plans to […]
[…] this example, I’m using the Anna Chair plan and have tie-dyed the fabric for the seat. If the chair plan calls for the aprons to be located […]