
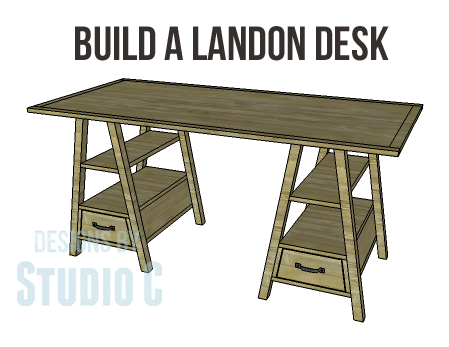
DIY Landon Desk Plans
Build a Gorgeous Desk with Storage
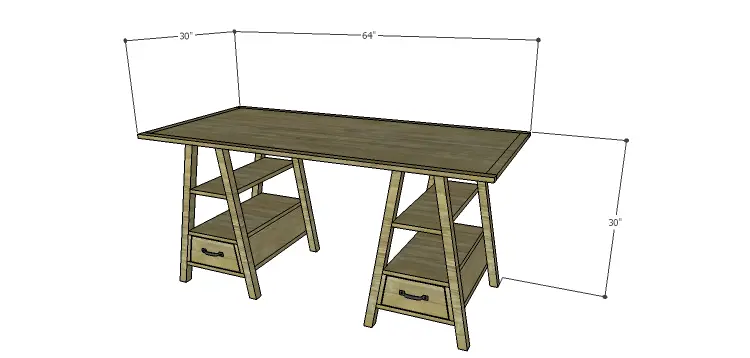
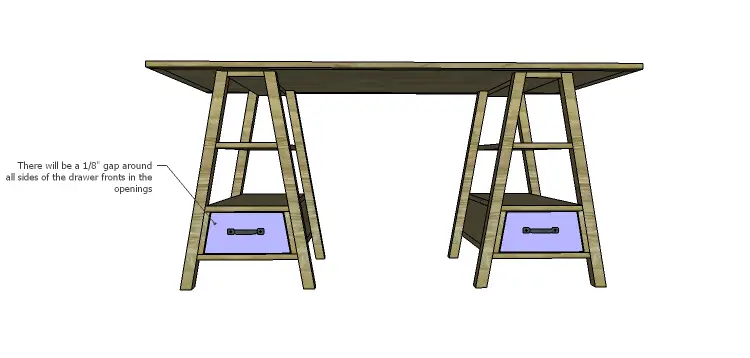
Wow, this desk is absolutely stunning! Don’t worry about the angled shelves and legs, they may look tricky but trust me, they’re a breeze to cut! The Landon desk plans are perfect for any DIY enthusiast, with two shelves and a drawer in each leg assembly. The top is made with a plywood base and solid wood edging, allowing you to add a decorative edge with a router. You should definitely give this desk build a go, it’s much easier than you might think!
Materials:
- 1-1/4″ pocket hole screws
- 1-1/4″ screws
- 2-1/2″ screws
- 1-1/4″ brad nails
- 2 – 21″ bottom mount drawer slides (<– affiliate link!)
- 2 – Cabinet pulls
- Wood glue
- Sandpaper (100, 150, 220 grits)
- Finishing supplies (primer & paint, or stain, sealer)
Lumber:
- 2 – 1×2 at 8′
- 2 – 2×2 at 6′
- 1 – 4′ x 4′ sheet of plywood
- 1 – 4′ x 8′ sheet of plywood
Cut List:
- 8 – 2×2 at 30″ – Legs
- 2 – 3/4″ plywood at 13-5/8″ x 24″ – Shelf 4
- 4 – 3/4″ plywood at 6″ x 24″ – Drawer Cubby Sides
- 2 – 3/4″ plywood at 5-3/4″ x 11-13/16″ – Drawer Cubby Back
- 2 – 3/4″ plywood at 11-5/16″ x 24″ – Shelf 3 (Drawer Cubby Top)
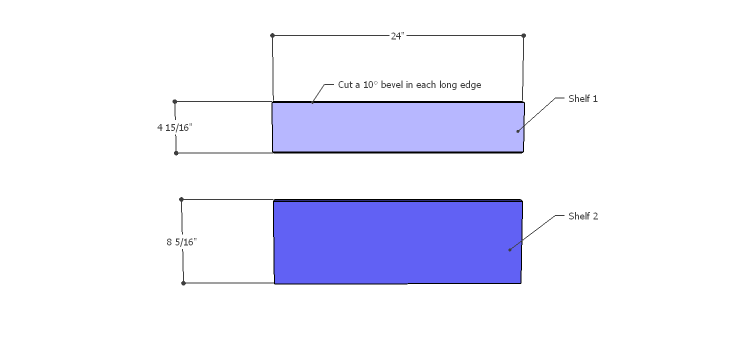
- 2 – 3/4″ plywood at 8-5/16″ x 24″ – Shelf 2
- 2 – 3/4″ plywood at 4-15/16″ x 24″ – Shelf 1
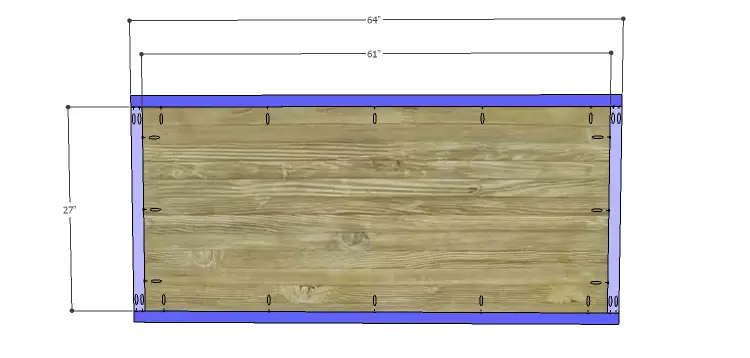
- 1 – 3/4″ plywood at 27″ x 61″ – Top Panel
- 2 – 1×2 at 27″ – Top Side Trim
- 2 – 1×2 at 64″ – Top Front & Back Trim
- 2 – 3/4″ plywood at 7-1/2″ x 18-1/2″ – Drawer Bottoms
- 4 – 3/4″ plywood at 4-1/2″ x 18-1/2″ – Drawer Box Sides
- 4 – 3/4″ plywood at 4-1/2″ x 9″ – Drawer Box Front & Back
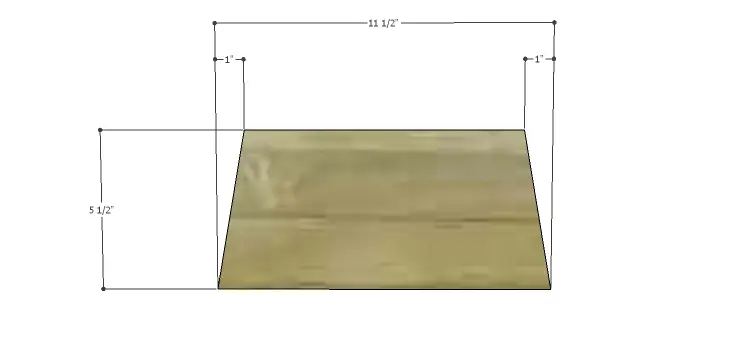
- 2 – 3/4″ plywood at 5-1/2″ x 11-1/2″ – Drawer Fronts
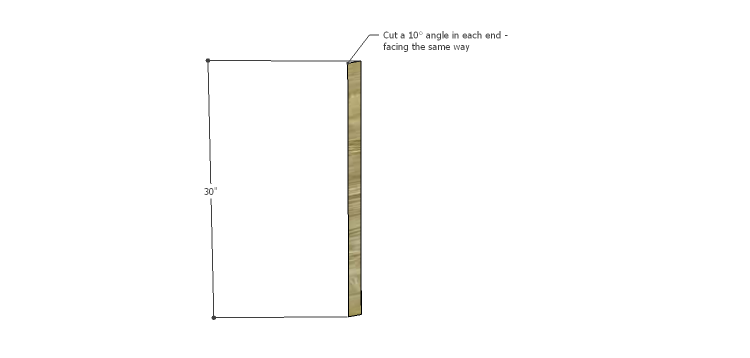
Step One
Edge banding will be applied to the exposed edges of the plywood prior to assembly!
Cut the pieces for the legs. Cut a 10° angle in each end. The angles will face the same direction (see drawing).
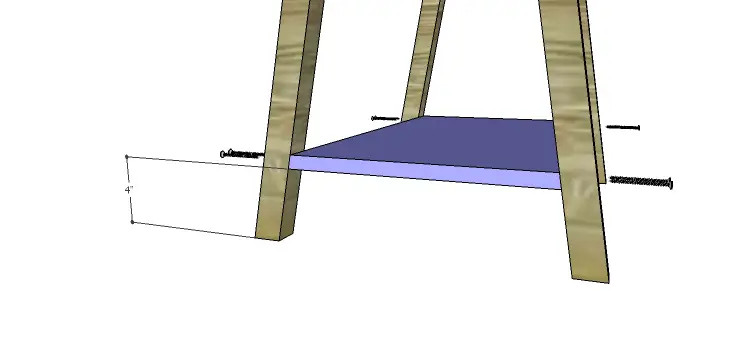
Step Two
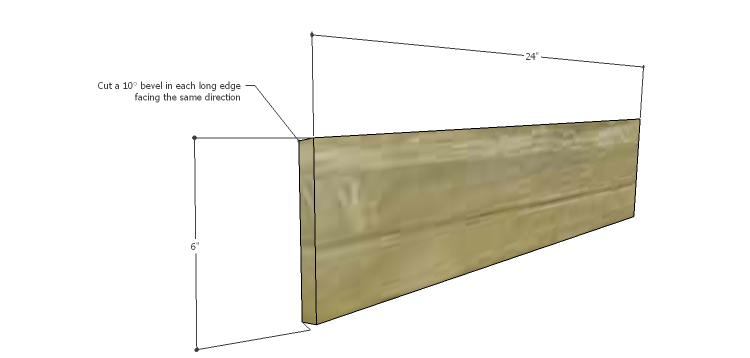
Cut the pieces for Shelf 4 and cut a 10° bevel in each long edge. The bevels will face toward each other so that if you are looking at the end of the piece, the side edges slant to the center of the piece. Secure Shelf 4 to the legs as shown using glue and countersunk 2-1/2″ screws. Install the cabinet half of the drawer slides on Shelf 4 according to the manufacturer’s installation instructions locating the slide 3/4″ back from the front edge of Shelf 4 to allow for the drawer front.
Step Three
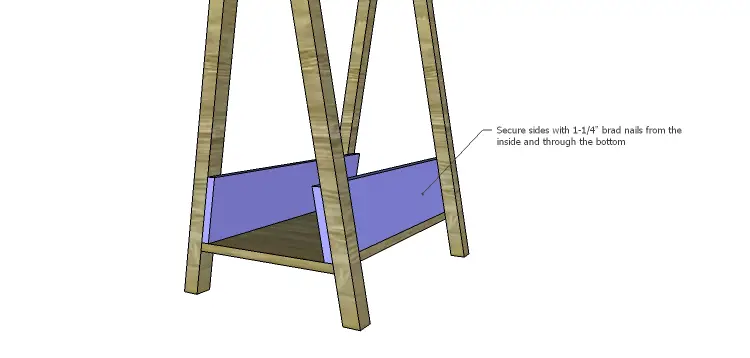
Cut the pieces for the drawer cubby sides. Cut a 10° bevel in each long edge with the bevels facing the same direction (opposite each other). Secure the pieces to the legs and Shelf 4 using glue and 1-1/4″ brad nails. The nails will be applied through the side pieces into the legs, and through the bottom of Shelf 4 into the bottom of the sides.
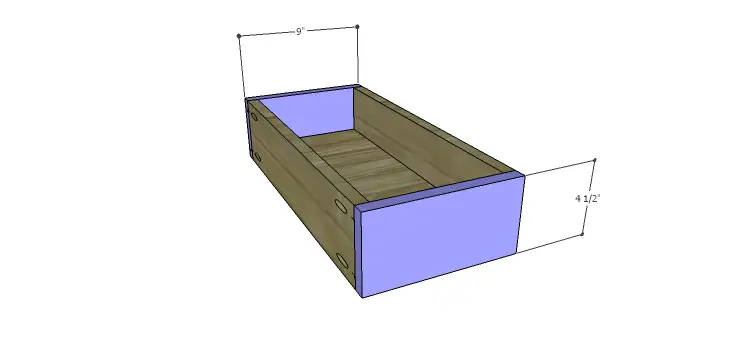
Step Four
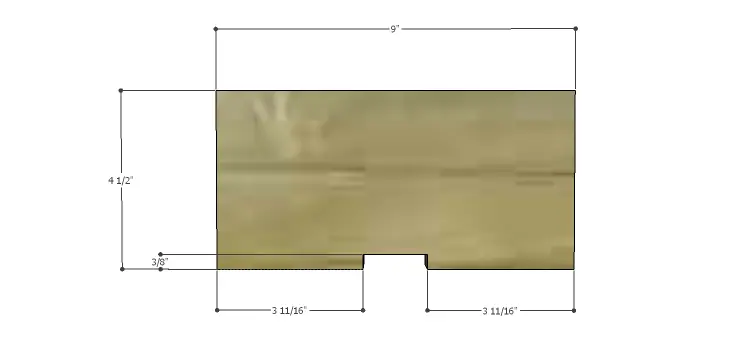
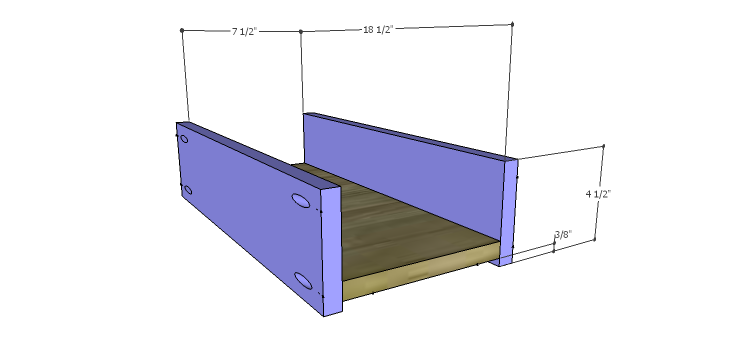
Now is a great time to fit the drawer slides and the drawer boxes because once the top and back are on the drawer cubby, there will be no way to adjust the pieces! Cut the pieces for the drawer boxes. Cut the notch in the back piece as shown. Secure the sides to the bottom using glue and 1-1/4″ pocket hole screws locating the bottom 3/8″ up from the bottom of the sides. Secure the front and back of the drawer boxes. The drawer slides should already be installed in the cabinet (see Step Two). Install the other half of the slide on the drawer, then check the fit of the drawer.
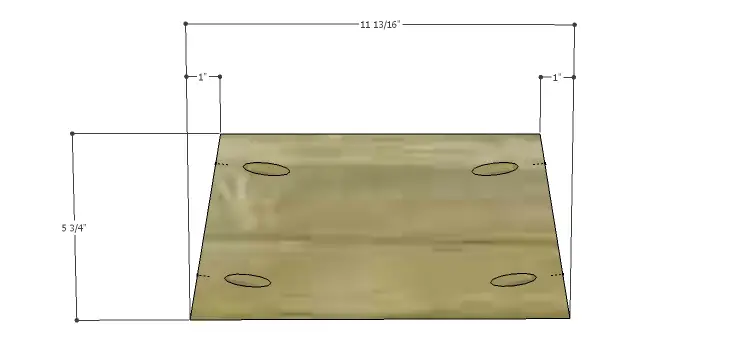
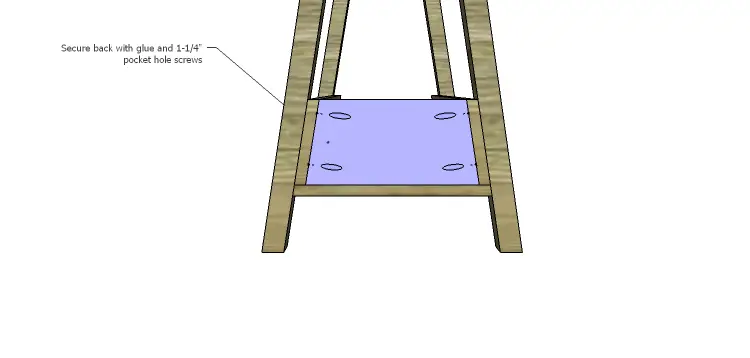
Step Five
Cut the pieces for the drawer cubby back. Set the pocket hole jig for 3/4″ material and drill pocket holes in each angled edge. Secure the back to the sides using glue and 1-1/4″ pocket hole screws. The pocket holes will face out which will make it much easier to secure the screws!
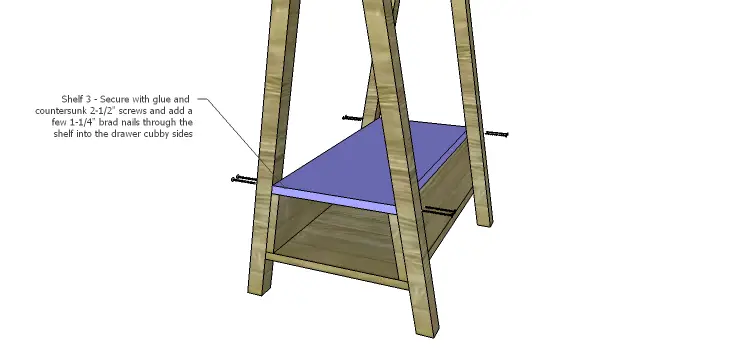
Step Six
Cut the pieces for Shelf 3 and cut a 10° bevel in each long edge. The bevels will face each other – the same way as they do on Shelf 4. Attach Shelf 3 to the top of each of the drawer cubbies securing in place with glue and2-1/2″ countersunk screws through the legs, and 1-1/4″ brad nails through Shelf 3 into the sides.
Step Seven
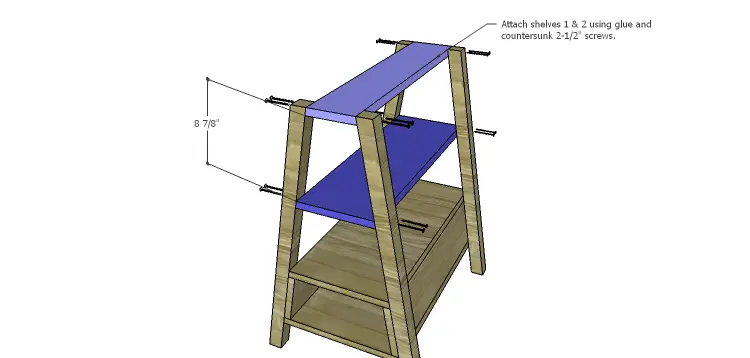
Cut the pieces for Shelf 1 and Shelf 2, and cut a 10° bevel in each long edge. Secure Shelf 1 and Shelf 2 to the legs as shown using glue and countersunk 2-1/2″ screws.
Step Eight
Cut the pieces for the top panel and the top trim. Drill pocket holes in each end of the shorter trim pieces as well as all four edges of the top panel. Secure the trim pieces using glue and 1-1/4″ pocket hole screws.
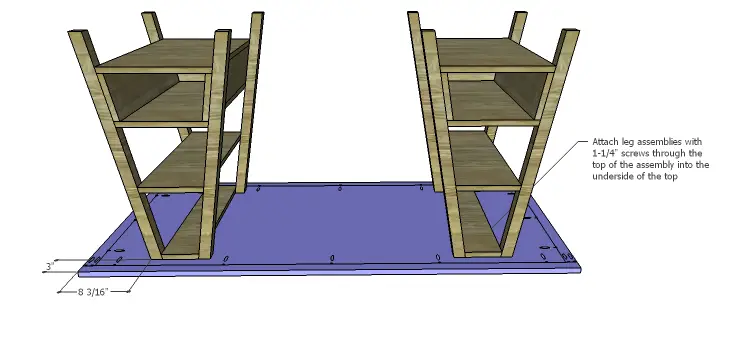
Place the top face down on a flat surface and position the leg assemblies as shown. Mark the position for the legs. Secure the leg assemblies in place using glue and 1-1/4″ countersunk screws.
Step Nine
Cut the pieces for the drawer fronts. Mark the position for the drawer pulls and drill the holes. Install the drawer box. Shim the drawer front in the opening – there will be a 1/8” gap around all sides – then drive screws through the holes for the drawer pulls into the drawer box. Open the drawer, and secure the drawer front using countersunk 1-1/4” screws from the inside. Remove the screws from the holes for the drawer pull then finish drilling the holes. Install the drawer pull. Check out this easy tutorial on installing drawer fronts.
Finish as desired!
The style of this desk will work in any space – home office, family room, kid or teen’s room, etc. The desk would also be great with any finish such as stain, “weathered”, or paint! Have any questions about the DIY Landon desk plans? Leave a comment below or contact me at cher {at} designsbystudioc {dot} com!
Originally posted 2014-07-18 08:00:07.