
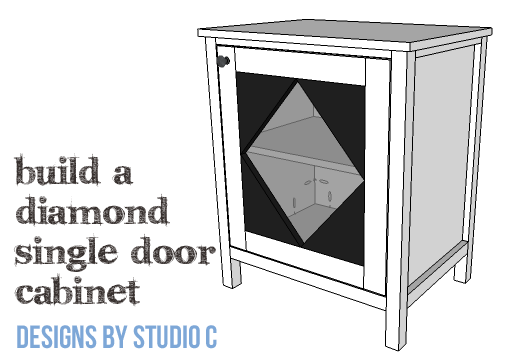
Build a Diamond Single Door Cabinet
DIY Furniture Plans to Build a Cabinet with a Unique Door
When I saw the piece that inspired this cabinet, I was in love! The original cabinet is longer with four doors. The DIY furniture plans to build a Diamond Single Door Cabinet feature a door with triangular pieces attached to the door frame to create the center diamond with a piece of Plexiglas attached to the back. The cabinet also has a shelf inside and can serve many uses in the home!
Materials:
- 1-1/4″ pocket hole screws (<– affiliate link!)
- 2-1/2″ pocket hole screws
- 1-3/4″ brad nails
- 3/4″ screws
- Edge banding
- 1/4″ Plexiglas
- 1 Set of hinges
- 1 Cabinet pull
- Wood glue
- Sandpaper (100, 150, 220 grits)
- Finishing supplies (primer & paint, or stain, sealer)
Tools needed:
- Miter saw or Circular saw
- Table saw
- Iron for edge banding
- Drill
- Pocket hole jig
- Pneumatic brad nailer with compressor
- Sander
Lumber:
- 1 – 1×2 at 8′
- 1 – 1×3 at 8′
- 1 – 1×10 at 4′
- 2 – 2×2 at 6′
- 1 – 2×2 at 8′
- 1 – 4′ x 8′ sheet of 3/4″ plywood
Cut List:
- 4 – 2×2 at 29-1/4″ – Legs
- 2 – 2×2 at 15″ – Lower Side Framing
- 2 – 1×2 at 15″ – Upper Side Framing
- 2 – 3/4″ plywood at 15″ x 23″ – Side Panels
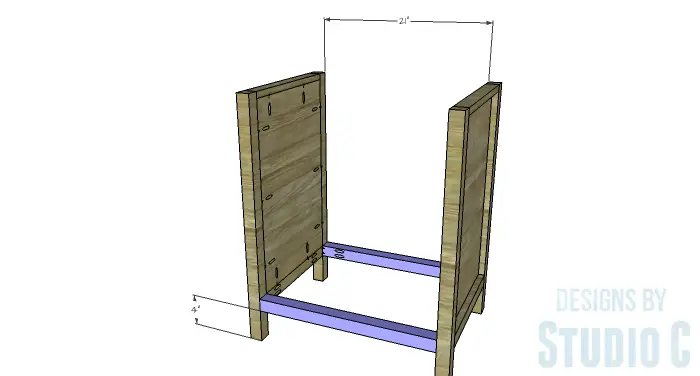
- 2 – 2×2 at 21″ – Lower Stretchers
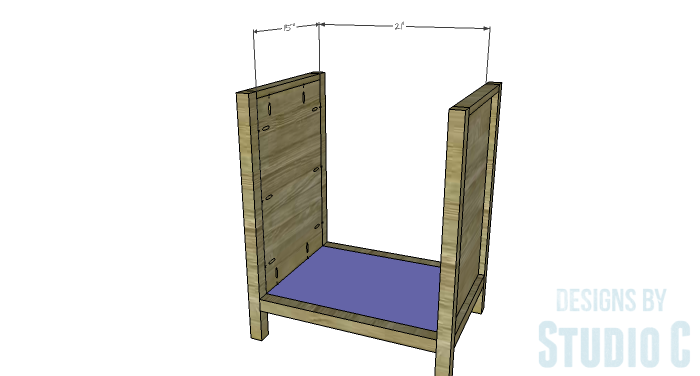
- 1 – 3/4″ plywood at 15″ x 21″ – Bottom
- 2 – 1×2 at 21″ – Upper Stretchers
- 1 – 3/4″ plywood at 21″ x 23″ – Back
- 1 – 3/4″ plywood at 15-3/8″ x 21″ – Shelf
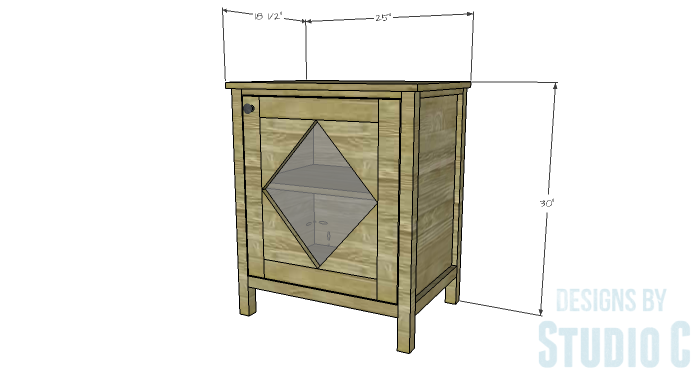
- 1 – 3/4″ plywood at 18-1/2″ x 25″ – Top
- 2 – 1×3 at 15-3/4″ – Door Rails
- 2 – 1×3 at 22-3/4″ – Door Stiles
- 4 – 1×10 pieces cut at 7-7/8″ x 8-7/8″ – Triangle Detail
- 1 – 1/4″ Plexiglas at 17-3/4″ x 19-3/4″ – Door Panel
Step One
Cut the pieces for the legs, side framing and side panels. Set the pocket hole jig for 1-1/2″ material and drill pocket holes in each end of the 2×2 framing pieces. Secure the 2×2 pieces to the legs using glue and 2-1/2″ pocket hole screws.
Set the pocket hole jig for 3/4″ material and drill pocket holes in each end of the 1×2 framing pieces as well as all four edges of the side panels. Secure the framing pieces to the upper portion of the legs using glue and 1-1/4″ pocket hole screws. Secure the panel to the framing and legs using glue and 1-1/4″ pocket hole screws. The back face of the panels will be flush with the inside faces of the legs.

Step Two
Cut the pieces for the 2×2 lower stretchers. Set the pocket hole jig for 1-1/2″ material and drill pocket holes in each end. Secure the lower stretchers to the legs using glue and 2-1/2″ pocket hole screws.
Set the pocket hole jig for 3/4″ material and drill pocket holes in as all four edges of the bottom. Secure the bottom to the lower front stretchers and the side framing using glue and 1-1/4″ pocket hole screws. The top face of the bottom with be flush with the top face of the lower stretchers.
Step Three
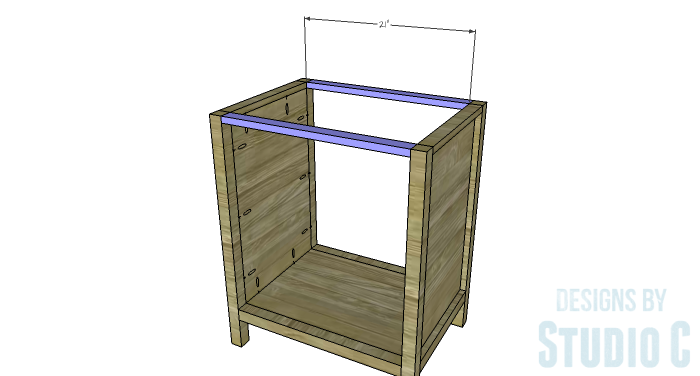
Cut the pieces for the upper stretchers and drill pocket holes in each end. Secure the upper stretchers to the upper portion of the legs using glue and 1-1/4″ pocket hole screws.
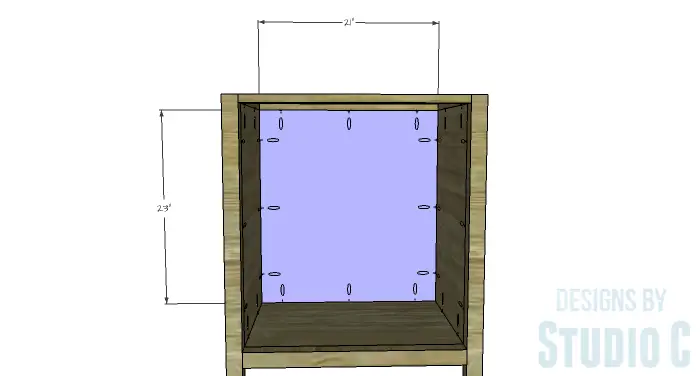
Cut the piece for the back and drill pocket holes in all four edges. Secure the back to the legs and stretchers using glue and 1-1/4″ pocket hole screws. The back face of the panel will be flush with the inside faces of the legs.
Step Four
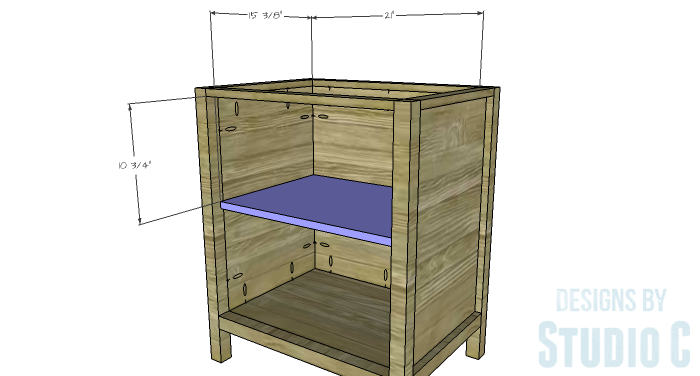
Cut the piece for the shelf and drill pocket holes in the side and back edges. Secure the shelf to the sides and back using glue and 1-1/4″ pocket hole screws. the shelf will be positioned 1-1/8″ back from the front face of the legs which makes it flush with the back.
Step Five
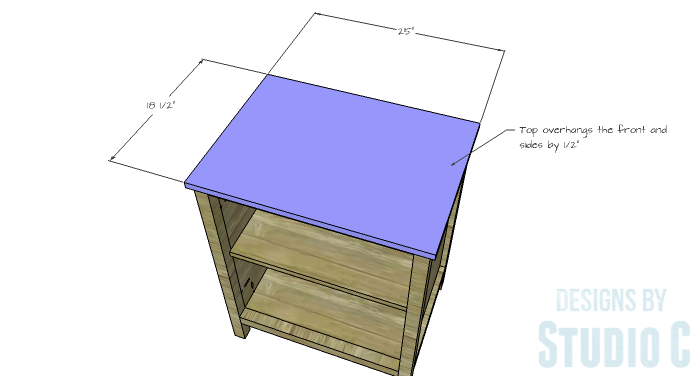
Cut the piece for the top. The top will overhang the sides and front by 1/2″. Secure the top in place using glue and 1-3/4″ brad nails.
Step Six
Cut the pieces for the door frame. Drill pocket holes in each end of the shorter frame pieces (the door rails). Assemble the frame using glue and 1-1/4″ pocket hole screws.

Step Seven
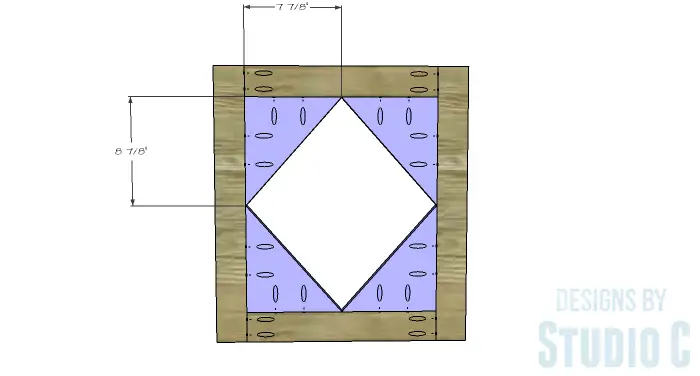
Cut the triangular pieces for the door frame and drill pocket holes in the pieces as shown. Secure the pieces to the inner edge of the frame using glue and 1-1/4″ pocket hole screws.
Step Eight
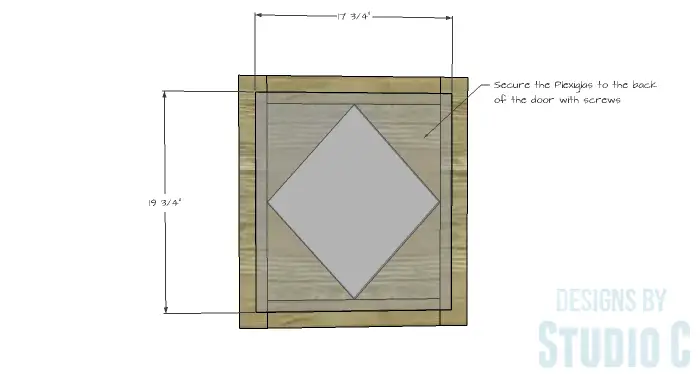
Cut the piece of Plexiglas for the back of the door. Drill holes in the corners and longer edges of the Plexiglas and attach it to the inside of the door using 3/4″ screws.
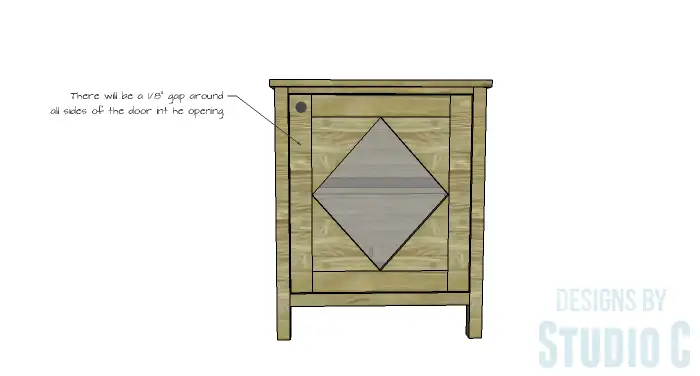
Install the hinges on the door, then install the door in the cabinet. There will be a 1/8″ gap around all sides of the door in the opening.
Install the cabinet knob.
Finish as desired.
This cabinet would be fabulous if used as a bar or as a media stand! Have any questions about the DIY furniture plans to build a Diamond Single Door Cabinet? Leave a comment below!
Originally posted 2016-03-02 08:00:06.