
Build a Cedar Fence Picket Planter Box
DIY Furniture Plans – Super-Simple Cedar Planter Box Using Fence Pickets
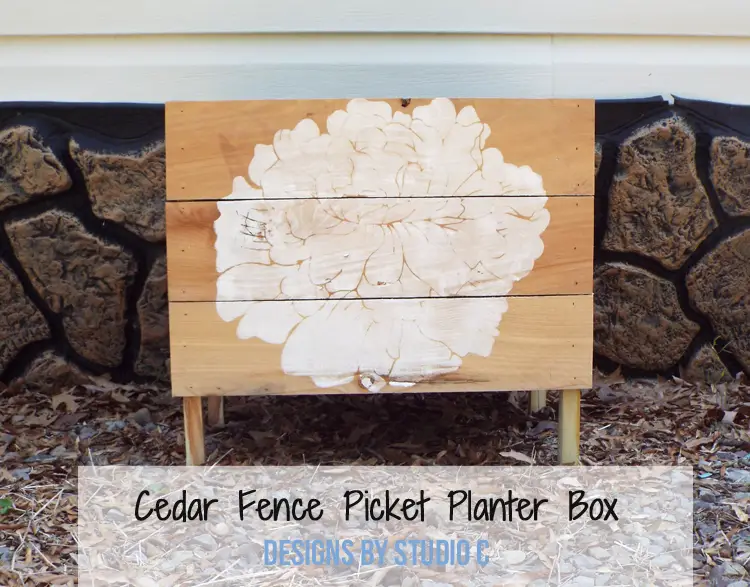
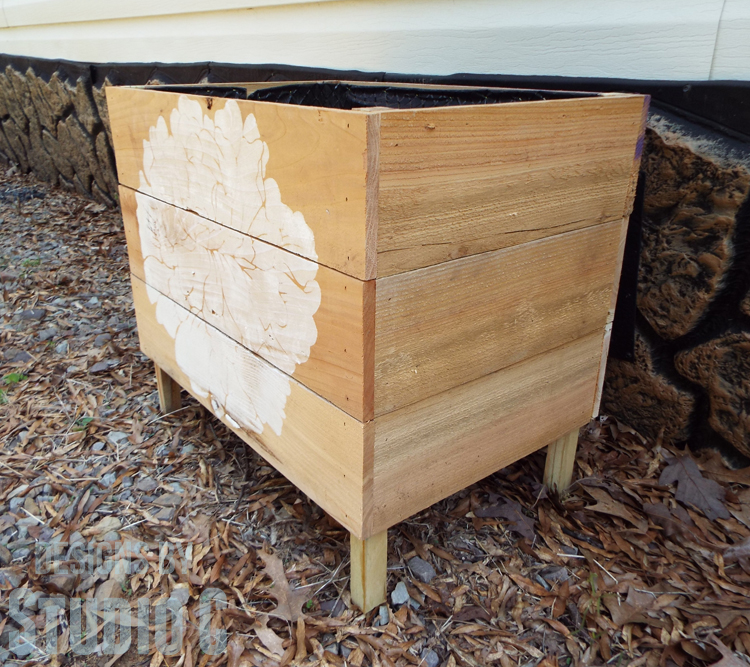
Spring is in full swing where I live and I am dying to work on planting a garden. I decided I would try to do a better job of taking care of the garden this year with my black thumb of death and all! So to keep up with my end of the bargain, I built a planter box that we can use. The DIY furniture plans to build a cedar fence picket planter box are really cheap and easy – cedar fence pickets, a treated 2×2, hardware cloth and weed barrier are all you need to create this simple box!
Materials:
- 1-1/2″ brad nails
- 1/2″ staples
- 1/4″ Hardware cloth (<– affiliate link!)
- Weed barrier fabric
- Wood glue
- Sandpaper (100, 150, 220 grits)
- Finishing supplies (primer & paint, or stain, sealer)
- Stencil with a small sponge roller, optional
Tools Needed:
- Miter Saw or Circular Saw
- Pneumatic Brad Nailer with Compressor
- Pneumatic Stapler
- Metal Snips
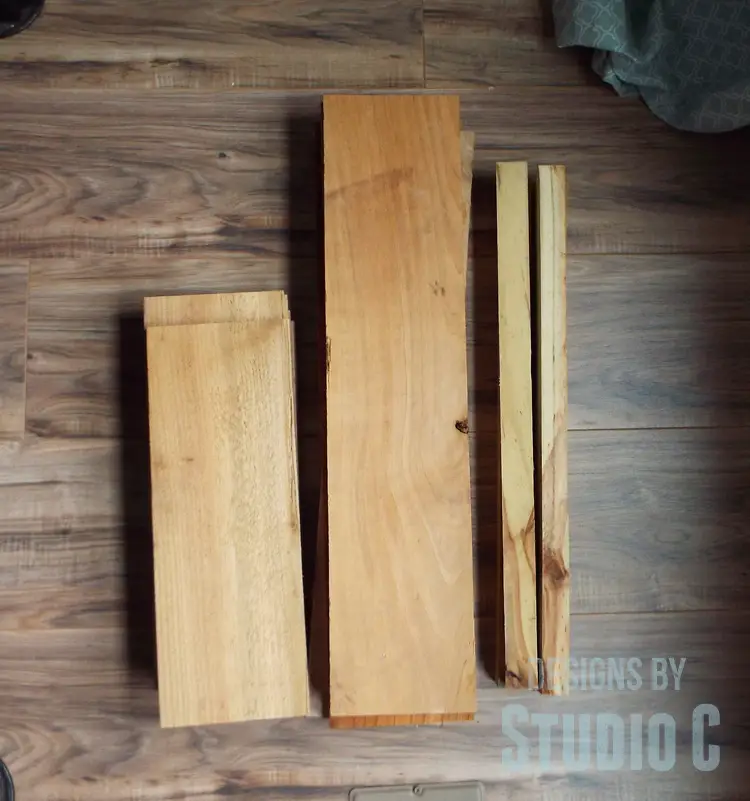
Lumber:
- 4 – Cedar Fence Pickets
- 1 – Pressure Treated 2×2 at 8′
Cut List:
- 4 – 2×2 at 21″ – Legs
- 6 – Fence pickets at 15″ – Sides
- 6 – Fence pickets at 24″ – Front & Back
- Hardware cloth cut large enough to make a tray to fit inside the planter
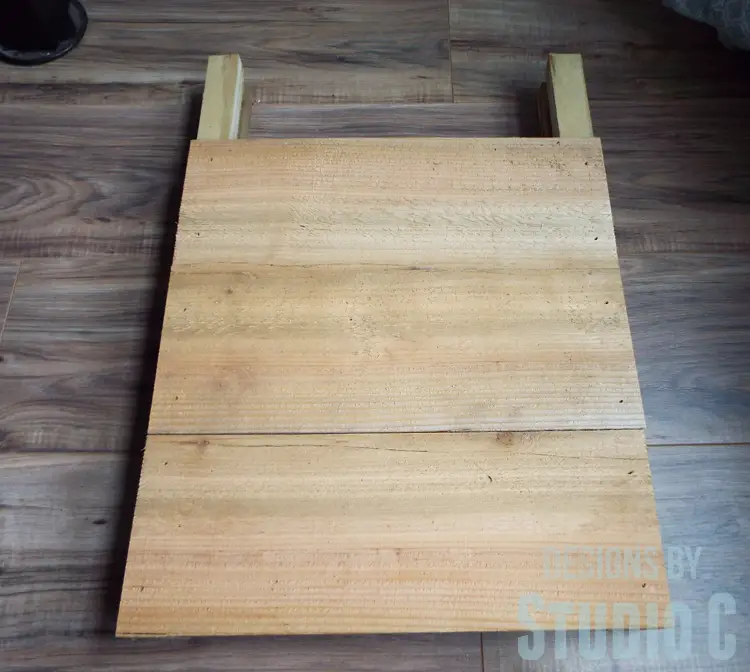
Step One
Cut the pieces for the legs, sides, front and back. Secure the sides to the legs using glue and 1-1/2″ brad nails. I positioned the first side piece so it was flush with the top of the legs, then secured the remaining two pieces underneath.
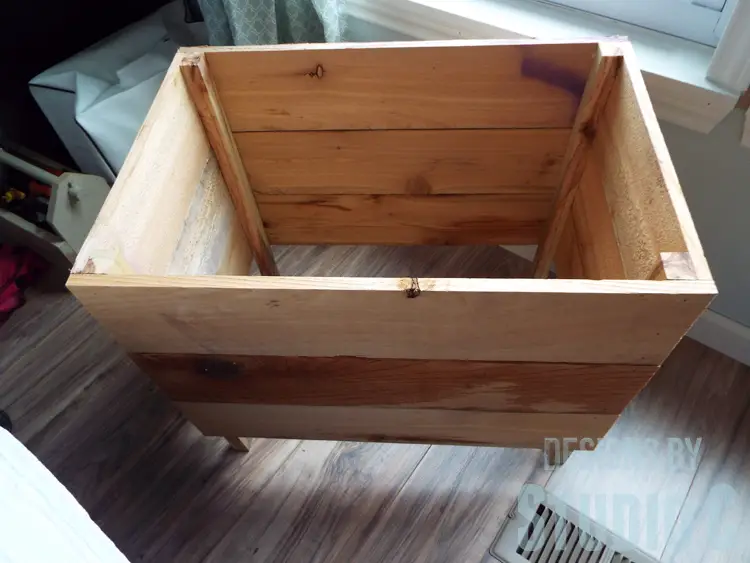
Step Two
Secure the front and back pieces to the legs overlapping the side edges of the side pieces.
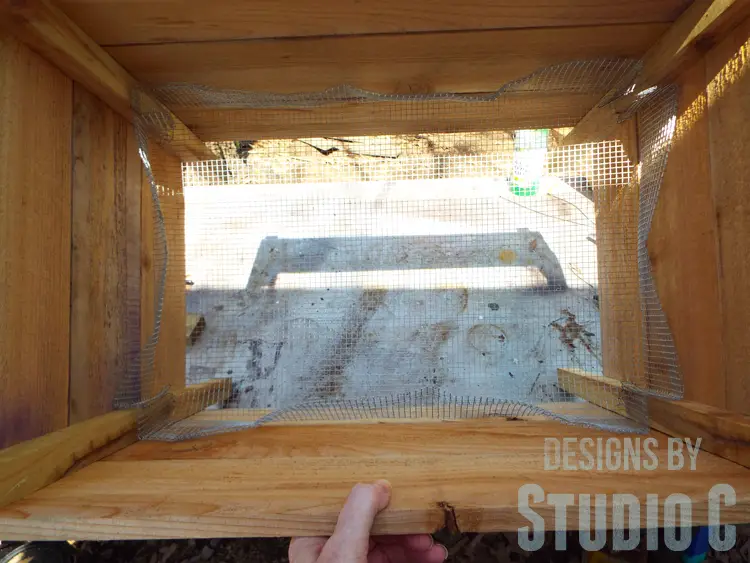
Step Three
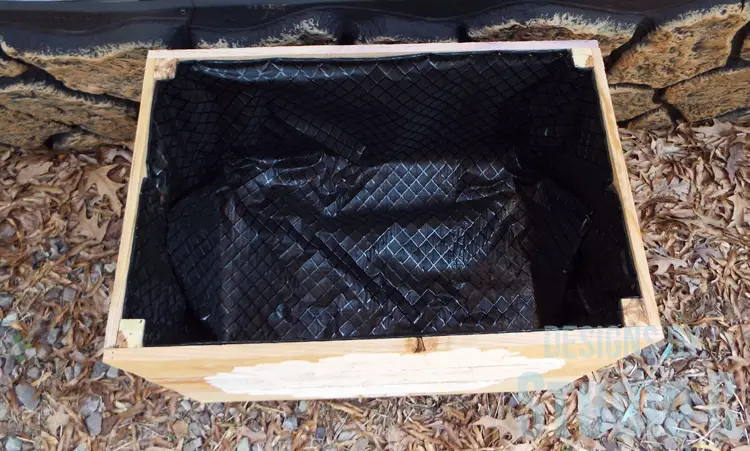
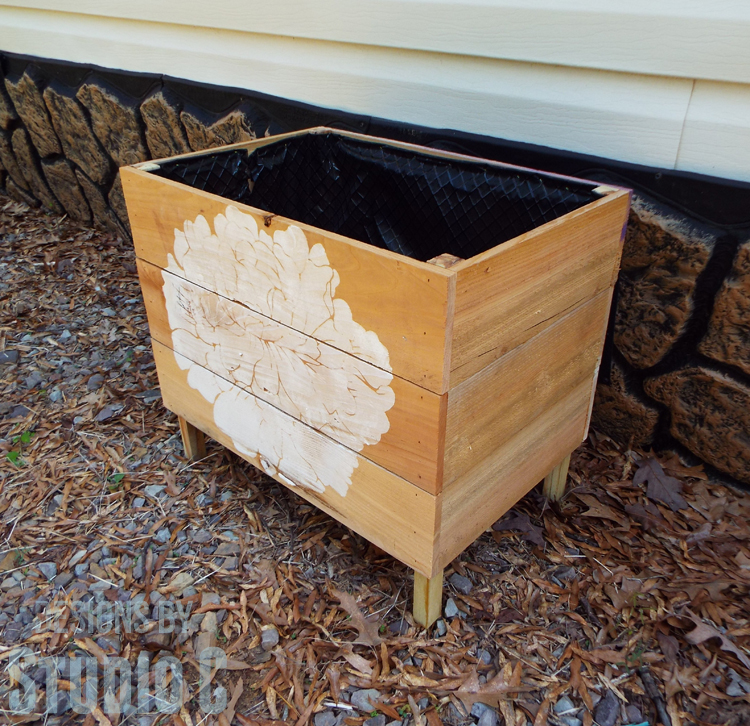
Cut a piece of hardware cloth approximately 2″ larger (on each side) than the box. Fold over each edge of the hardware cloth approximately 1″. Cut a square out of each corner so that the cloth will fit around the legs on the inside. Fold each side of the hardware cloth up to create a sort of basket to fit inside the planter. Secure the “basket” to the inside of the planter using 1/2″ staples. In my planter, I positioned the basket so the bottom was flush with the bottom of the second board because I didn’t want the planter to be too deep.
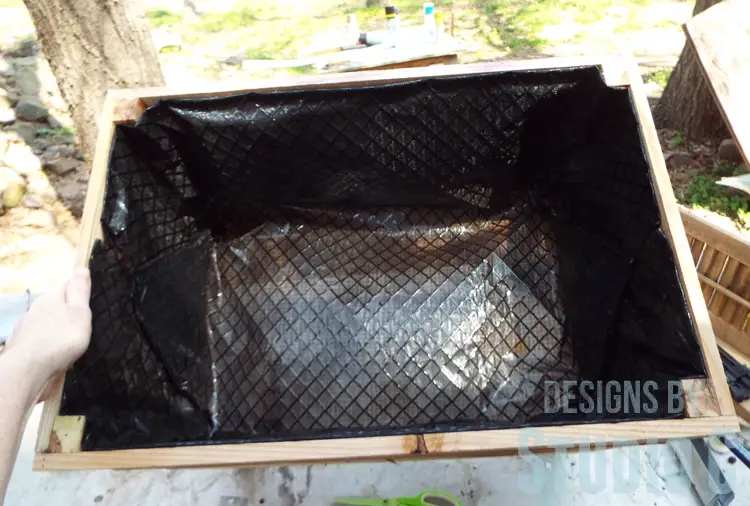
Step Four
Cut a piece of weed barrier to fit the inside of the planter, and secure in place with 1/2″ staples. The weed barrier will keep the soil from falling through the hardware cloth while letting water drain through. Straw or moss can also be used. I covered the entire inside of my planter with the weed barrier.
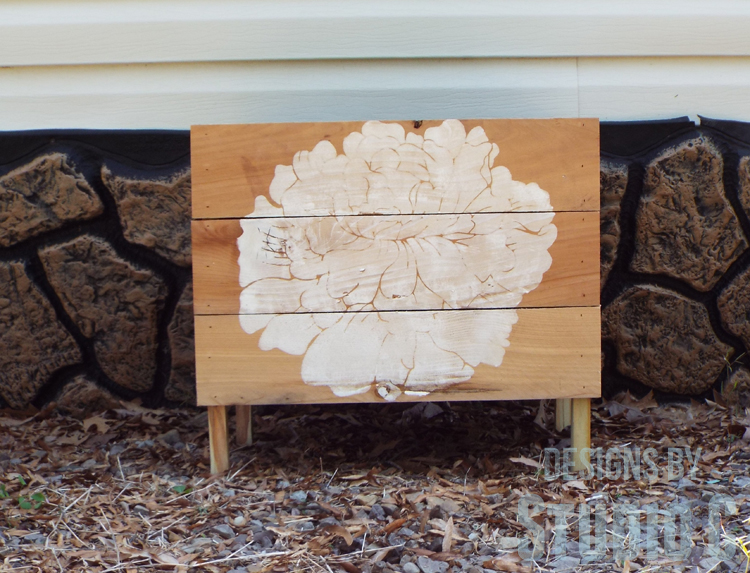
I left the planter unfinished (because I want the cedar to “age”) and added a large, stenciled flower to the front.
This planter would be easy to customize… I plan on making another planter but this time using full length pickets (with the dog-eared portion cut off) so that I can plant a variety of herbs! I may move the smaller box to a shady spot and use it to grow lettuce. Have any questions about the DIY furniture plans to build a cedar fence picket planter box? Leave a comment below!