
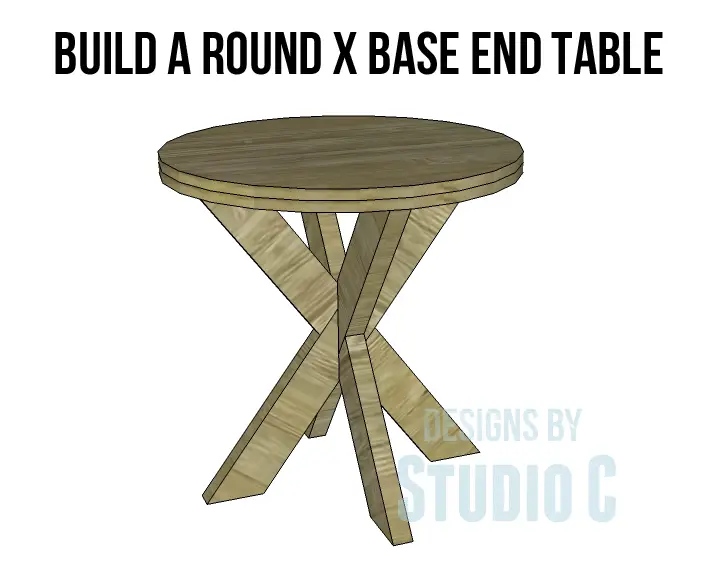
Build a Round X Base End Table
Plans to Build a Super Stylish Round End Table with an X Base!
The plans for this table only look complicated… The X base for the round end table is very easy to construct and is very big on style impact!
Materials:
- 2-1/2″ pocket hole screws
- 1-1/4″ screws
- 1-1/2″ edge banding, optional
- Wood glue
- Sandpaper (100, 150, 220 grits)
- Finishing supplies (primer & paint, or stain, sealer)
Lumber:
- 1 sheet of 3/4″ plywood (PureBond plywood would be a great choice!!)
- 2 – 2×4 at 6′
Cut List:
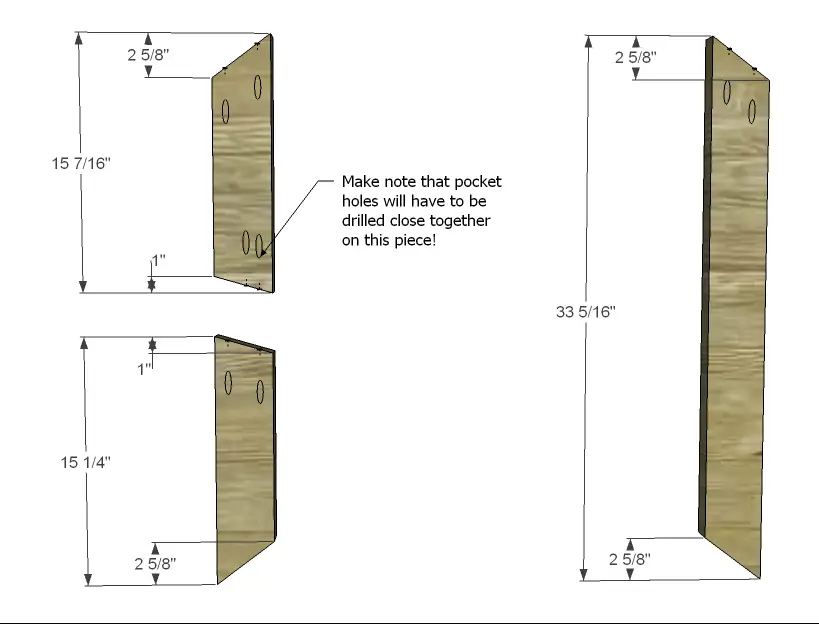
- 2 – 2×4 at 15-7/16″ – X Base
- 2 – 2×4 at 15-1/4″ – X Base
- 2 – 2×4 at 33-5/16″ – X Base
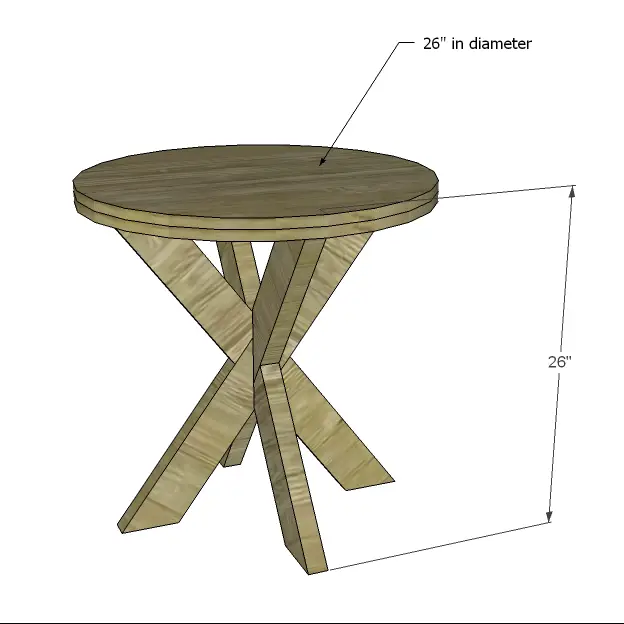
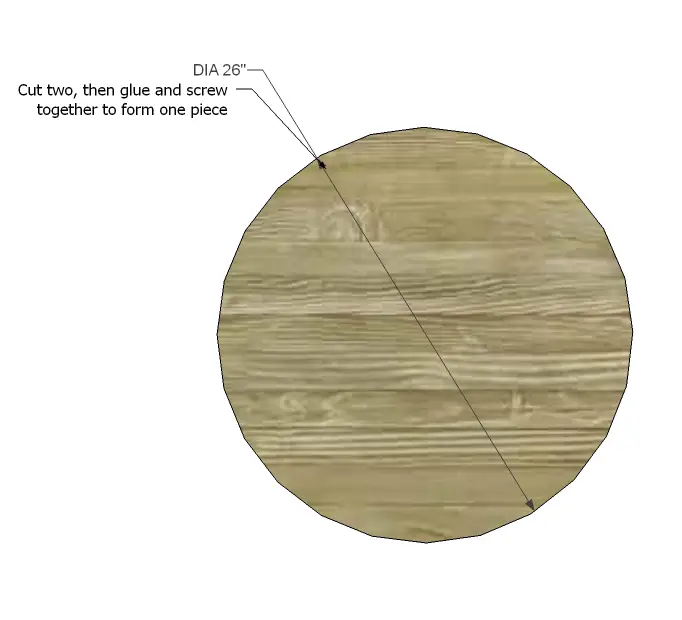
- 2 – 3/4″ plywood at 26″ in diameter
Click on the drawings for a larger view!
Step One
Cut the pieces for the base. Note that the angles are NOT cut at 45 degrees. To cut the angles, draw a line perpendicular to the length of the board at the dimension indicated. For example, draw a line across the board 2-5/8″ down from the top edge of the first board, as shown in the upper left corner of the drawing. Then draw a diagonal line from the corner of the board to the opposite end of the line just drawn. This will be the cut line for the angle. Repeat this process for all of the angles on the boards. With the pocket hole jig set for 1-1/2″ material, drill pocket holes as shown noting that the pocket holes located in the lower edge of the piece shown in the upper left of the drawing will have to be drilled close together to allow for the notch that will be cut in the next step.
Step Two
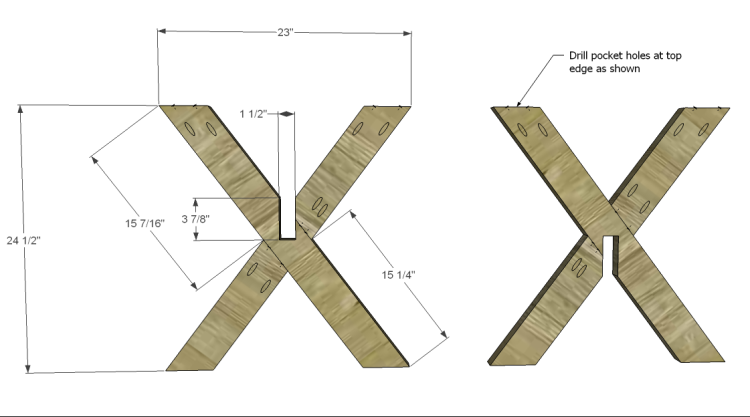
Assemble the X as shown using glue and 2-1/2″ pocket hole screws. To cut the notch, start by drawing a horizontal line across the center of the X where the pieces meet. Draw a vertical line from where the pieces meet to the center of the horizontal line. Offset the center line by 3/4″ on each side (making a rectangle) then cut out the notch using a jigsaw or a bandsaw. Note that one notch will face up toward the top of the X, and one notch will face down toward the bottom of the other X.
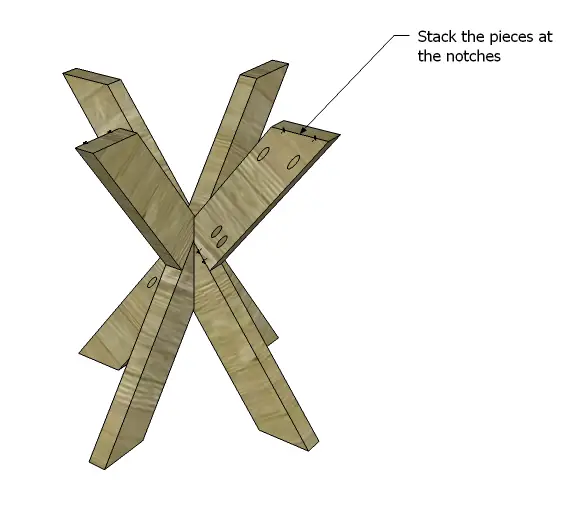
Step Three
Stack the pieces to form the base. It should be a tight fit, and sanding of the notches may be necessary.
Step Four
Cut the pieces for the top. I like to use the “string and push pin method” to draw circles. Cut out the pieces with a jigsaw or bandsaw. Spread glue on the face of one piece, then position the other piece on top. Wiggle the top piece a bit to create suction, then clamp the edges. Drive a few countersunk 1-1/4″ screws through the face to further secure the pieces together. Allow time for the glue to dry, then apply the 1-1/2″ edge banding.
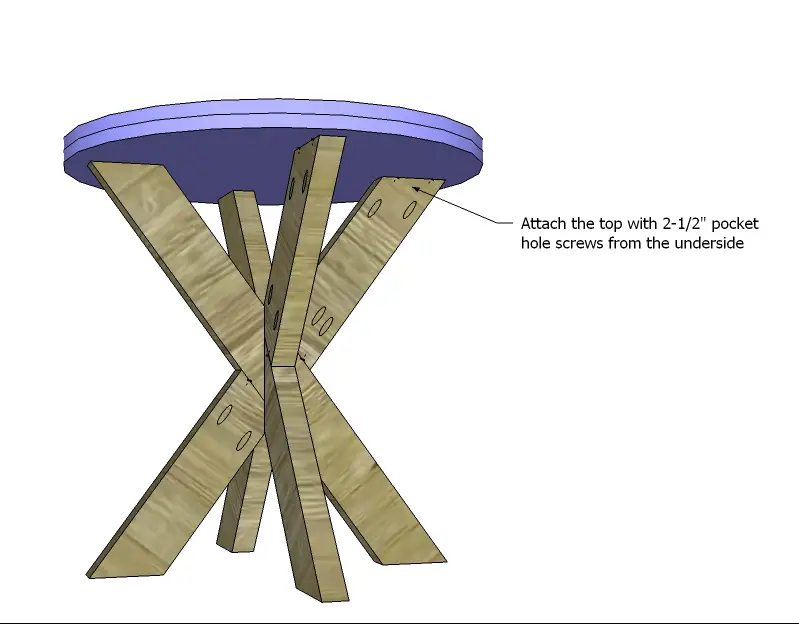
Step Five
Position the base on the bottom of the table top then secure using glue and 2-1/2″ pocket hole screws.
Finish as desired! The plans for this round x base end table are very easy to follow, right? If you have any questions let me know at cher {at} designsbystudioc {dot} com… I’d be happy to walk you through the build if you get stuck!