
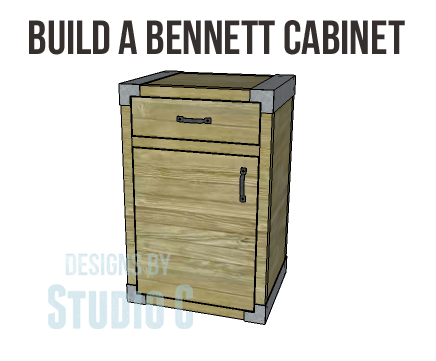
The Easy to Build Bennett Cabinet Plans
Build a Cool Industrial -Style Cabinet
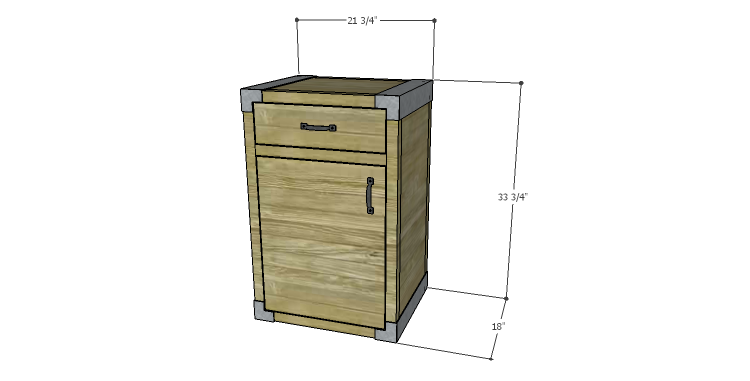
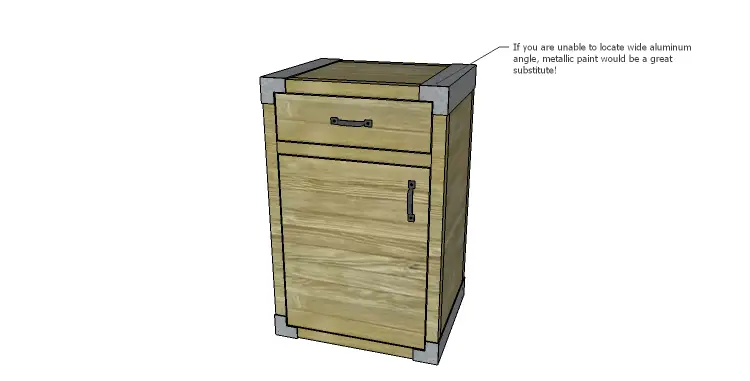
This neat little cabinet features a metallic accent on the front, top, and sides giving it an “industrial” feel… The Bennett cabinet plans feature a drawer as well as a cubby with a door and a shelf. The metal trim is standard off-the-shelf aluminum angle and brackets, but if the right size of angle or brackets cannot be found (or if it just is not in the budget!), metallic paint can also be used!
Materials:
- 1-1/4″ pocket hole screws (<– affiliate link!)
- 2-1/2″ pocket hole screws
- 1-1/4″ brad nails
- Edge banding, optional
- 1 set of 14″ Drawer slides
- 1 set of hinges
- 2 – Cabinet pulls
- Aluminum angle and angle brackets
- Wood glue
- Sandpaper (100, 150, 220 grits)
- Finishing supplies (primer & paint, or stain, sealer)
Lumber:
- 1 – 1×2 at 4′
- 1 – 1×4 at 6′
- 3 – 2×2 at 8′
- 1 – 2′ x 4′ sheet of 3/4″ plywood
- 1 sheet of 3/4″ plywood
Cut List:
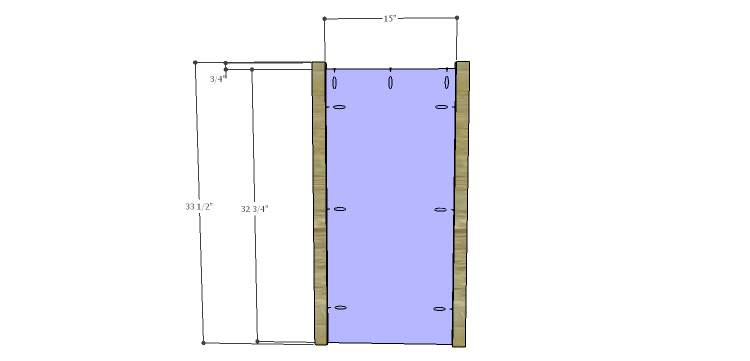
- 4 – 2×2 at 33-1/2″ – Legs
- 2 – 3/4″ plywood at 15″ x 32-3/4″ – Side Panels
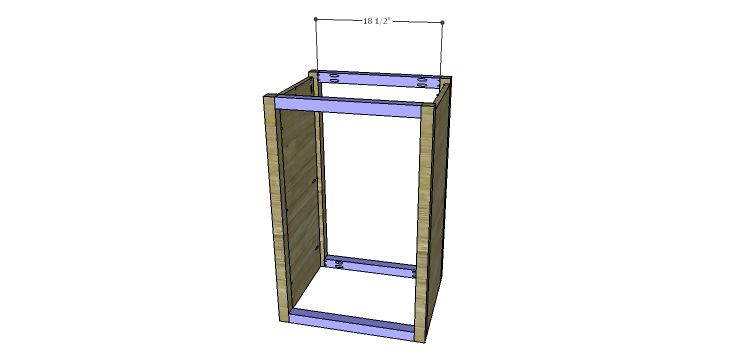
- 4 – 2×2 at 18-1/2″ – Stretchers
- 1 – 3/4″ plywood at 15″ x 21-1/2″ – Top
- 1 – 3/4″ plywood at 15″ x 20″ – Bottom
- 1 – 3/4″ plywood at 18-1/2″ x 30-1/2″ – Back
- 1 – 2×2 at 18-1/2″ – Front Stretcher
- 1 – 3/4″ plywood at 15″ x 20″ – Shelf
- 2 – 1×2 at 15″ – Drawer Spacer
- 1 – 3/4″ plywood at 12-1/2″ x 16″ – Drawer Bottom
- 2 – 1×4 at 12-1/2″ – Drawer Box Sides
- 2 – 1×4 at 17-1/2″ – Drawer Box Front & Back
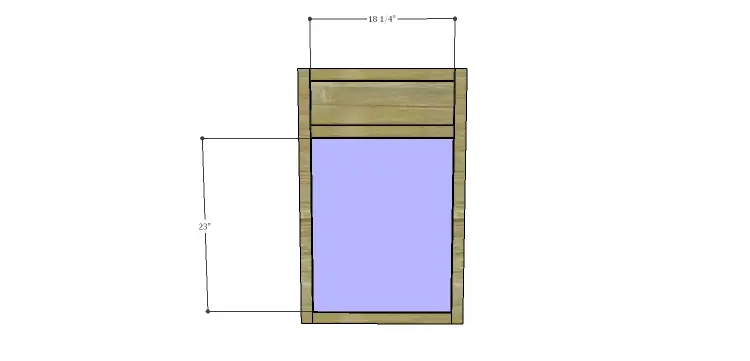
- 1 – 3/4″ plywood at 5-1/2″ x 18-1/4″ – Drawer Front
- 1 – 3/4″ plywood at 18-1/4″ x 23″ – Door
Step One
Edge banding will be applied to the exposed edges of the plywood prior to assembly.
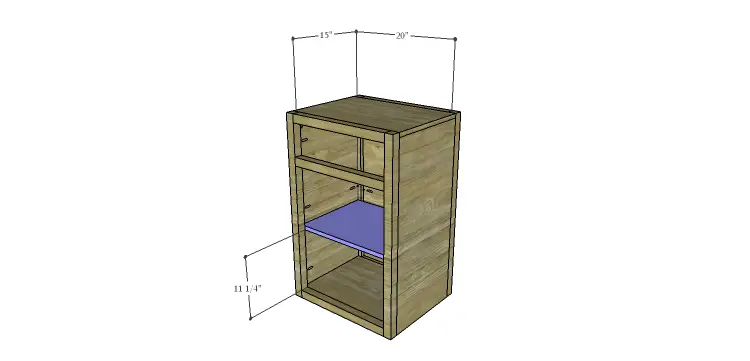
Cut the pieces for the legs and the side panels. With the pocket hole jig set for 3/4” material, drill pocket holes in each longer edge of the side panels. Secure the panels to the legs using glue and 1-1/4″ pocket hole screws. The outside face of the panels will be flush with the outside face of the legs, and the side panels will be 3/4″ shorter than the legs.
Step Two
Cut the pieces for the stretchers. Set the pocket hole jig for 1-1/2” material and drill pocket holes in each end. Secure the stretchers to the legs using glue and 2-1/2″ pocket hole screws.
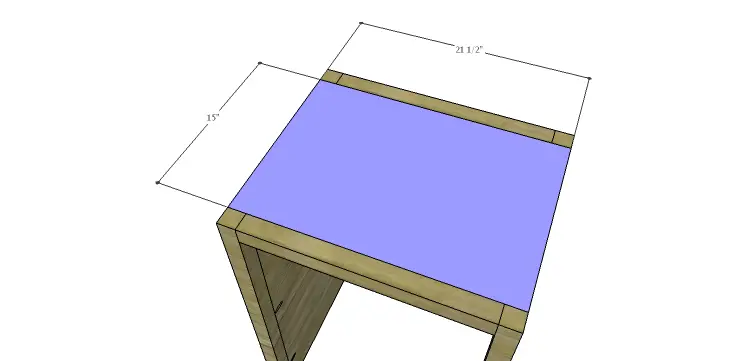
Step Three
Cut the piece for the top. Set the pocket hole jig for 3/4” material and drill pocket holes in each long edge. Position the top so it rests on the side panels, then secure to the side panels using glue and 1-1/4″ brad nails. Use 1-1/4″ pocket hole screws the secure the top to the stretchers from the underside.
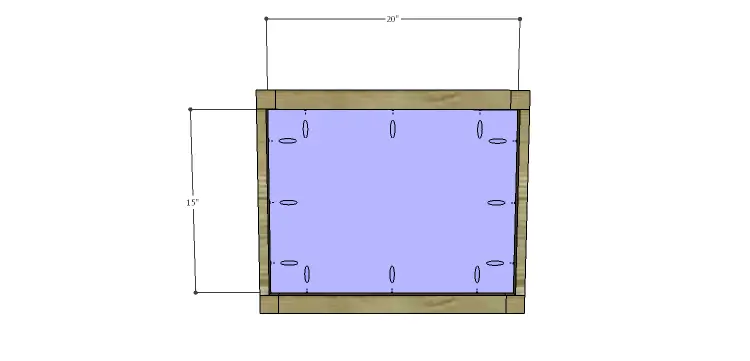
Step Four
Cut the pieces for the bottom and drill pocket holes in all four edges. Secure the bottom to the side panels and bottom stretchers using glue and 1-1/4″ pocket hole screws. The top face of the bottom piece will be flush with the top of the lower stretchers.
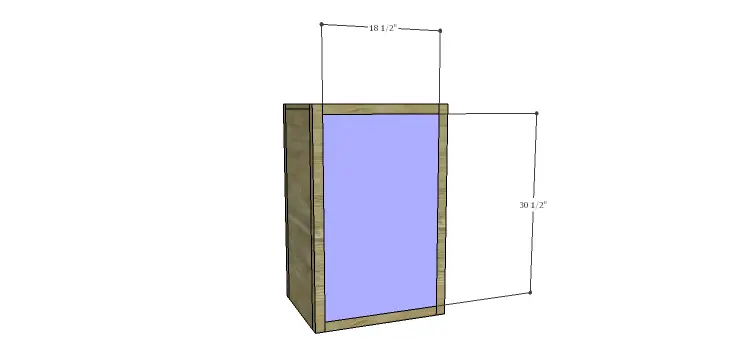
Step Five
Cut the piece for the back and drill pocket holes in all four edges. Secure to the legs and stretchers using glue and 1-1/4″ pocket hole screws. The outside face will be flush with the outside face of the legs.
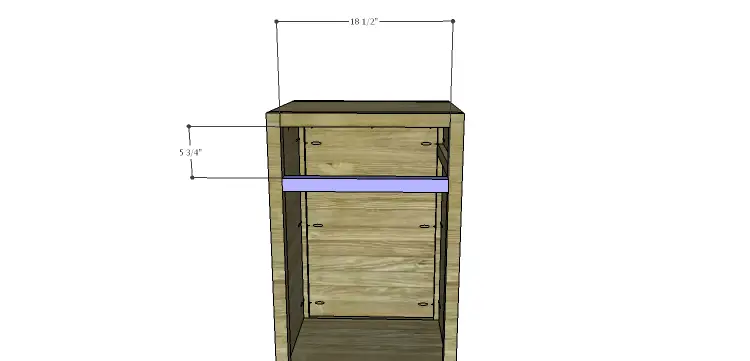
Step Six
Cut the piece for the front stretcher. Set the pocket hole jig for 1-1/2” material and drill pocket holes in each end. Secure the stretcher to the legs using glue and 2-1/2″ pocket hole screws.
Step Seven
Cut the piece for the shelf. Secure the shelf inside using glue and 1-1/4″ brad nails through the back and sides into the shelf.
Step Eight
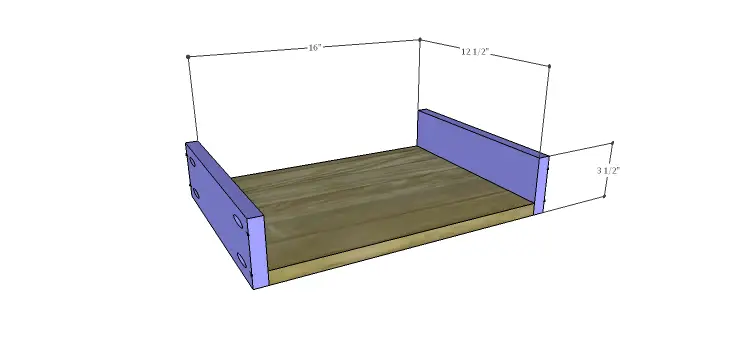
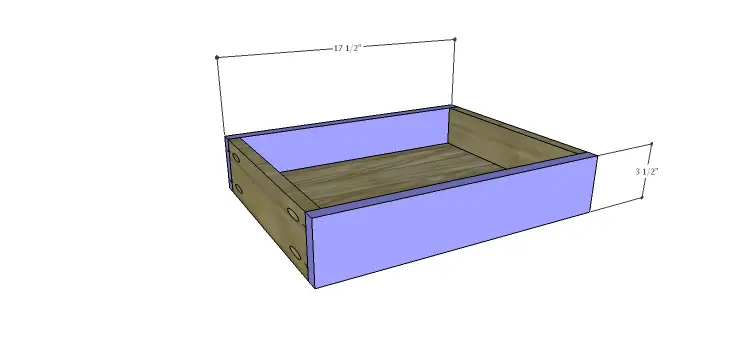
Cut the pieces for the drawer box. Drill pocket holes in all four edges of the bottom as well as each end of the sides. Assemble the drawer box as shown using glue and 1-1/4” pocket hole screws. Install the drawer slides according to the manufacturer’s installation instructions, locating them ¾” back from the front edge of the sides. This easy tutorial on installing drawer slides will be very helpful. Make any necessary adjustments.
Step Nine
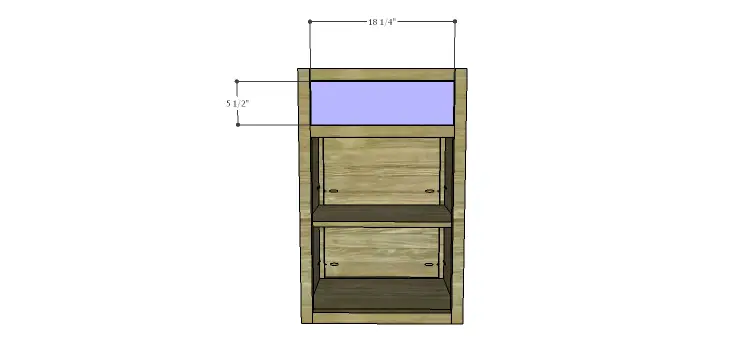
Cut the pieces for the drawer front. Mark the position for the drawer pulls and drill the holes. Shim the drawer front in the opening – there will be a 1/8” gap around all sides – then drive screws through the holes for the drawer pulls into the drawer box. Open the drawer, and secure the drawer front using countersunk 1-1/4” screws from the inside. Remove the screws from the holes for the drawer pull then finish drilling the holes. Install the drawer pull. Try this easy tutorial on installing drawer fronts.
Step Ten
Cut the piece for the door. Install the hinges on the door, then install the door in the opening.
Finish as desired. Add the metal angle and brackets. Metallic paint would be a great option instead of the metal angle!
This cabinet would be great used by the front door as a catch-all, or as a taller nightstand in the bedroom. Wherever the cabinet is placed, it is sure to fit in with any decor! Any questions or comments about the Bennett cabinet plans? Leave a comment below or contact me at cher {at} designsbystudioc {dot} com!