
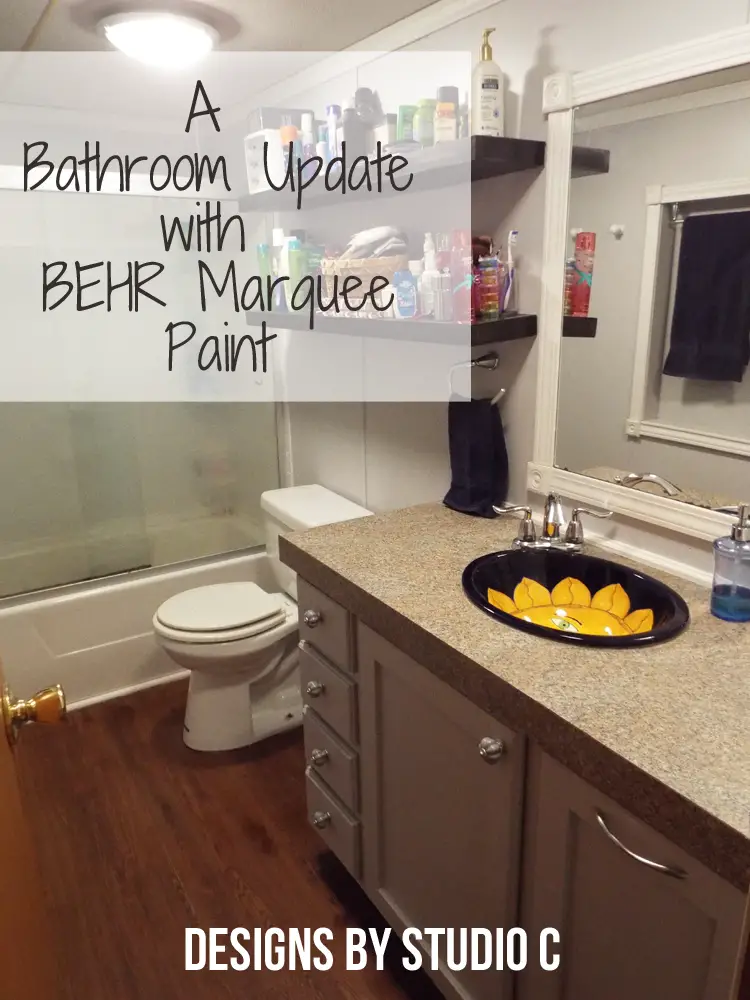
An Update to a Dated Bathroom with BEHR Marquee
A Fabulous Bathroom Update
BEHR® sponsored this blog post. The opinions and text are all mine.
Several years ago, I remodeled my kids’ bathroom. There was a crack in the bathtub (it was plastic) and along with a crappy caulking job on the tub surround, it created a leak which ruined the floor. I replaced the tub and surround, and added a sliding door. Now that the kids are older, it is time for something new. This bathroom update will feature new wall color with BEHR MARQUEE® Interior Paint and Primer, a new vanity, and a new light fixture among other things!
There was a lot of prep work I needed to do before I could start painting the walls. The first thing I needed to do was fill the holes I never filled when I replaced the fixtures. I removed the wall anchors, filled the holes, and sanded the filler smooth.
Next, I removed the old vanity and the top, and removed the tile backsplash. I cleaned the walls and trim using a mixture of vinegar and water to remove any dirt, grime, dust, and other “questionable” materials – this is a kids’ bathroom after all!
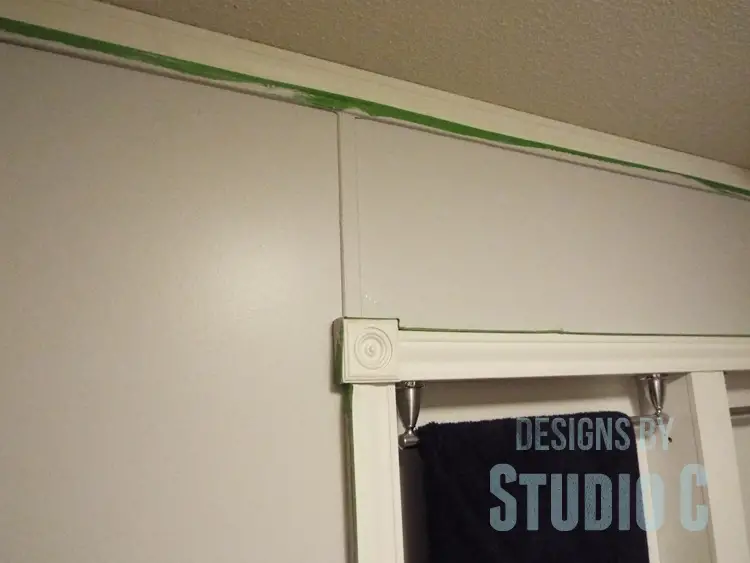
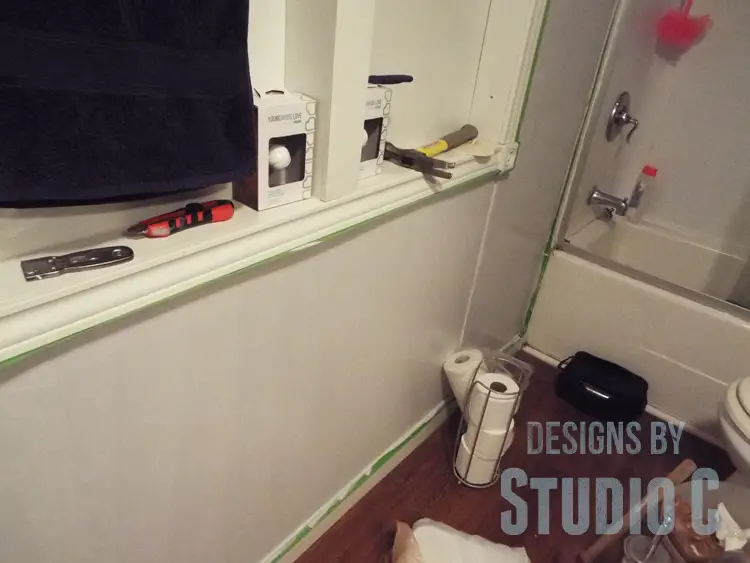
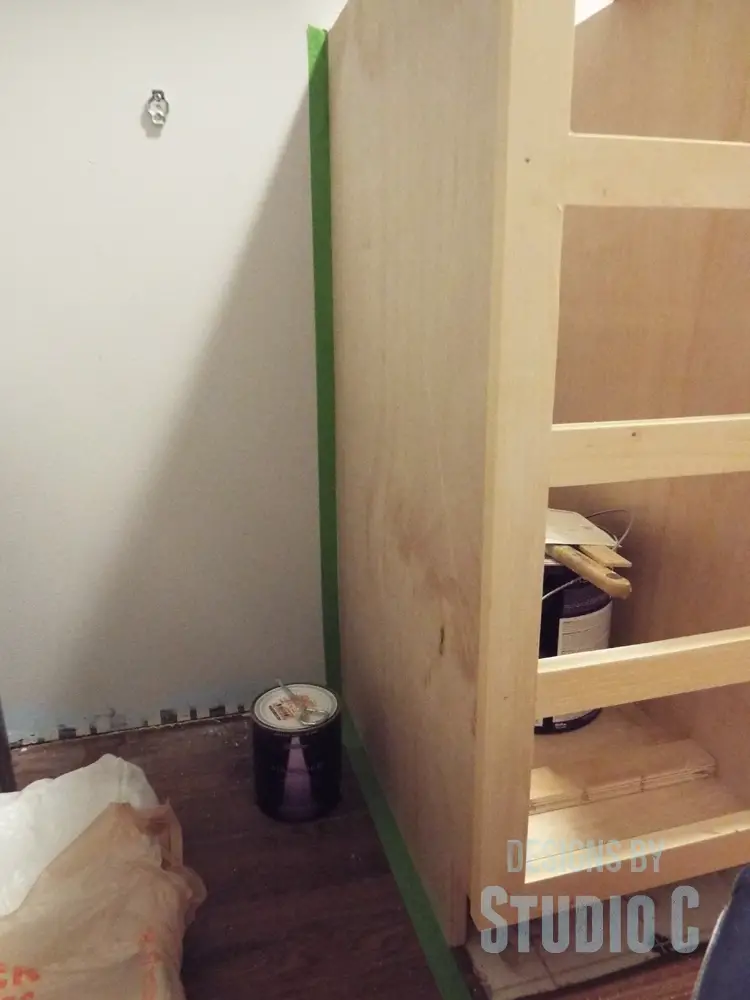
I taped off the trim at the ceiling, the baseboards at the floor, and the casing around the door and the towel racks. In addition, I taped off the edge of the tub and the shower door frame.

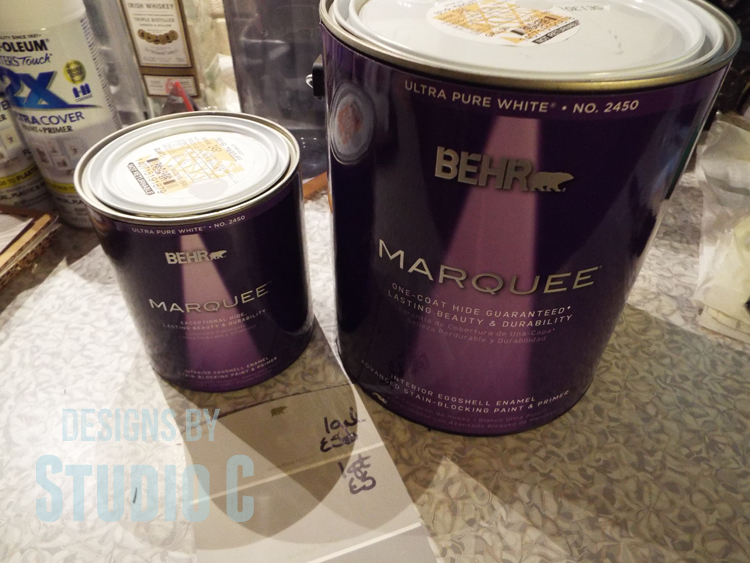
I used a brush to cut in around the trim, in the corners, and at the baseboards. I applied the paint to the walls with a roller. Behr has a great step by step tutorial on properly preparing a roller for paint and it can be found here. With MARQUEE Interior Paint and Primer, one-coat coverage is guaranteed when tinted to any of the 372 colors in the MARQUEE Interior One-Coat Collection. Behr products are available exclusively at The Home Depot and have an outstanding color collection! The color I’m using is White Metal which is an ultra-pale grey (a shade that is not a guaranteed one-coat color).
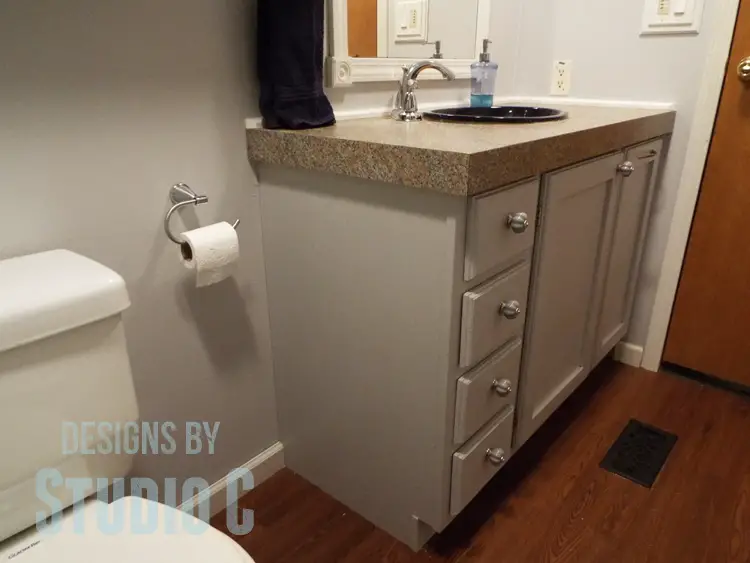
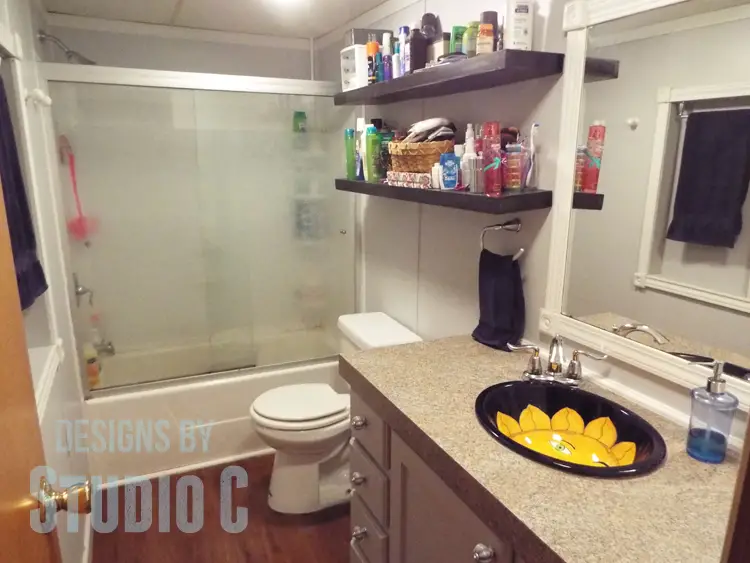
The next part of the project was to build a new vanity). We are a tall family and a taller vanity was definitely on the list of requests! I custom designed this vanity specifically for this space and it includes a built-in laundry hamper, four drawers, and a shelf in the center. I used MARQUEE Interior Paint and Primer on the vanity, as well. I installed the vanity and the trim on the lower edge, then taped off the floor and wall. I used a brush for this project, and the color I selected is Silver Bullet which is a shade just below the wall color on the color card (another shade that is not a guaranteed one-coat color).
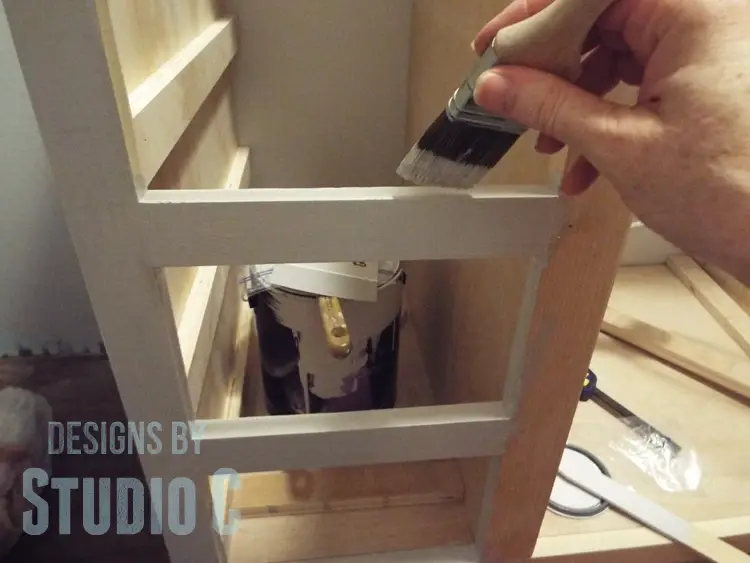
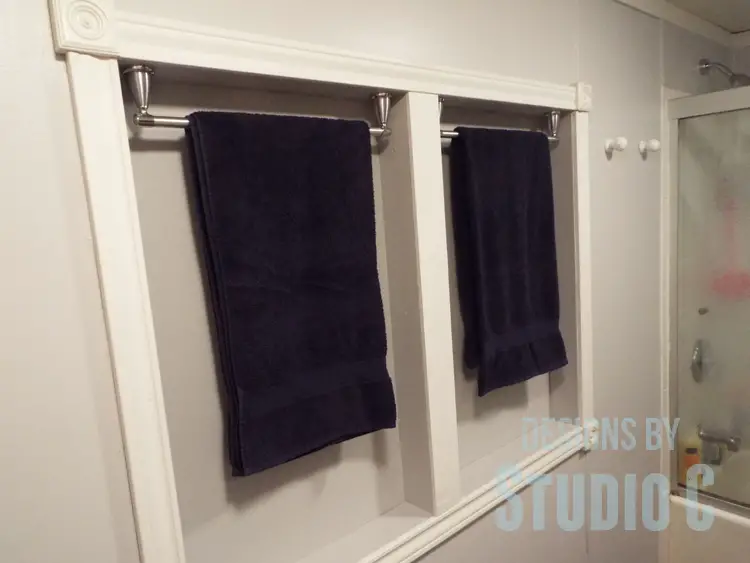
I also painted the inside of the towel rack cabinets in the same shade as the vanity. The contrast between the two is amazing!
The vanity came out fabulous!
I offered to make a few storage crates for the kids’ “stuff” but they refused – pardon the chaos on the shelves!
I am crazy in love with MARQUEE Interior Paint and Primer, and especially the colors I chose. I think it looks brighter, and more modern! These are my perfect colors and this bathroom update is my favorite project so far!
This post is brought to you by BEHR. Color that’s True to Hue. If you feel it you can find it.
BEHR® sponsored this blog post. The opinions and text are all mine.
Originally posted 2015-09-16 08:00:35.
[…] let’s talk about the fun part – DIY bathroom painting! It’s actually easier than you might think. Just make sure to prep the walls properly by cleaning […]