The Allie Armoire Cabinet Plans
A Gorgeous Cabinet to Build for Any Space
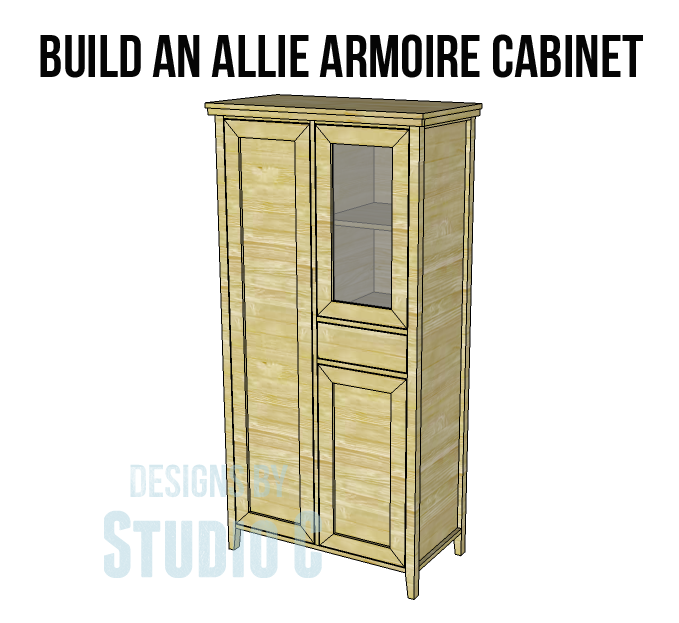
I really love the style of this armoire cabinet… The Allie armoire cabinet plans feature one long cabinet with shelves, a drawer, and two shorter cabinets with shelves. How awesome would it be to build two, side by side, and swap the door and drawer location so that each cabinet is opposite? Oooh… This may be added to my “to build” list!
Materials:
- 1-1/4″ pocket hole screws (<– affiliate link!)
- 2-1/2″ pocket hole screws
- 1-1/4″ brad nails
- Edge banding, optional
- 1 set of 16″ drawer slides
- Cabinet pulls
- 3 magnetic door catches
- 1 – piece of 1/4″ Plexiglas at 12″ x 24″
- Wood glue
- Sandpaper (100, 150, 220 grits)
- Finishing supplies (primer & paint, or stain, sealer)
Lumber:
- 1 – 1×2 at 4′
- 4 – 1×3 at 8′
- 1 – 1×4 at 6′
- 1 – scrap of 1×6 at 15″
- 1 sheet of 1/4″ plywood
- 3 sheets of 3/4″ plywood
Cut List:
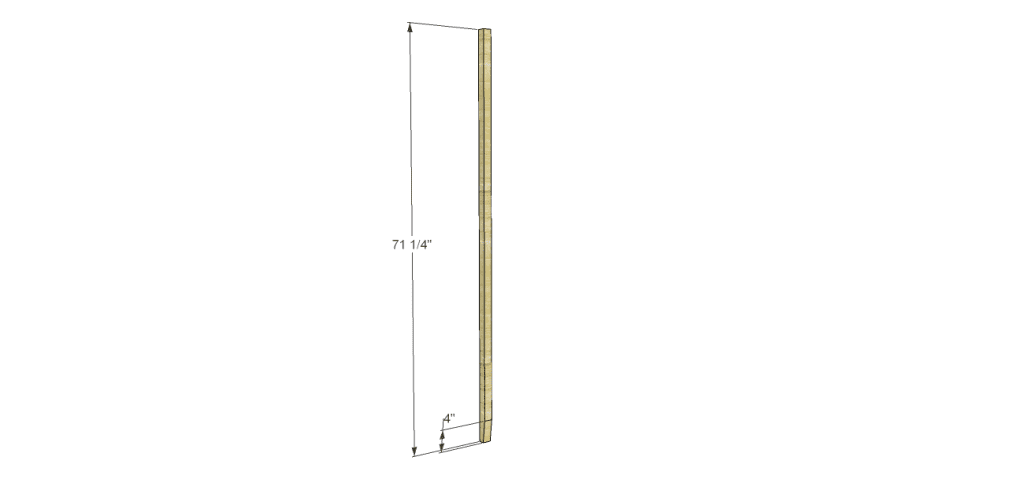
- 4 – 2×2 at 71-1/4″ – Legs
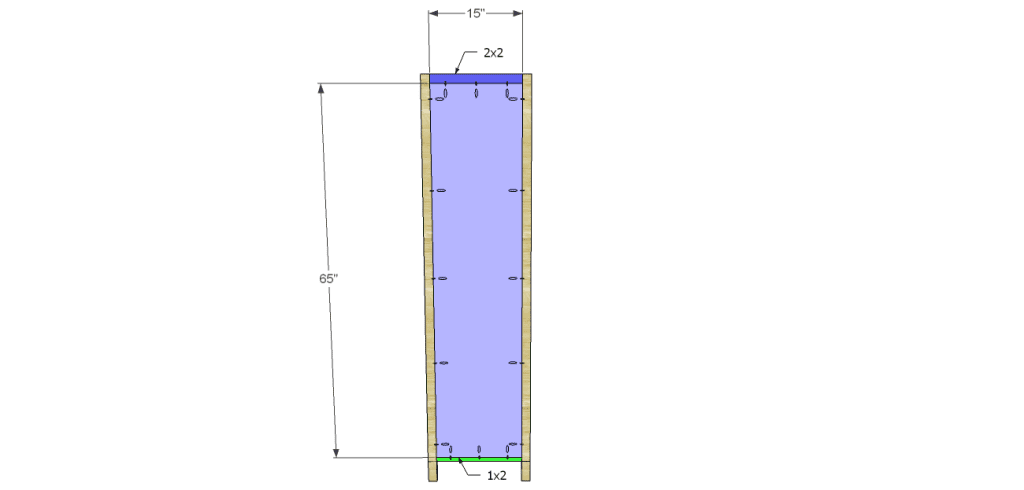
- 2 – 2×2 at 15″ – Upper Side Frame
- 2 – 1×2 at 15″ – Lower Side Frame
- 2 – 3/4″ plywood at 15″ x 65″ – Side Panels
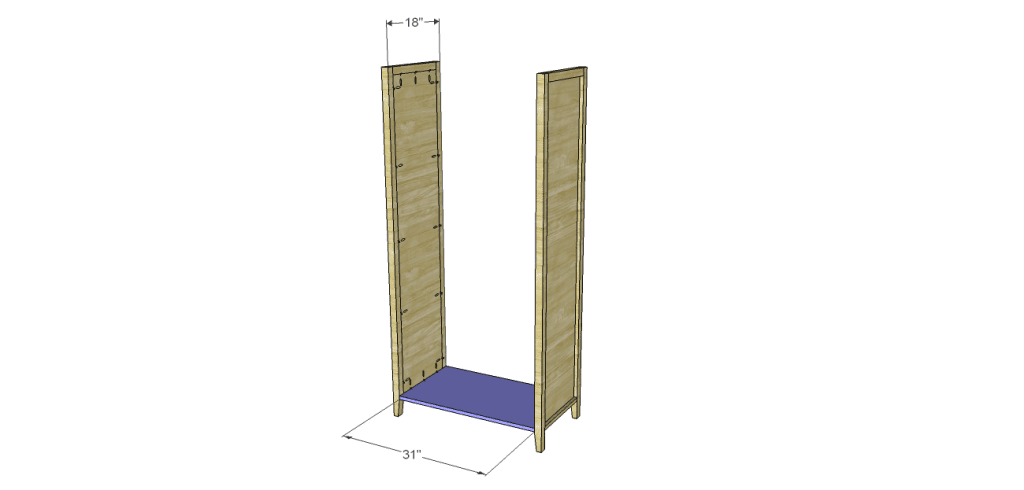
- 1 – 3/4″ plywood at 18″ x 31″ – Bottom
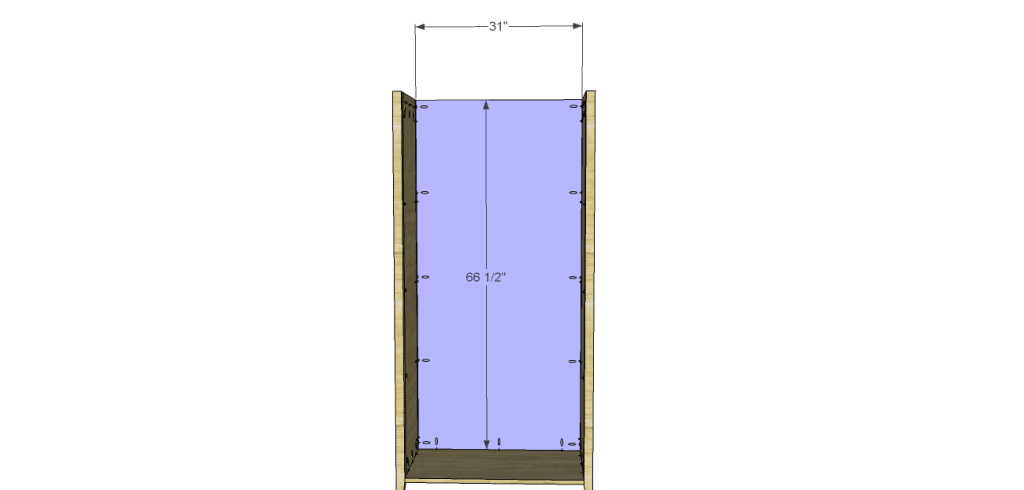
- 1 – 3/4″ plywood at 31″ x 66-1/2″ – Back
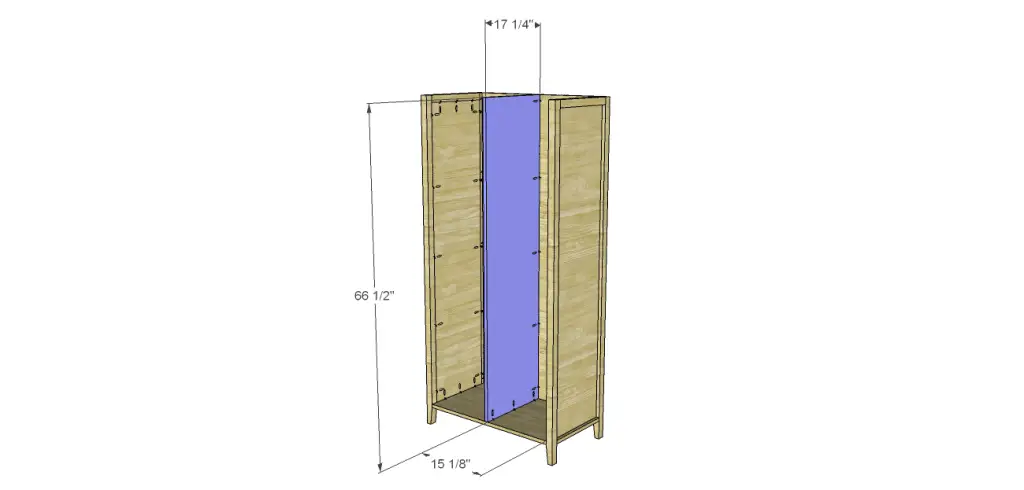
- 1 – 3/4″ plywood at 17-1/4″ x 66-1/2″ – Divider
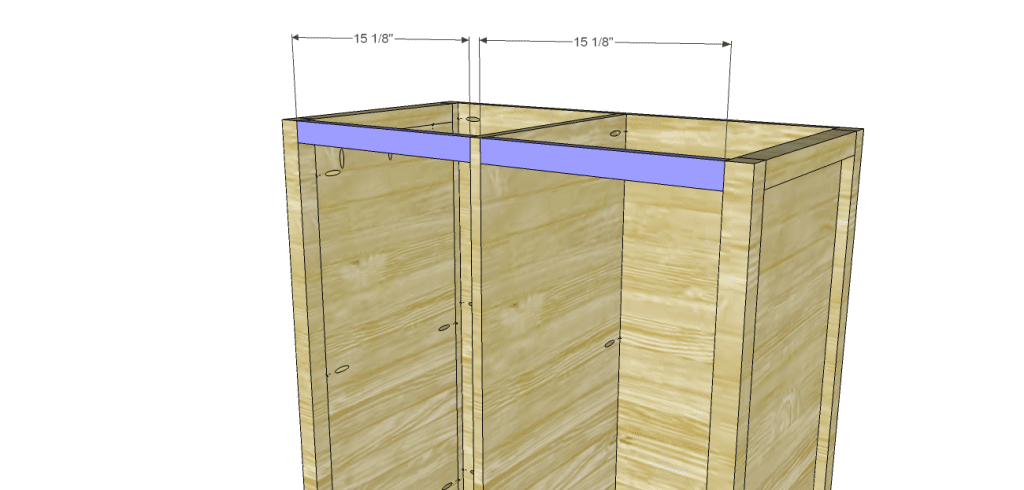
- 2 – 1×2 at 15-1/8″ – Upper Front Stretchers
- 2 – 3/4″ plywood at 15-1/8″ x 17-1/4″ – Drawer Shelves
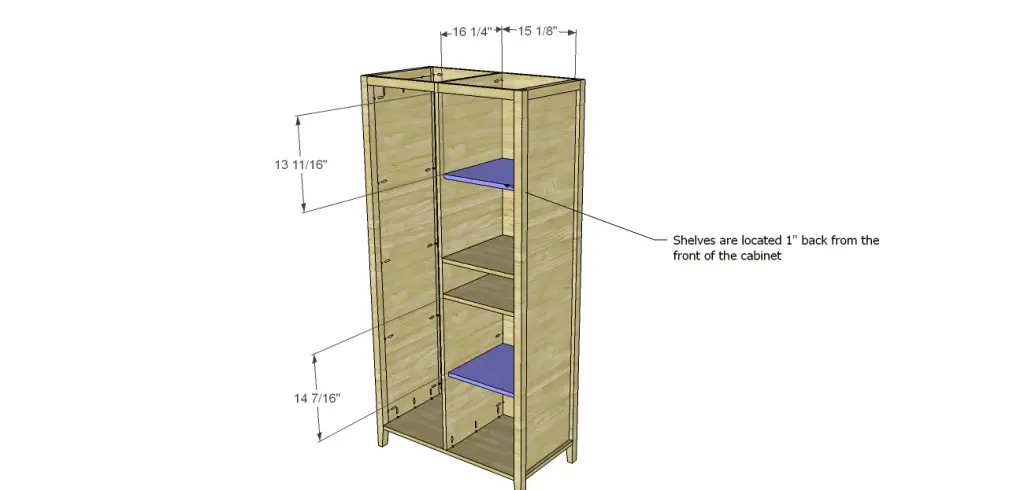
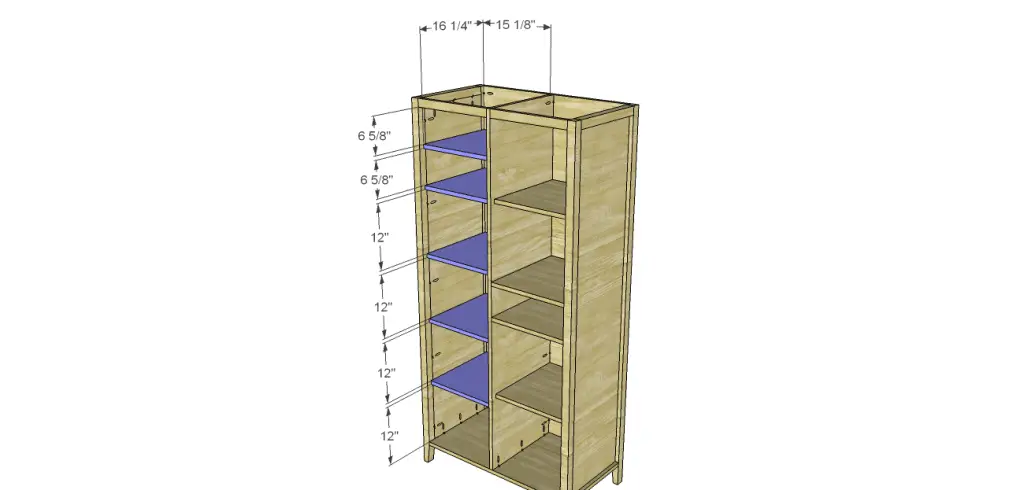
- 7 – 3/4″ plywood at 15-1/8″ x 16-1/4″ – Cabinet Shelves
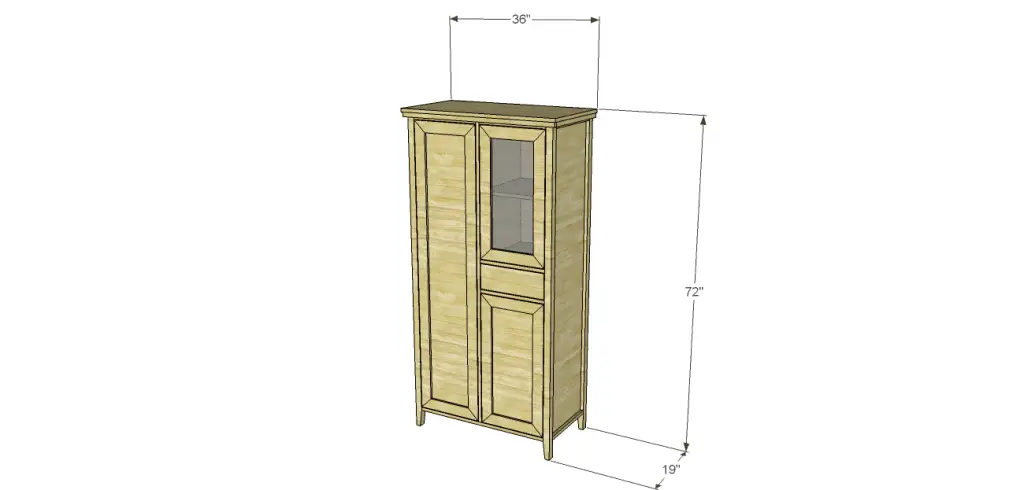
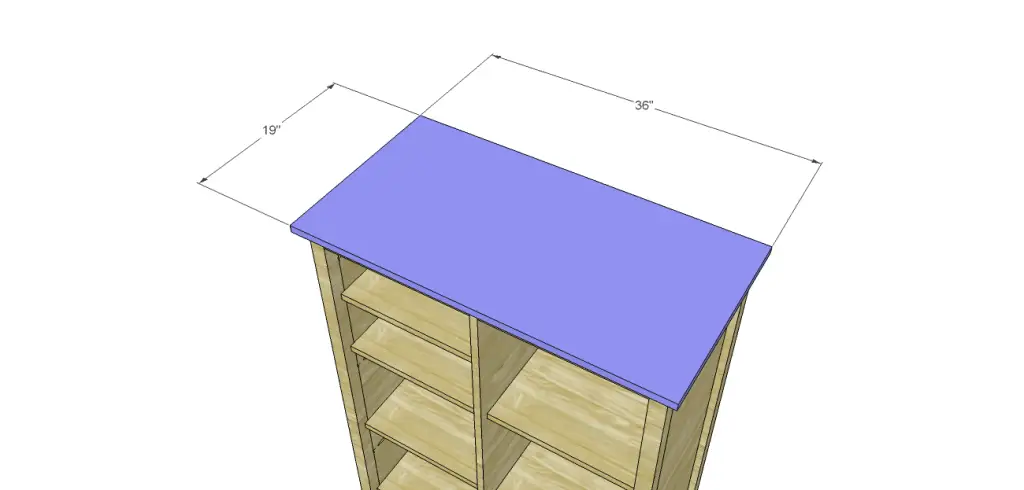
- 1 – 3/4″ plywood at 19″ x 36″ – Top
- 2 – 3/4″ trim – cut to fit the sides of the cabinet
- 1 – 3/4″ trim cut to fit the front of the cabinet
- 1 – 3/4″ plywood at 12-5/8″ x 14-1/2″ – Drawer Box Bottom
- 2 – 1×4 at 14-1/2″ – Drawer Box Sides
- 2 – 1×4 at 14-1/8″ – Drawer Box Front & Back
- 1 – 1×6 at 14-7/8″ – Drawer Front
- 6 – 1×3 at 14-7/8″ – Door Rails
- 2 – 1×3 at 27-7/8″ – Upper Side Door Stiles
- 2 – 1×3 at 29-3/8″ – Lower Door Stiles
- 2 – 1×3 at 64-3/4″ – Tall Door Stiles
- 1 – 1/4″ Plexiglas at 10-5/8″ x 23-5/8″ – Upper Door Panel
- 1 – 1/4″ plywood at 10-5/8″ x 25-1/8″ – Lower Door Panel
- 1 – 1/4″ plywood at 10-5/8″ x 60-1/2″ – Tall Door Panels
 Step One
Edge banding will be applied to the exposed edges of the plywood prior to assembly! Cut the pieces for the legs. Cut the taper using a jigsaw or bandsaw. Cut the pieces for the side frames and side panels. With the pocket hole jig set for 1-1/2″ material, drill pocket holes in each end of the 2×2 frame piece. Secure to the legs using glue and 2-1/2″ pocket hole screws. The taper of the legs will point in. Set the pocket hole jig for 3/4″ material and drill pocket holes in each end of the 1×2 piece as well as all four edges of the side panels. Secure the 1×2 piece to the legs using glue and 1-1/4″ pocket hole screws, then secure the panel using glue and 1-1/4″ pocket hole screws. The back face of the panel will be flush with the inside face of the legs.
Step Two
Cut the piece for the bottom and drill pocket holes in each of the side edges. Secure to the lower side frame pieces using glue and 1-1/4″ pocket hole screws.
Step Three
Cut the piece for the back and drill pocket holes in the lower edge as well as both side edges. Secure to the legs using glue and 1-1/4″ pocket hole screws. The outside face of the back will be flush with the outside face of the legs.
Step Four
Cut the piece for the divider and drill pocket holes in the lower edge, as well as the back edge. Secure the divider to the bottom and back as shown using glue and 1-1/4″ pocket hole screws.
Step Five
Cut the pieces for the front stretchers and drill pocket holes in each end. Secure to the sides and divider using glue and 1-1/4″ pocket hole screws.
Step Six
Cut the pieces for the drawer shelves. The shelves can be secured to the sides, back, and divider using glue and 1-1/4″ brad nails or 1-1/4″ pocket hole screws. Choose the method that is easiest for you!
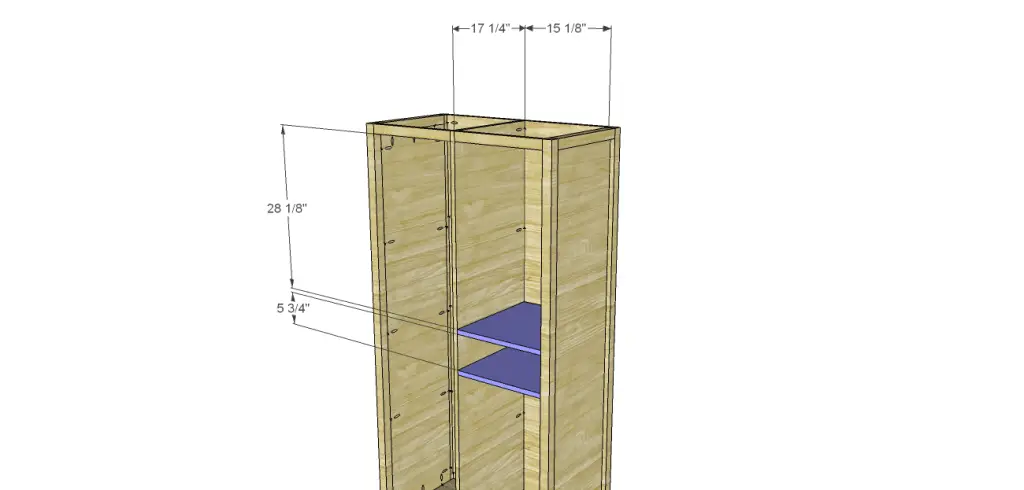
Step Seven
Cut the pieces for the cabinet shelves. The cabinet shelves will be located 1″ back from the front edge of the cabinet and can be secured to the sides, back, and divider using glue and 1-1/4″ brad nails or 1-1/4″ pocket hole screws.
Step Eight
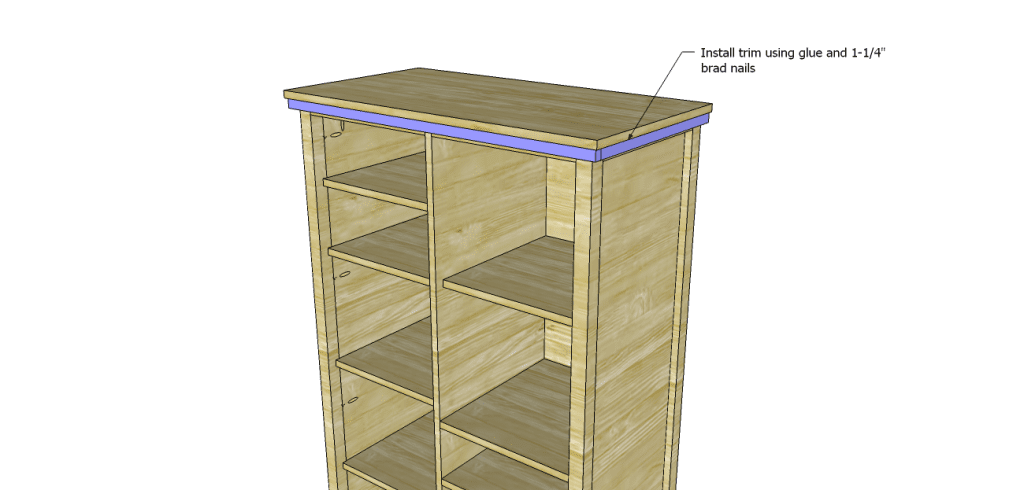
Cut the piece for the top. The sides and front of the top will overhang by 1″. Secure in place using glue and 1-1/4″ brad nails. Cut the pieces for the trim. There is no measurement given in the cut list because it will depend on the type of trim chosen. Cut the side pieces to fit and secure using glue and 1-1/4″ brad nails, then cut and secure the front.
Step Nine
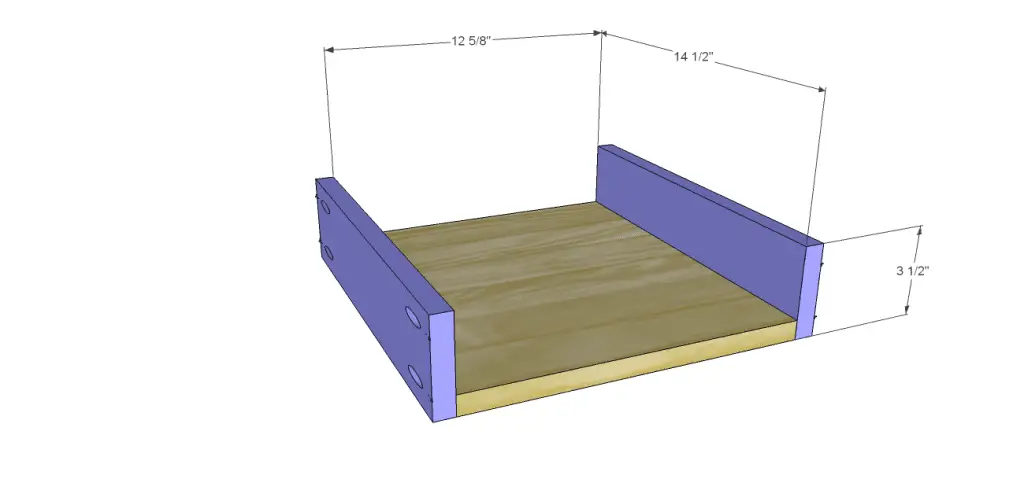
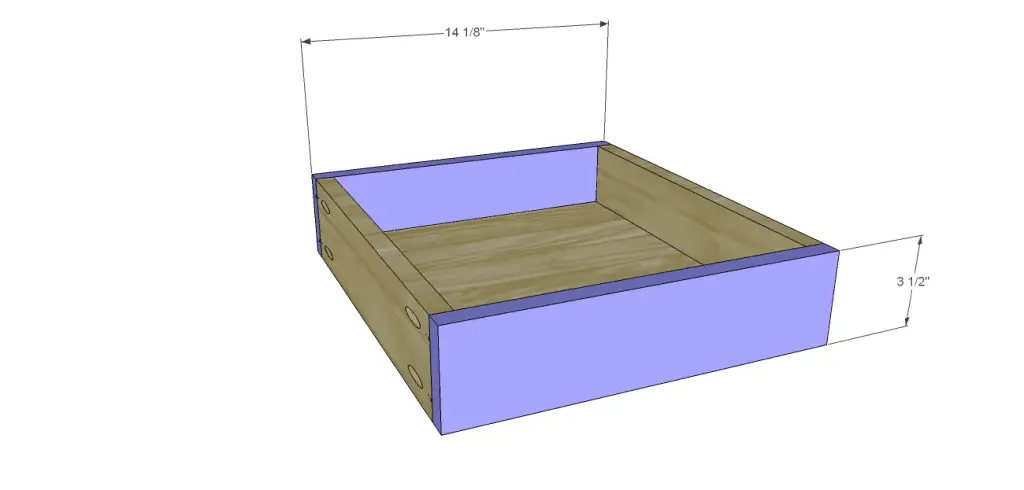
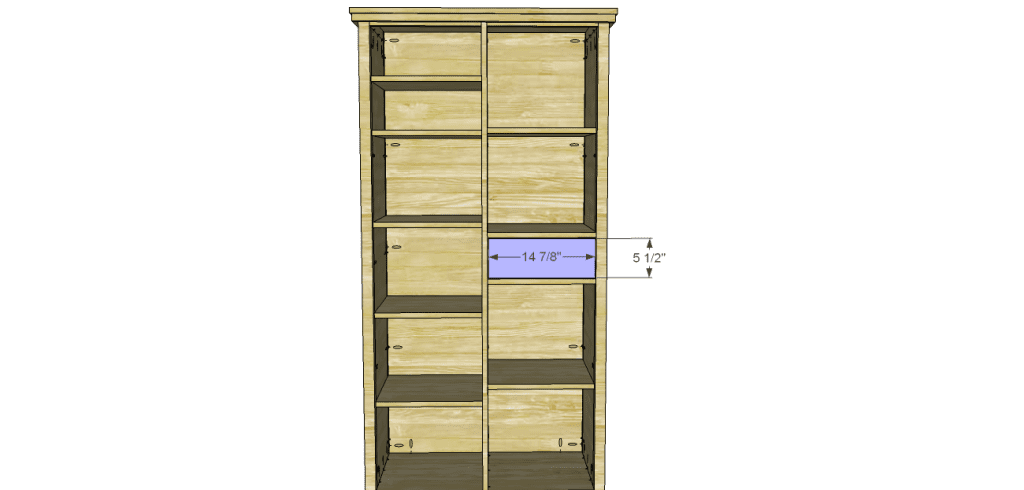
Cut the pieces for the drawer boxes. Drill pocket holes in all four edges of the bottom as well as each end of the sides. Assemble the drawer box as shown using glue and 1-1/4” pocket hole screws. Install the drawer slides according to the manufacturer’s installation instructions, locating them ¾” back from the front edge of the sides. This easy tutorial on installing drawer slides will be very helpful. Make any necessary adjustments. Cut the pieces for the drawer front. Mark the position for the drawer pulls and drill the holes. Shim the drawer front in the opening – there will be a 1/8” gap around all sides – then drive screws through the holes for the drawer pulls into the drawer box. Open the drawer, and secure the drawer front using countersunk 1-1/4” screws from the inside. Remove the screws from the holes for the drawer pull then finish drilling the holes. Install the drawer pull. Take a look at this easy tutorial on installing drawer fronts for reference.
Step Ten
Cut the pieces for the doors. Cut a 45° miter in each end of each piece, and drill one pocket hole in each end of each piece making sure the pocket holes in the rails and corresponding stiles do not interfere with each other! also, make sure the pocket holes will not interfere with the router bit when cutting the rabbet for the center panels. Assemble the doors using glue and 1-1/4″ pocket hole screws. Use a router and a 1/4″ rabbeting bit to cut a rabbet for the 1/4″ plywood or Plexiglas panels to fit into. Secure the panel into the opening using glue or adhesive such as Liquid Nails or Go 2. Install the hinges on the doors, then install the doors in the cabinet. Install a magnetic catch for each door. 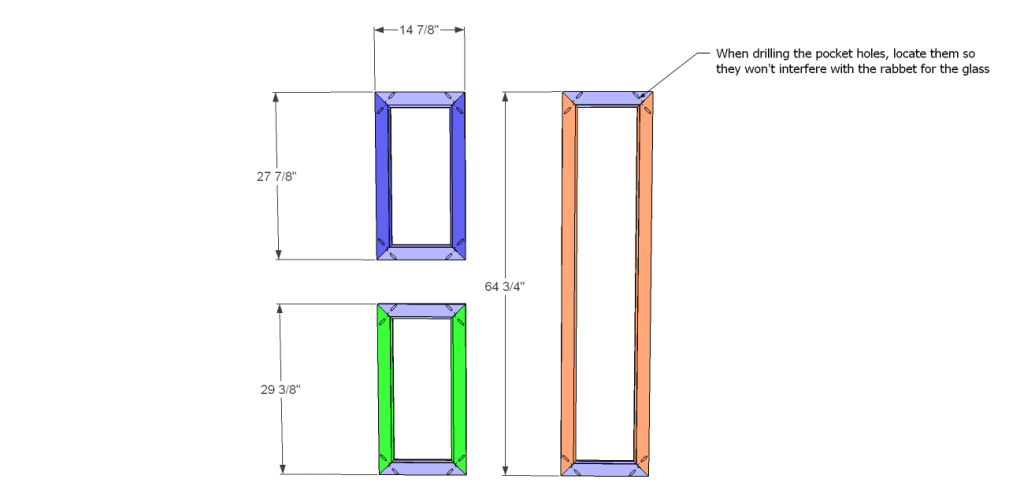
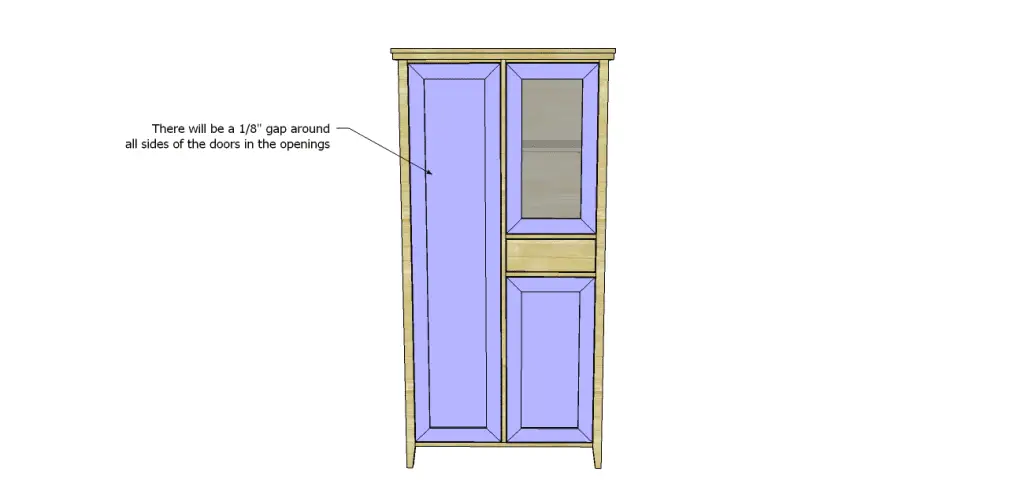 Finish as desired! This armoire cabinet would be great in so many spaces – the kitchen, a bathroom, in a craft room, or a bedroom with the shelving in the long cabinet replaced with a short rod for hangers! Awesome! Have questions about the Allie armoire cabinet plans? Leave a comment below!
